> ## Documentation Index
> Fetch the complete documentation index at: https://docs.noimosai.com/llms.txt
> Use this file to discover all available pages before exploring further.
# Create and Edit Campaign Steps
> Learn how to create and revise campaign steps in chat, then configure individual steps in the canvas.
## Overview
`Campaign steps` define which messages customers receive after meeting an entry condition, when they receive them, and in what order. This page explains how to create or revise the whole sequence in chat and configure individual blocks in the canvas.
You can create and revise campaign steps in the following two ways.
| Method | Best for |
| ------------------ | -------------------------------------------------------------------------------------------- |
| Ask in chat | Creating the overall campaign from the goal and audience, or changing several steps together |
| Edit in the canvas | Changing an individual email, wait time, or branch condition |
## Create and Revise Steps in Chat
Ask the agent in chat when you are creating an entire campaign or making several changes together.
Start by describing the goal, target customers, and what you want to send. If information is missing, the agent asks about entry conditions and timing.
For example, to create a campaign for newly signed-up customers, ask:
```text theme={null}
Create a campaign that introduces initial setup and key features to newly signed-up customers.
Make activation within 7 days of sign-up the goal, and send three emails.
```
To change created campaign steps, describe the location and the change you want.
```text theme={null}
Send the second email 3 days after sign-up.
Add a branch that sends customers who did not open the email a follow-up with a different subject line the next day.
```
After the agent updates the campaign, review whether messages, wait times, branch conditions, and endpoints match your intent. Open an individual step in the canvas when you need a more detailed adjustment.
## Set Entry Conditions with Triggers
A `Trigger` is what starts work for a customer. Set who moves to the first step and what needs to happen for them to enter the campaign.
You can currently choose from the following seven triggers.
| Trigger | When the campaign starts | What to configure |
| ---------------------------------------------------------------- | ---------------------------------------------------------------- | ------------------------------------------------------------- |
| Webhook (a way for an external service to send data to NoimosAI) | An external service sends data to NoimosAI | Register the URL issued by NoimosAI with the external service |
| Attribute or segment | A customer starts matching the specified segment | Choose the segment to use |
| Joins a list | A customer is added to the specified list | Choose the list to use |
| Event | An event such as a sign-up, purchase, or feature use is received | Choose the event name to use |
| X DM received | A customer sends a direct message on X | Select X |
| Facebook DM received | A customer sends a direct message on Facebook | Select Facebook |
| Instagram DM received | A customer sends a direct message on Instagram | Select Instagram |
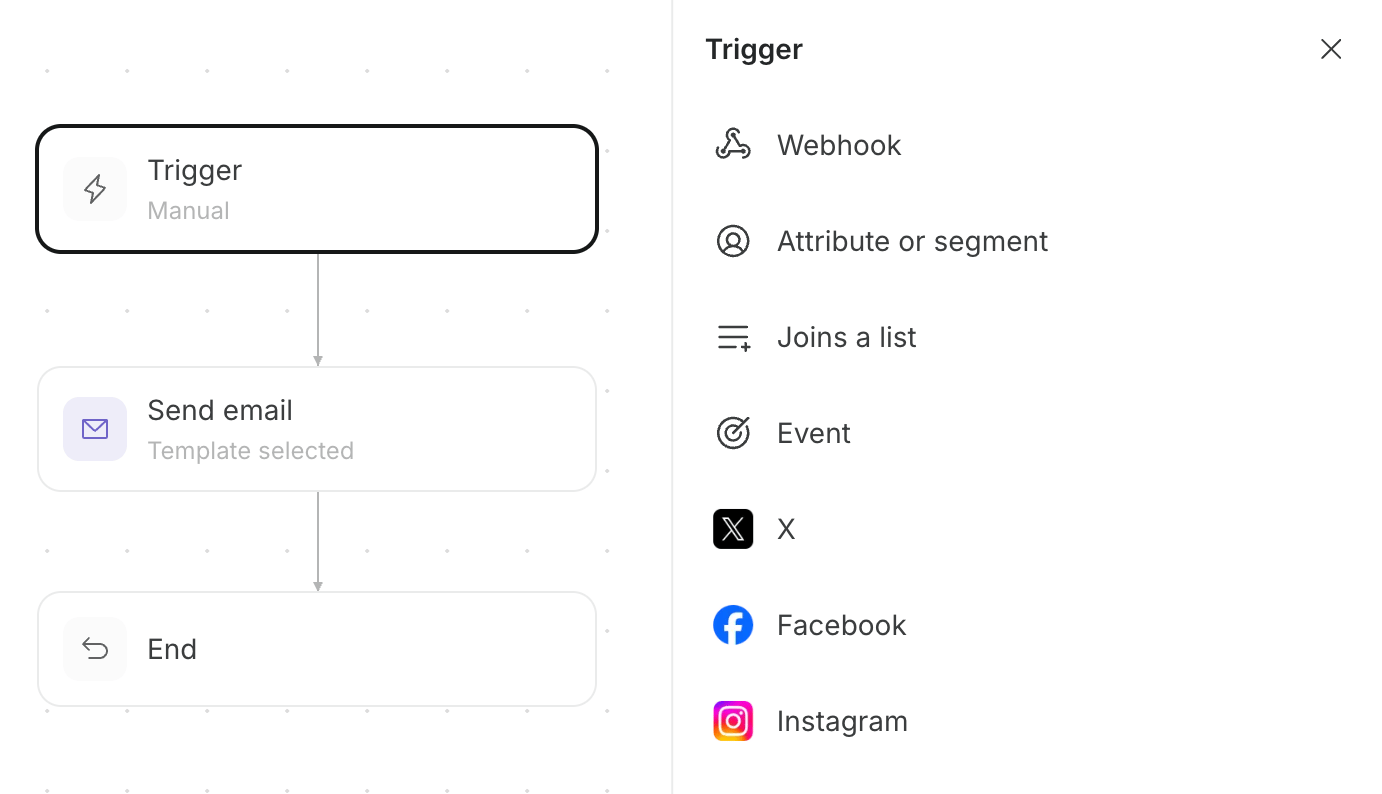 For example, for guidance to newly signed-up customers, start the campaign when you receive a `New sign-up` event or when the customer starts matching a `Within 7 days of sign-up` segment. When you use an event, you also need to configure your website or app to send the same event name.
## Deliver a Message
Message steps set the channel and content delivered to customers.
You can add the following five message types.
| Step | Delivered to | Main settings |
| ----------- | ------------------------------------------------------------- | --------------------------------------------------------------------------------------------------------------------------------------------------------- |
| Send email | Customer's email address | Sender, template, subject, and body. You can also set up A/B testing, which sends different emails to a portion of customers and compares their response. |
| Send SMS | Customer's phone number or WhatsApp | SMS or WhatsApp, sender, and body |
| Send in-app | A screen in the website or app | Message to display |
| Send DM | Direct messages on X, Facebook, Instagram, and other channels | Connected sender account and message body |
| Send push | A browser or device notification area | Notification title, body, and link |
Open `Add step` to select the message channel from the list.
For example, for guidance to newly signed-up customers, start the campaign when you receive a `New sign-up` event or when the customer starts matching a `Within 7 days of sign-up` segment. When you use an event, you also need to configure your website or app to send the same event name.
## Deliver a Message
Message steps set the channel and content delivered to customers.
You can add the following five message types.
| Step | Delivered to | Main settings |
| ----------- | ------------------------------------------------------------- | --------------------------------------------------------------------------------------------------------------------------------------------------------- |
| Send email | Customer's email address | Sender, template, subject, and body. You can also set up A/B testing, which sends different emails to a portion of customers and compares their response. |
| Send SMS | Customer's phone number or WhatsApp | SMS or WhatsApp, sender, and body |
| Send in-app | A screen in the website or app | Message to display |
| Send DM | Direct messages on X, Facebook, Instagram, and other channels | Connected sender account and message body |
| Send push | A browser or device notification area | Notification title, body, and link |
Open `Add step` to select the message channel from the list.
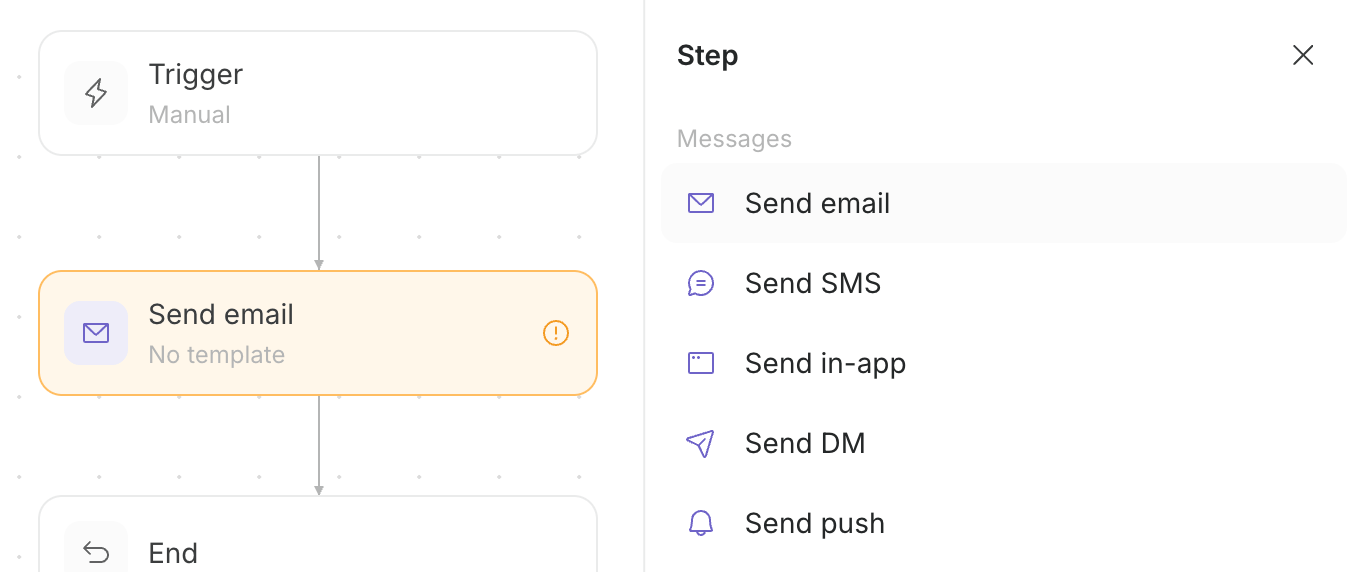 For email, select a saved template or create a new template from the send-email step. [Create and Edit Email Templates](/help-center/ai-team/campaigns/customer-engagement/create-and-edit-email-templates) explains how to create templates and use merge tags.
## Adjust Sending Timing
Add a `Wait` step to control when or under what condition the campaign moves to the next message.
You can configure the following four wait methods.
| Wait method | How to use it |
| ----------------- | -------------------------------------------------------------------------------------------------------------- |
| Time delay | Move to the next step a number of minutes, hours, days, or weeks after the previous step. |
| Time window | Wait until the specified day and time window before moving to the next step. |
| Wait until | Wait until a condition such as a purchase or completed initial setup is met, or until a time limit is reached. |
| Optimal time (AI) | Use each customer's open and click history to choose a sending time within the specified time window. |
In `Wait` under `Add step`, choose a time delay, time window, or wait-until condition. Configure optimal time after you add a Wait step.
For email, select a saved template or create a new template from the send-email step. [Create and Edit Email Templates](/help-center/ai-team/campaigns/customer-engagement/create-and-edit-email-templates) explains how to create templates and use merge tags.
## Adjust Sending Timing
Add a `Wait` step to control when or under what condition the campaign moves to the next message.
You can configure the following four wait methods.
| Wait method | How to use it |
| ----------------- | -------------------------------------------------------------------------------------------------------------- |
| Time delay | Move to the next step a number of minutes, hours, days, or weeks after the previous step. |
| Time window | Wait until the specified day and time window before moving to the next step. |
| Wait until | Wait until a condition such as a purchase or completed initial setup is met, or until a time limit is reached. |
| Optimal time (AI) | Use each customer's open and click history to choose a sending time within the specified time window. |
In `Wait` under `Add step`, choose a time delay, time window, or wait-until condition. Configure optimal time after you add a Wait step.
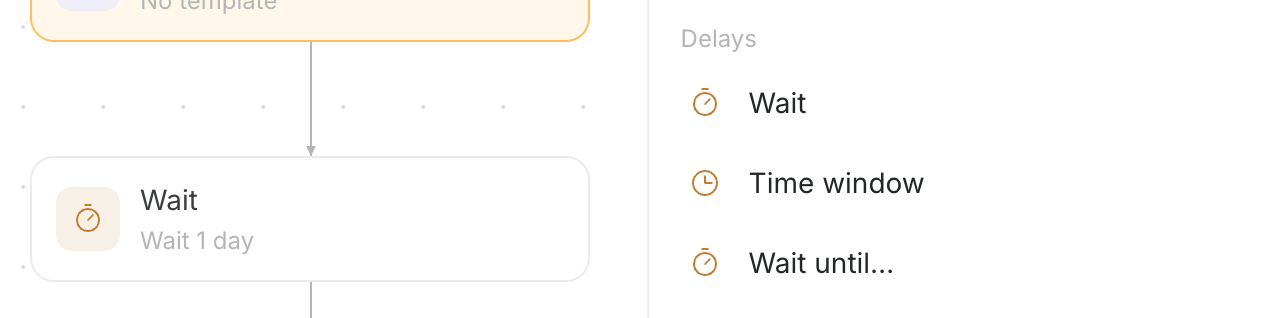 For example, send the first email immediately after sign-up, then add a `3 days` delay before the second email. Add a wait-until condition for `Initial setup completed` before the second email to send customers who complete setup to the goal and those who do not complete it by the deadline to the next guidance.
## Change the Path Based on Conditions
Condition steps change the next action based on a customer's information or behavior.
The following four blocks can change the path.
| Step | How to use it |
| ----------- | ---------------------------------------------------------------------------------------------------------------- |
| Branch | Send customers who match one condition to `True`, and customers who do not match it to `False`. |
| Split | Split paths by several conditions, or divide customers into groups by a specified percentage. |
| AI decision | Have AI read customer information, select one outcome from the choices you configure, and move to the next step. |
| Loop | Return to a previous step up to the specified number of times, then move forward when the limit is reached. |
When you select Branch, the canvas separates the paths for customers who match the condition and those who do not.
For example, send the first email immediately after sign-up, then add a `3 days` delay before the second email. Add a wait-until condition for `Initial setup completed` before the second email to send customers who complete setup to the goal and those who do not complete it by the deadline to the next guidance.
## Change the Path Based on Conditions
Condition steps change the next action based on a customer's information or behavior.
The following four blocks can change the path.
| Step | How to use it |
| ----------- | ---------------------------------------------------------------------------------------------------------------- |
| Branch | Send customers who match one condition to `True`, and customers who do not match it to `False`. |
| Split | Split paths by several conditions, or divide customers into groups by a specified percentage. |
| AI decision | Have AI read customer information, select one outcome from the choices you configure, and move to the next step. |
| Loop | Return to a previous step up to the specified number of times, then move forward when the limit is reached. |
When you select Branch, the canvas separates the paths for customers who match the condition and those who do not.
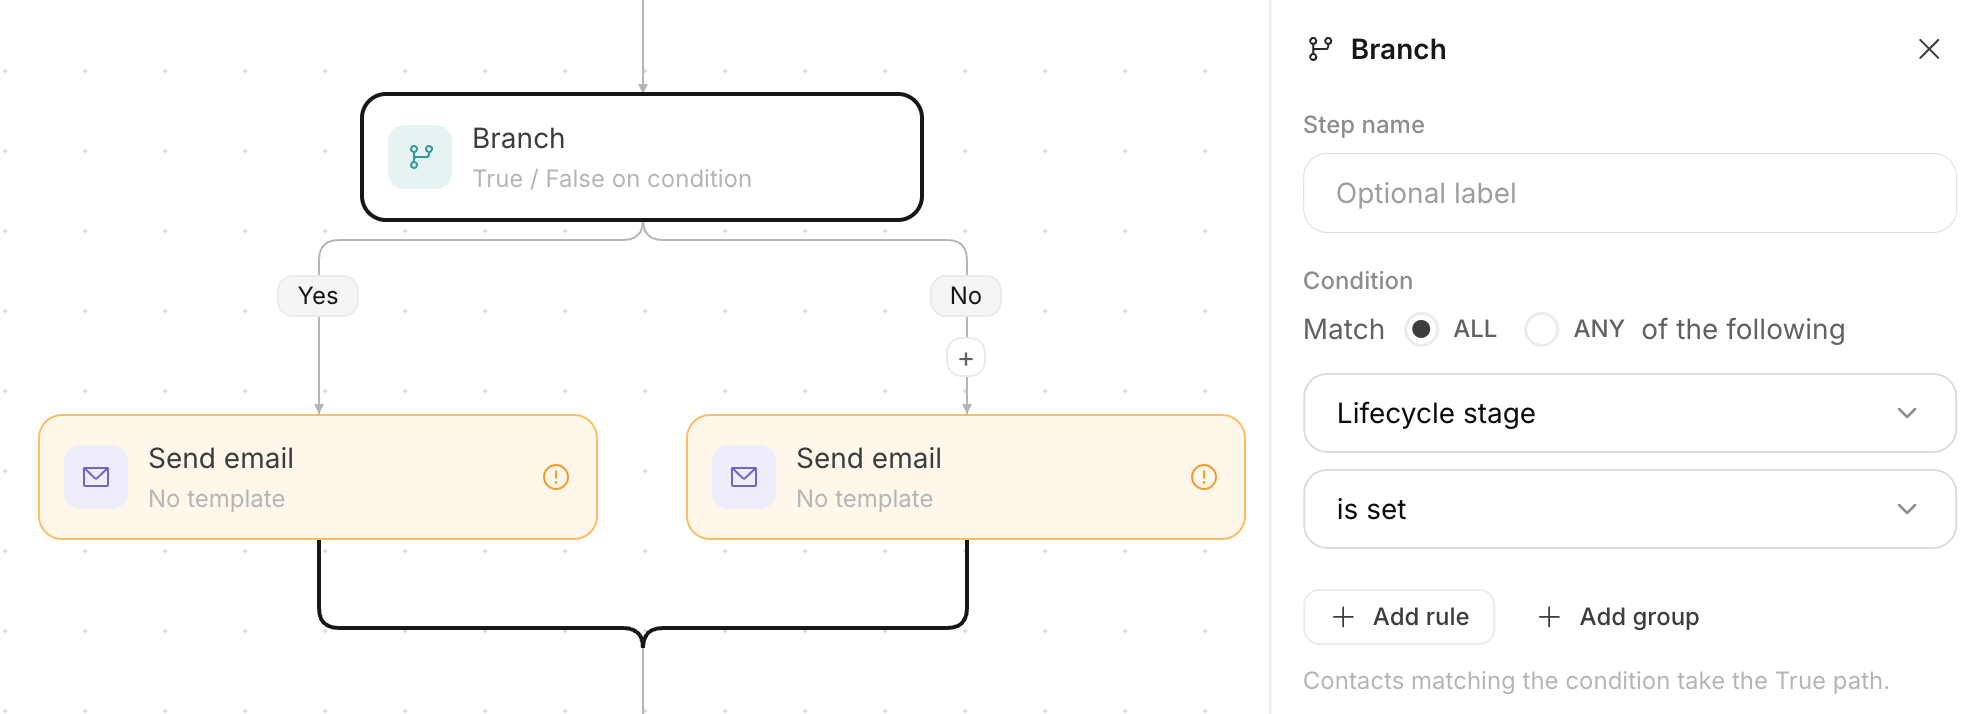 For example, branch based on whether the `Initial setup completed` event occurred and move customers who completed setup to the goal. Send the next guidance to customers who have not completed setup, then move them to End after the planned number of messages.
## Update Customer Data and Connect External Services
An `Action` adds work that updates customer data or triggers an external service.
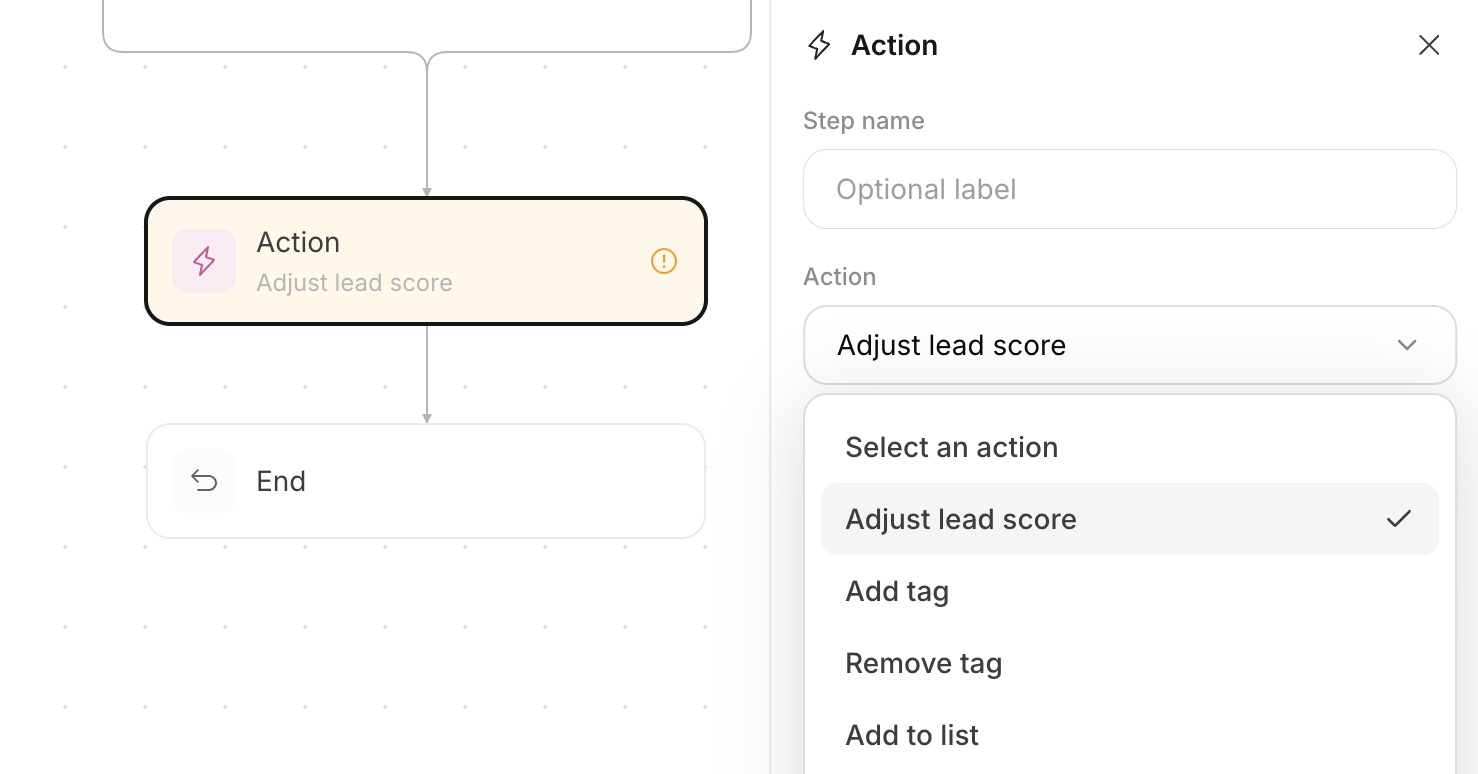
You can choose from the following eleven actions.
| Action | What it does |
| ----------------------- | ------------------------------------------------------------------------------------------------ |
| Adjust lead score | Increase or decrease the number that represents a customer's level of interest. |
| Add tag | Add a tag used to classify a customer. |
| Remove tag | Remove a selected tag from a customer. |
| Add to list | Add a customer to a selected list. |
| Remove from list | Remove a customer from a selected list. |
| Set lifecycle | Change the current stage, such as prospect, in discussion, or customer. |
| Set field | Save a value in a selected customer-information field. |
| AI personalize | Create text from customer information for use in later messages. |
| AI classification (LLM) | Classify a customer according to your instructions and add the selected classification as a tag. |
| Send webhook | Send an external service the fact that a customer reached this step. |
| Run AI agent | Run a selected AI agent. |
Select an Action step to choose the customer-data operation from the list.
For example, branch based on whether the `Initial setup completed` event occurred and move customers who completed setup to the goal. Send the next guidance to customers who have not completed setup, then move them to End after the planned number of messages.
## Update Customer Data and Connect External Services
An `Action` adds work that updates customer data or triggers an external service.
You can choose from the following eleven actions.
| Action | What it does |
| ----------------------- | ------------------------------------------------------------------------------------------------ |
| Adjust lead score | Increase or decrease the number that represents a customer's level of interest. |
| Add tag | Add a tag used to classify a customer. |
| Remove tag | Remove a selected tag from a customer. |
| Add to list | Add a customer to a selected list. |
| Remove from list | Remove a customer from a selected list. |
| Set lifecycle | Change the current stage, such as prospect, in discussion, or customer. |
| Set field | Save a value in a selected customer-information field. |
| AI personalize | Create text from customer information for use in later messages. |
| AI classification (LLM) | Classify a customer according to your instructions and add the selected classification as a tag. |
| Send webhook | Send an external service the fact that a customer reached this step. |
| Run AI agent | Run a selected AI agent. |
Select an Action step to choose the customer-data operation from the list.
 Set an execution condition on an action to perform it only for customers who meet that condition.
## Choose Between Goal and End
Connect every path to `Goal`, which counts as a result, or `End`, which does not.
The two endpoints handle customers differently.
| Endpoint | How a customer is handled after reaching it |
| -------- | ------------------------------------------------------------------------------- |
| Goal | Count the customer as having achieved the campaign result, then end processing. |
| End | End processing without counting the customer as having achieved the result. |
Set an execution condition on an action to perform it only for customers who meet that condition.
## Choose Between Goal and End
Connect every path to `Goal`, which counts as a result, or `End`, which does not.
The two endpoints handle customers differently.
| Endpoint | How a customer is handled after reaching it |
| -------- | ------------------------------------------------------------------------------- |
| Goal | Count the customer as having achieved the campaign result, then end processing. |
| End | End processing without counting the customer as having achieved the result. |
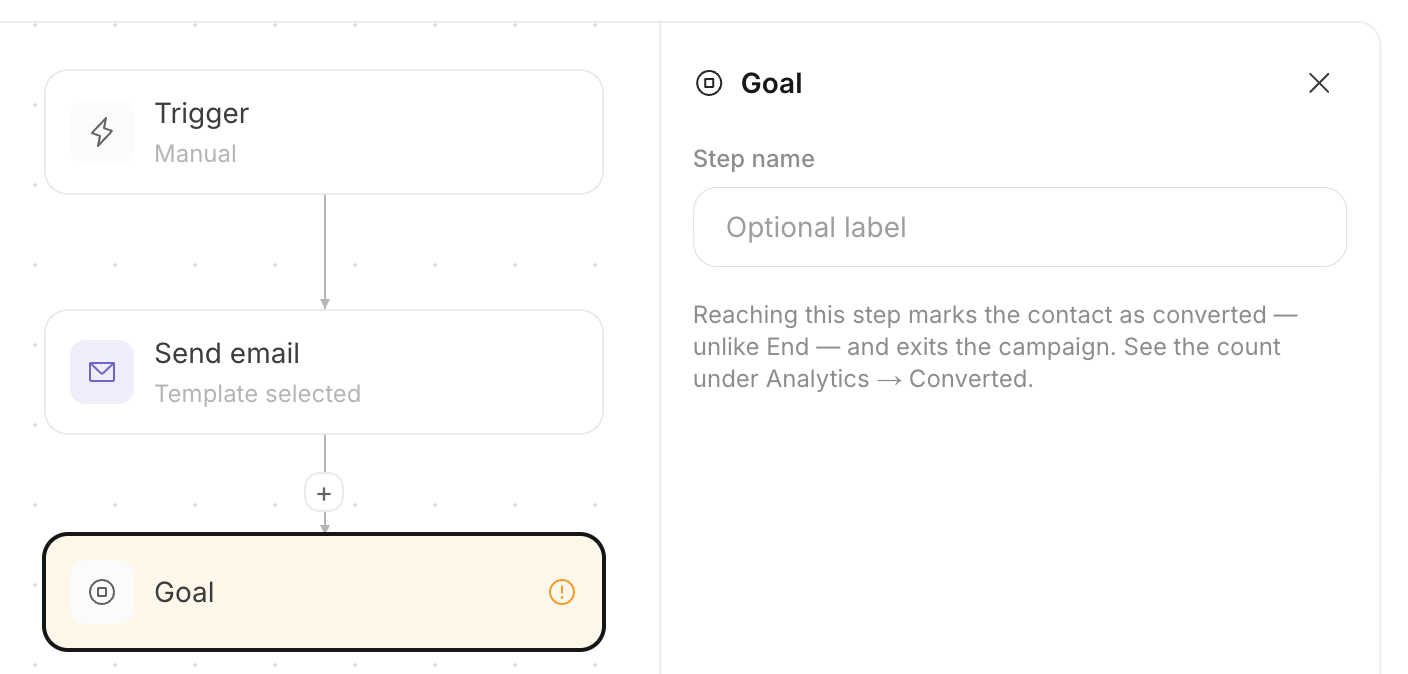 For example, in a campaign that encourages a purchase, connect customers who purchase to `Goal` and customers who do not purchase by the end of the guidance period to `End`.
## Edit Steps in the Canvas
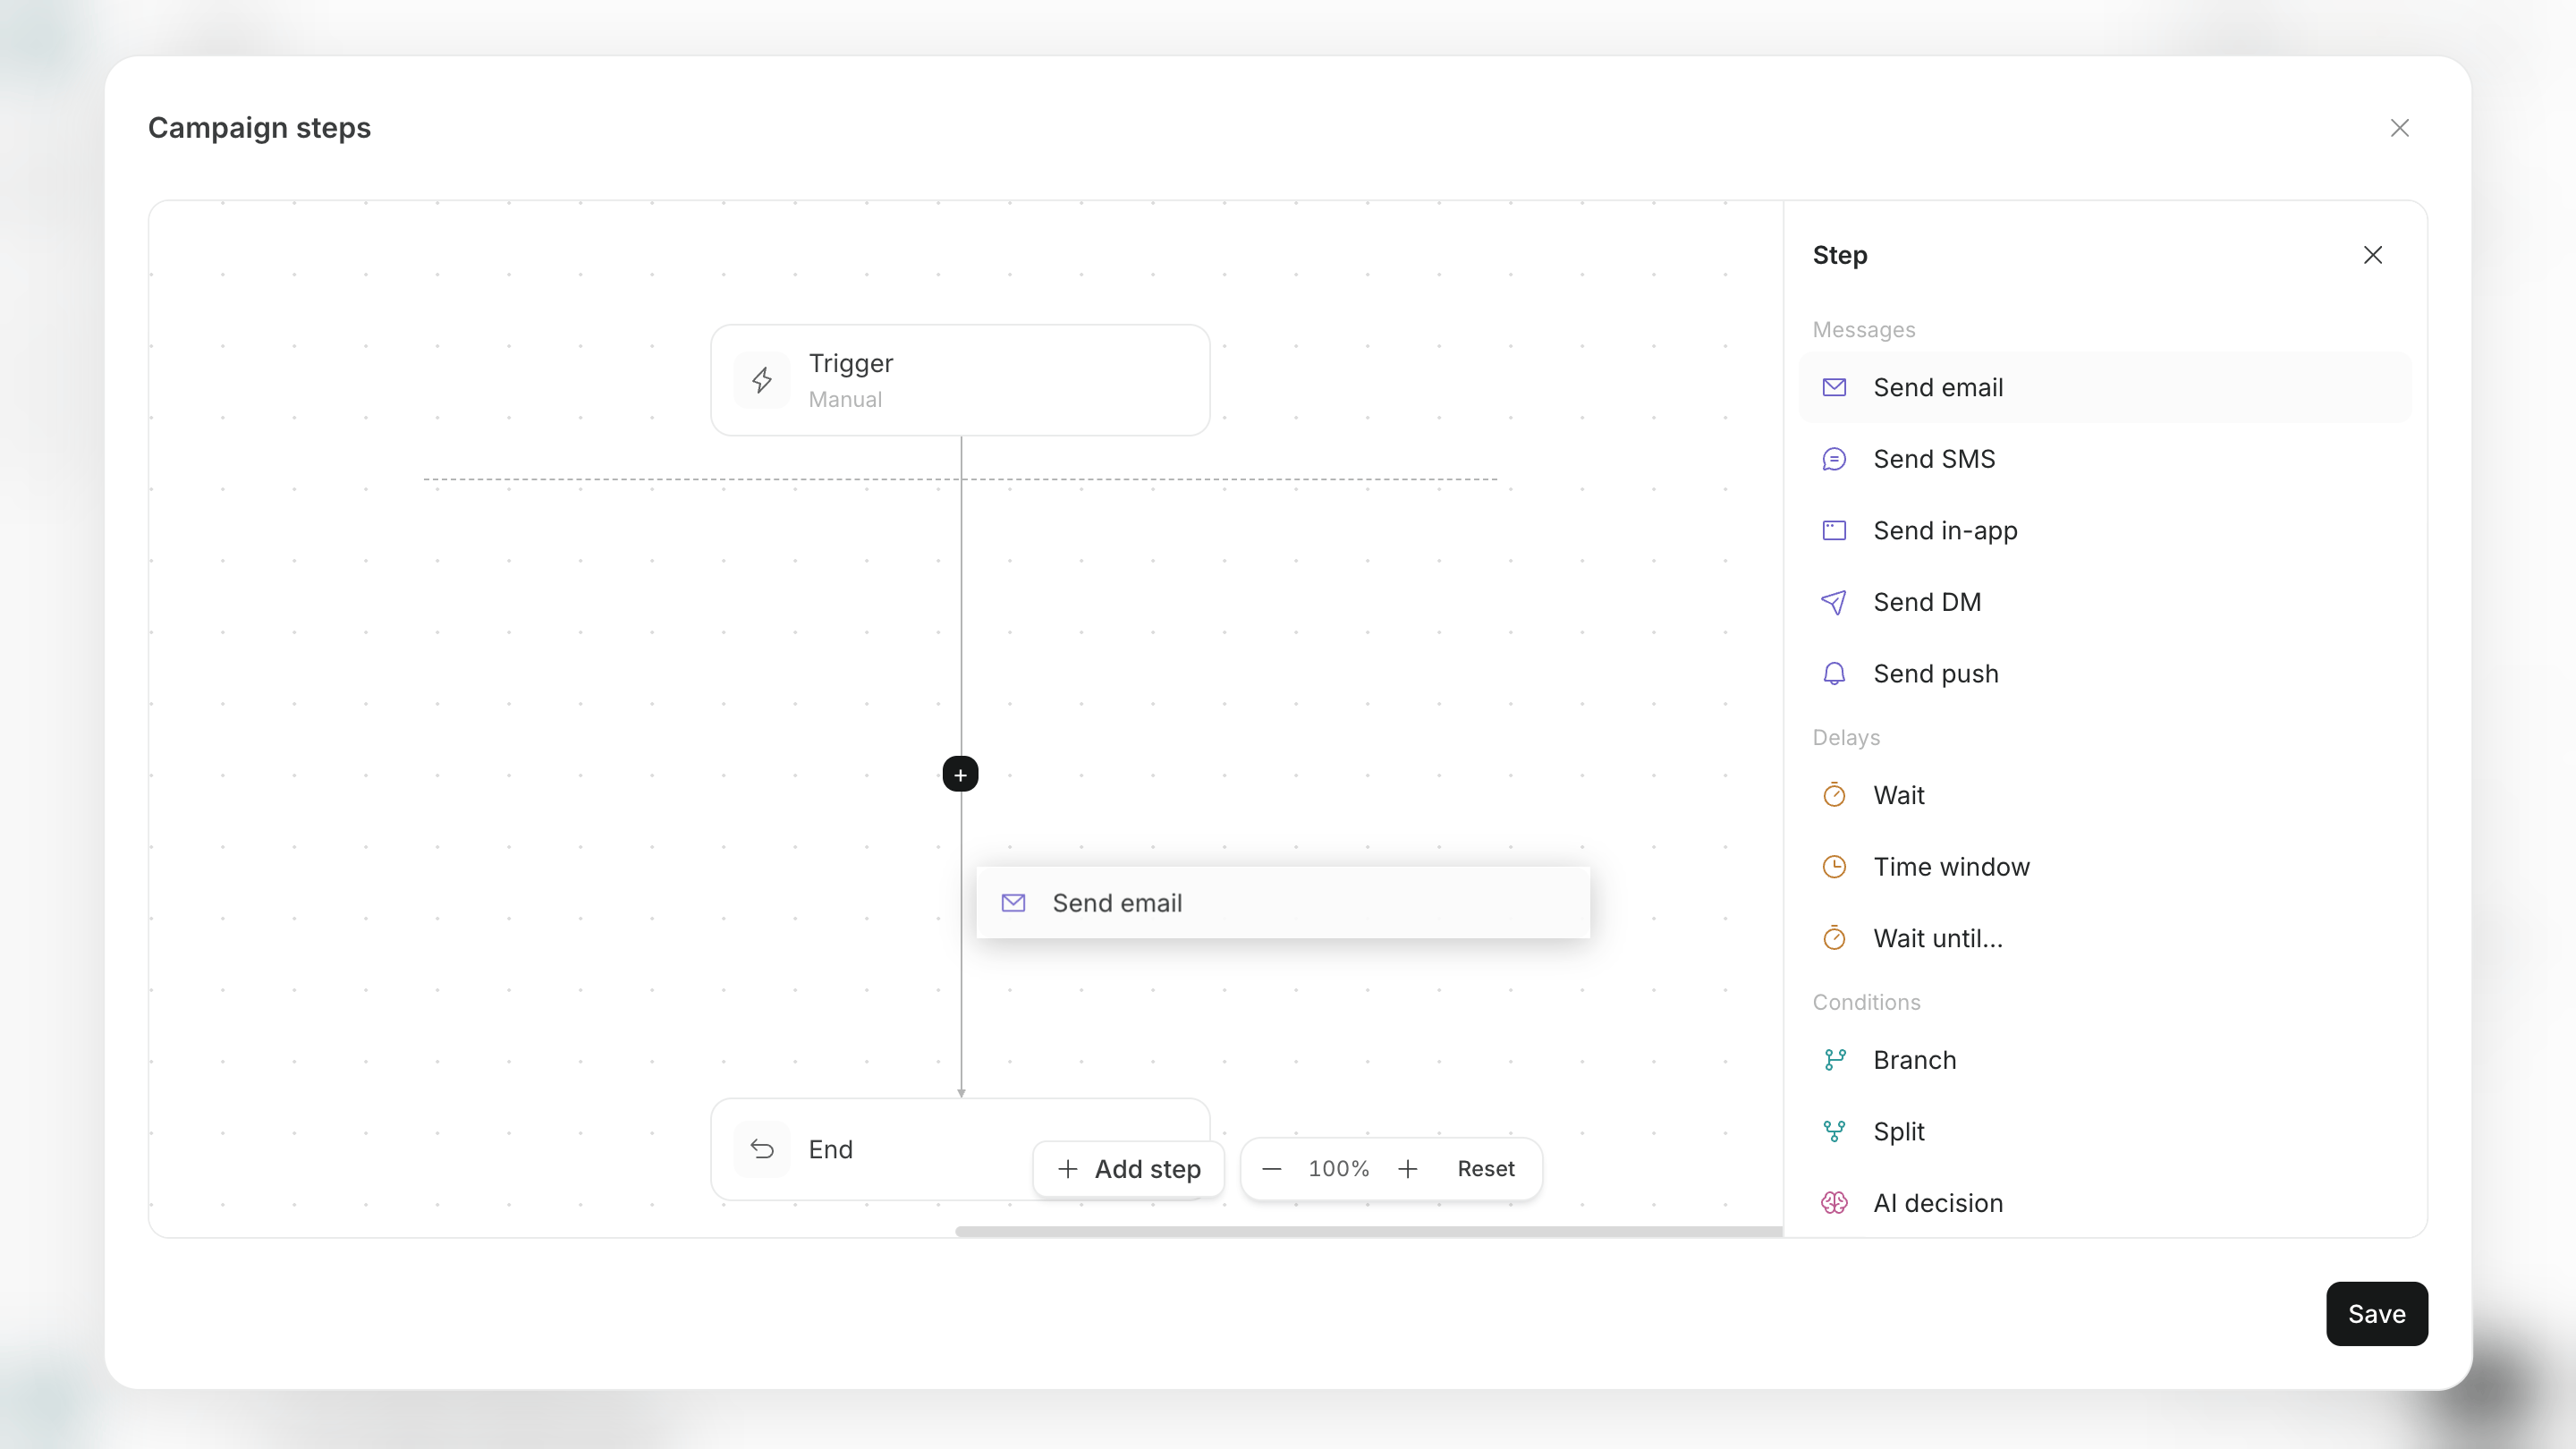
Use the canvas labeled `Flowchart` to change individual steps created by the agent.
Edit in the canvas in the following six steps. When complete, you can save or approve the changed steps.
1. Open `Flowchart` in the campaign canvas.
2. Select the trigger or step you want to change.
3. When needed, use `Add step` to add a message, wait, condition, action, or another step.
4. Open each step and configure its content or conditions.
5. Connect every branched path to another step, `Goal`, or `End`.
6. Review the full sequence and save it.
For example, in a campaign that encourages a purchase, connect customers who purchase to `Goal` and customers who do not purchase by the end of the guidance period to `End`.
## Edit Steps in the Canvas
Use the canvas labeled `Flowchart` to change individual steps created by the agent.
Edit in the canvas in the following six steps. When complete, you can save or approve the changed steps.
1. Open `Flowchart` in the campaign canvas.
2. Select the trigger or step you want to change.
3. When needed, use `Add step` to add a message, wait, condition, action, or another step.
4. Open each step and configure its content or conditions.
5. Connect every branched path to another step, `Goal`, or `End`.
6. Review the full sequence and save it.
 ## Configure Segments and Events
Use `Segments & Events` to configure the target customer group and the actions used as entry conditions or goals.
You can perform the following actions on this screen.
* Set an existing segment as the campaign audience.
* Create a new segment.
* Create or save an event to use.
* View an event's code and most recent received time.
* Ask the agent to create a GitHub pull request that adds activity-tracking code to your website.
## Configure Segments and Events
Use `Segments & Events` to configure the target customer group and the actions used as entry conditions or goals.
You can perform the following actions on this screen.
* Set an existing segment as the campaign audience.
* Create a new segment.
* Create or save an event to use.
* View an event's code and most recent received time.
* Ask the agent to create a GitHub pull request that adds activity-tracking code to your website.
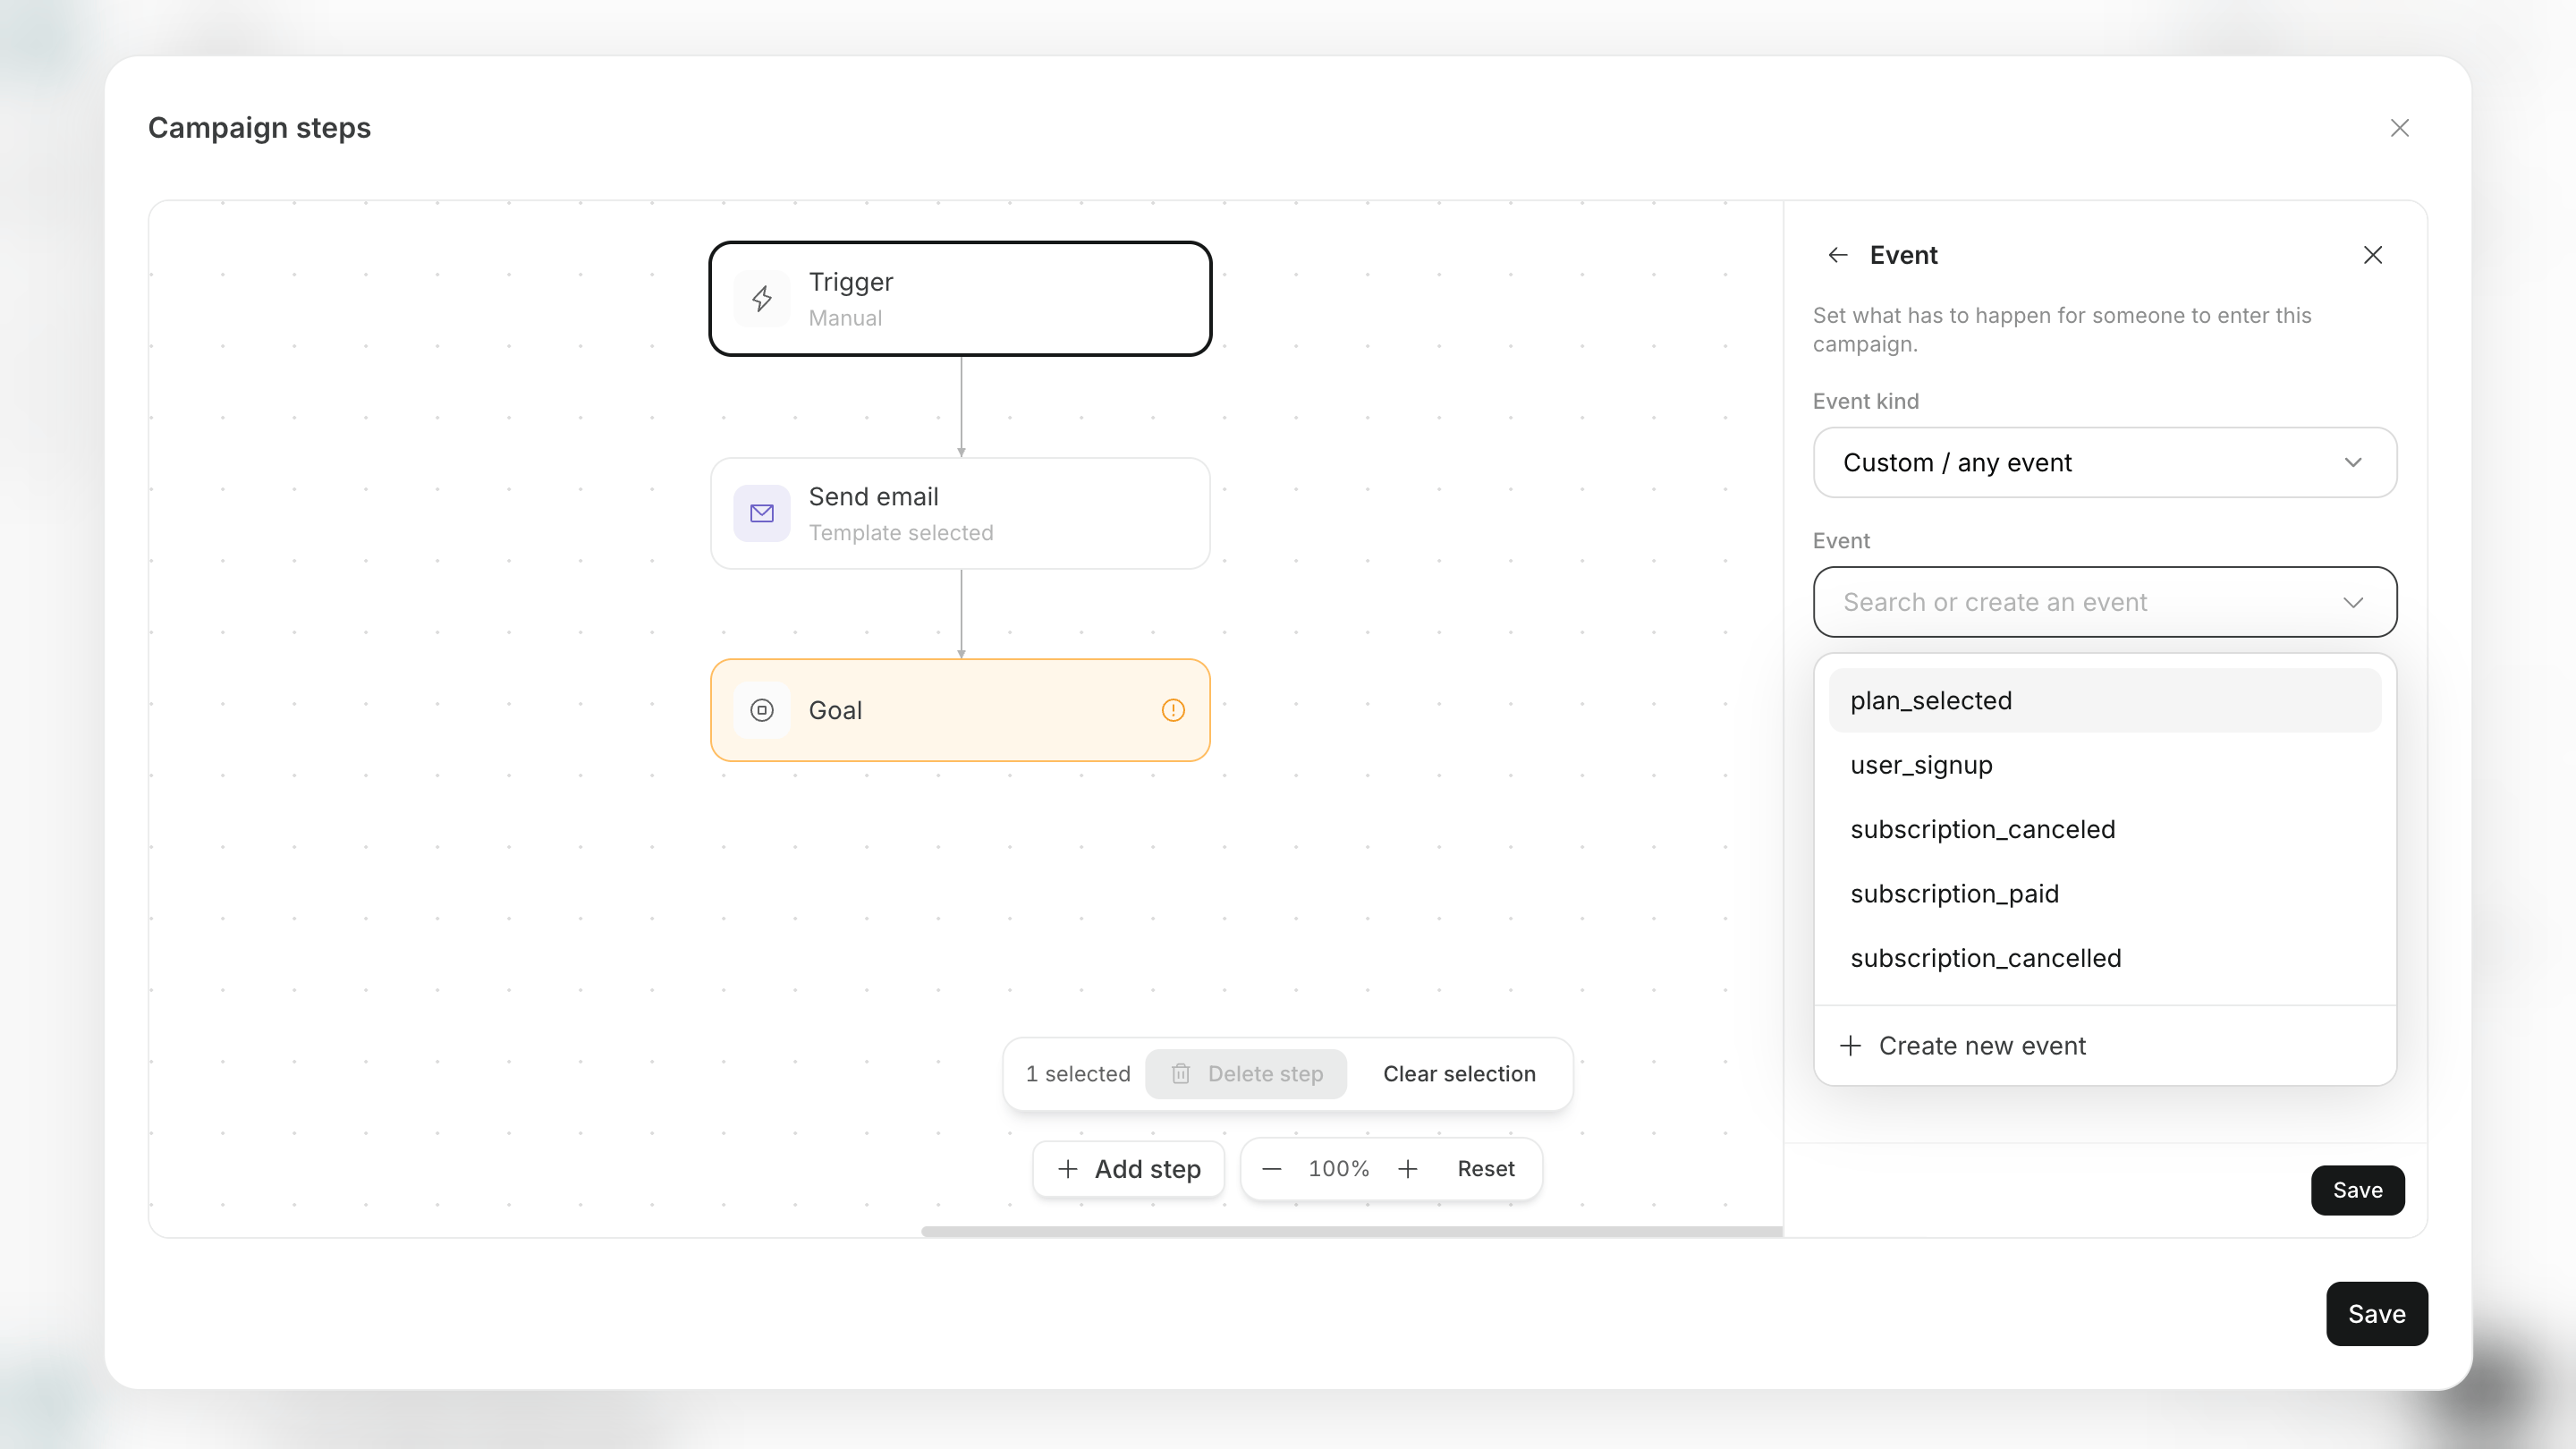 When the agent creates a new segment or event, review the conditions or event name before approving it.
## Fix Incomplete Steps and Paths
Before saving or starting, fix steps with missing configuration and paths that do not reach an endpoint.
The following five issues commonly require a fix.
* A trigger is not configured.
* Email or notification content is not configured.
* A wait time or branch condition has no value.
* A path after a branch does not connect to the next step.
* A path remains without a Goal or End.
The canvas displays incomplete areas. Complete every path before saving or approving.
## Edit a Running Campaign
You cannot edit the steps in a running campaign, so customers already in progress do not receive a different configuration partway through.
Make changes in the following six steps. When you resume after saving, the campaign proceeds with the changed steps.
1. Open the campaign from `Campaigns` on the `Agents` screen.
2. Pause the campaign.
3. In `Settings`, select `Edit` for `Campaign steps`.
4. Ask for changes in chat or change individual steps in the canvas.
5. Select `Save`.
6. Review the changes and start the campaign again.
If you close the screen without saving, you are asked whether to discard the changes. Return to the screen and select `Save` to continue editing.
## Related Pages
The following pages explain how to configure customer data, email, senders, and pre-start testing.
* [Manage Customers, Segments, and Events](/help-center/ai-team/campaigns/customer-engagement/manage-customers-segments-and-events)
* [Create and Edit Email Templates](/help-center/ai-team/campaigns/customer-engagement/create-and-edit-email-templates)
* [Configure Senders and Event Tracking](/help-center/ai-team/campaigns/customer-engagement/configure-senders-and-event-tracking)
* [Test, Approve, and Start a Campaign](/help-center/ai-team/campaigns/customer-engagement/test-approve-and-start-campaign)
When the agent creates a new segment or event, review the conditions or event name before approving it.
## Fix Incomplete Steps and Paths
Before saving or starting, fix steps with missing configuration and paths that do not reach an endpoint.
The following five issues commonly require a fix.
* A trigger is not configured.
* Email or notification content is not configured.
* A wait time or branch condition has no value.
* A path after a branch does not connect to the next step.
* A path remains without a Goal or End.
The canvas displays incomplete areas. Complete every path before saving or approving.
## Edit a Running Campaign
You cannot edit the steps in a running campaign, so customers already in progress do not receive a different configuration partway through.
Make changes in the following six steps. When you resume after saving, the campaign proceeds with the changed steps.
1. Open the campaign from `Campaigns` on the `Agents` screen.
2. Pause the campaign.
3. In `Settings`, select `Edit` for `Campaign steps`.
4. Ask for changes in chat or change individual steps in the canvas.
5. Select `Save`.
6. Review the changes and start the campaign again.
If you close the screen without saving, you are asked whether to discard the changes. Return to the screen and select `Save` to continue editing.
## Related Pages
The following pages explain how to configure customer data, email, senders, and pre-start testing.
* [Manage Customers, Segments, and Events](/help-center/ai-team/campaigns/customer-engagement/manage-customers-segments-and-events)
* [Create and Edit Email Templates](/help-center/ai-team/campaigns/customer-engagement/create-and-edit-email-templates)
* [Configure Senders and Event Tracking](/help-center/ai-team/campaigns/customer-engagement/configure-senders-and-event-tracking)
* [Test, Approve, and Start a Campaign](/help-center/ai-team/campaigns/customer-engagement/test-approve-and-start-campaign)