> ## Documentation Index
> Fetch the complete documentation index at: https://docs.noimosai.com/llms.txt
> Use this file to discover all available pages before exploring further.
# Quickstart Guide
> Get your first execution running in three steps: connect apps, create an agent, and review results.
## Overview
Use this guide to get your first autonomous workflow running quickly. You only need to do three things:
1. Connect your apps
2. Create an agent
3. Review results in All Tasks
## Before You Start
Confirm the basics below so your first autonomous run can start without setup blockers.
* You can access a workspace.
* You have at least one app to connect (for example, Google Analytics, WordPress, or social platforms).
* You know the first task you want agents to run autonomously.
## Step 1: Connect Apps
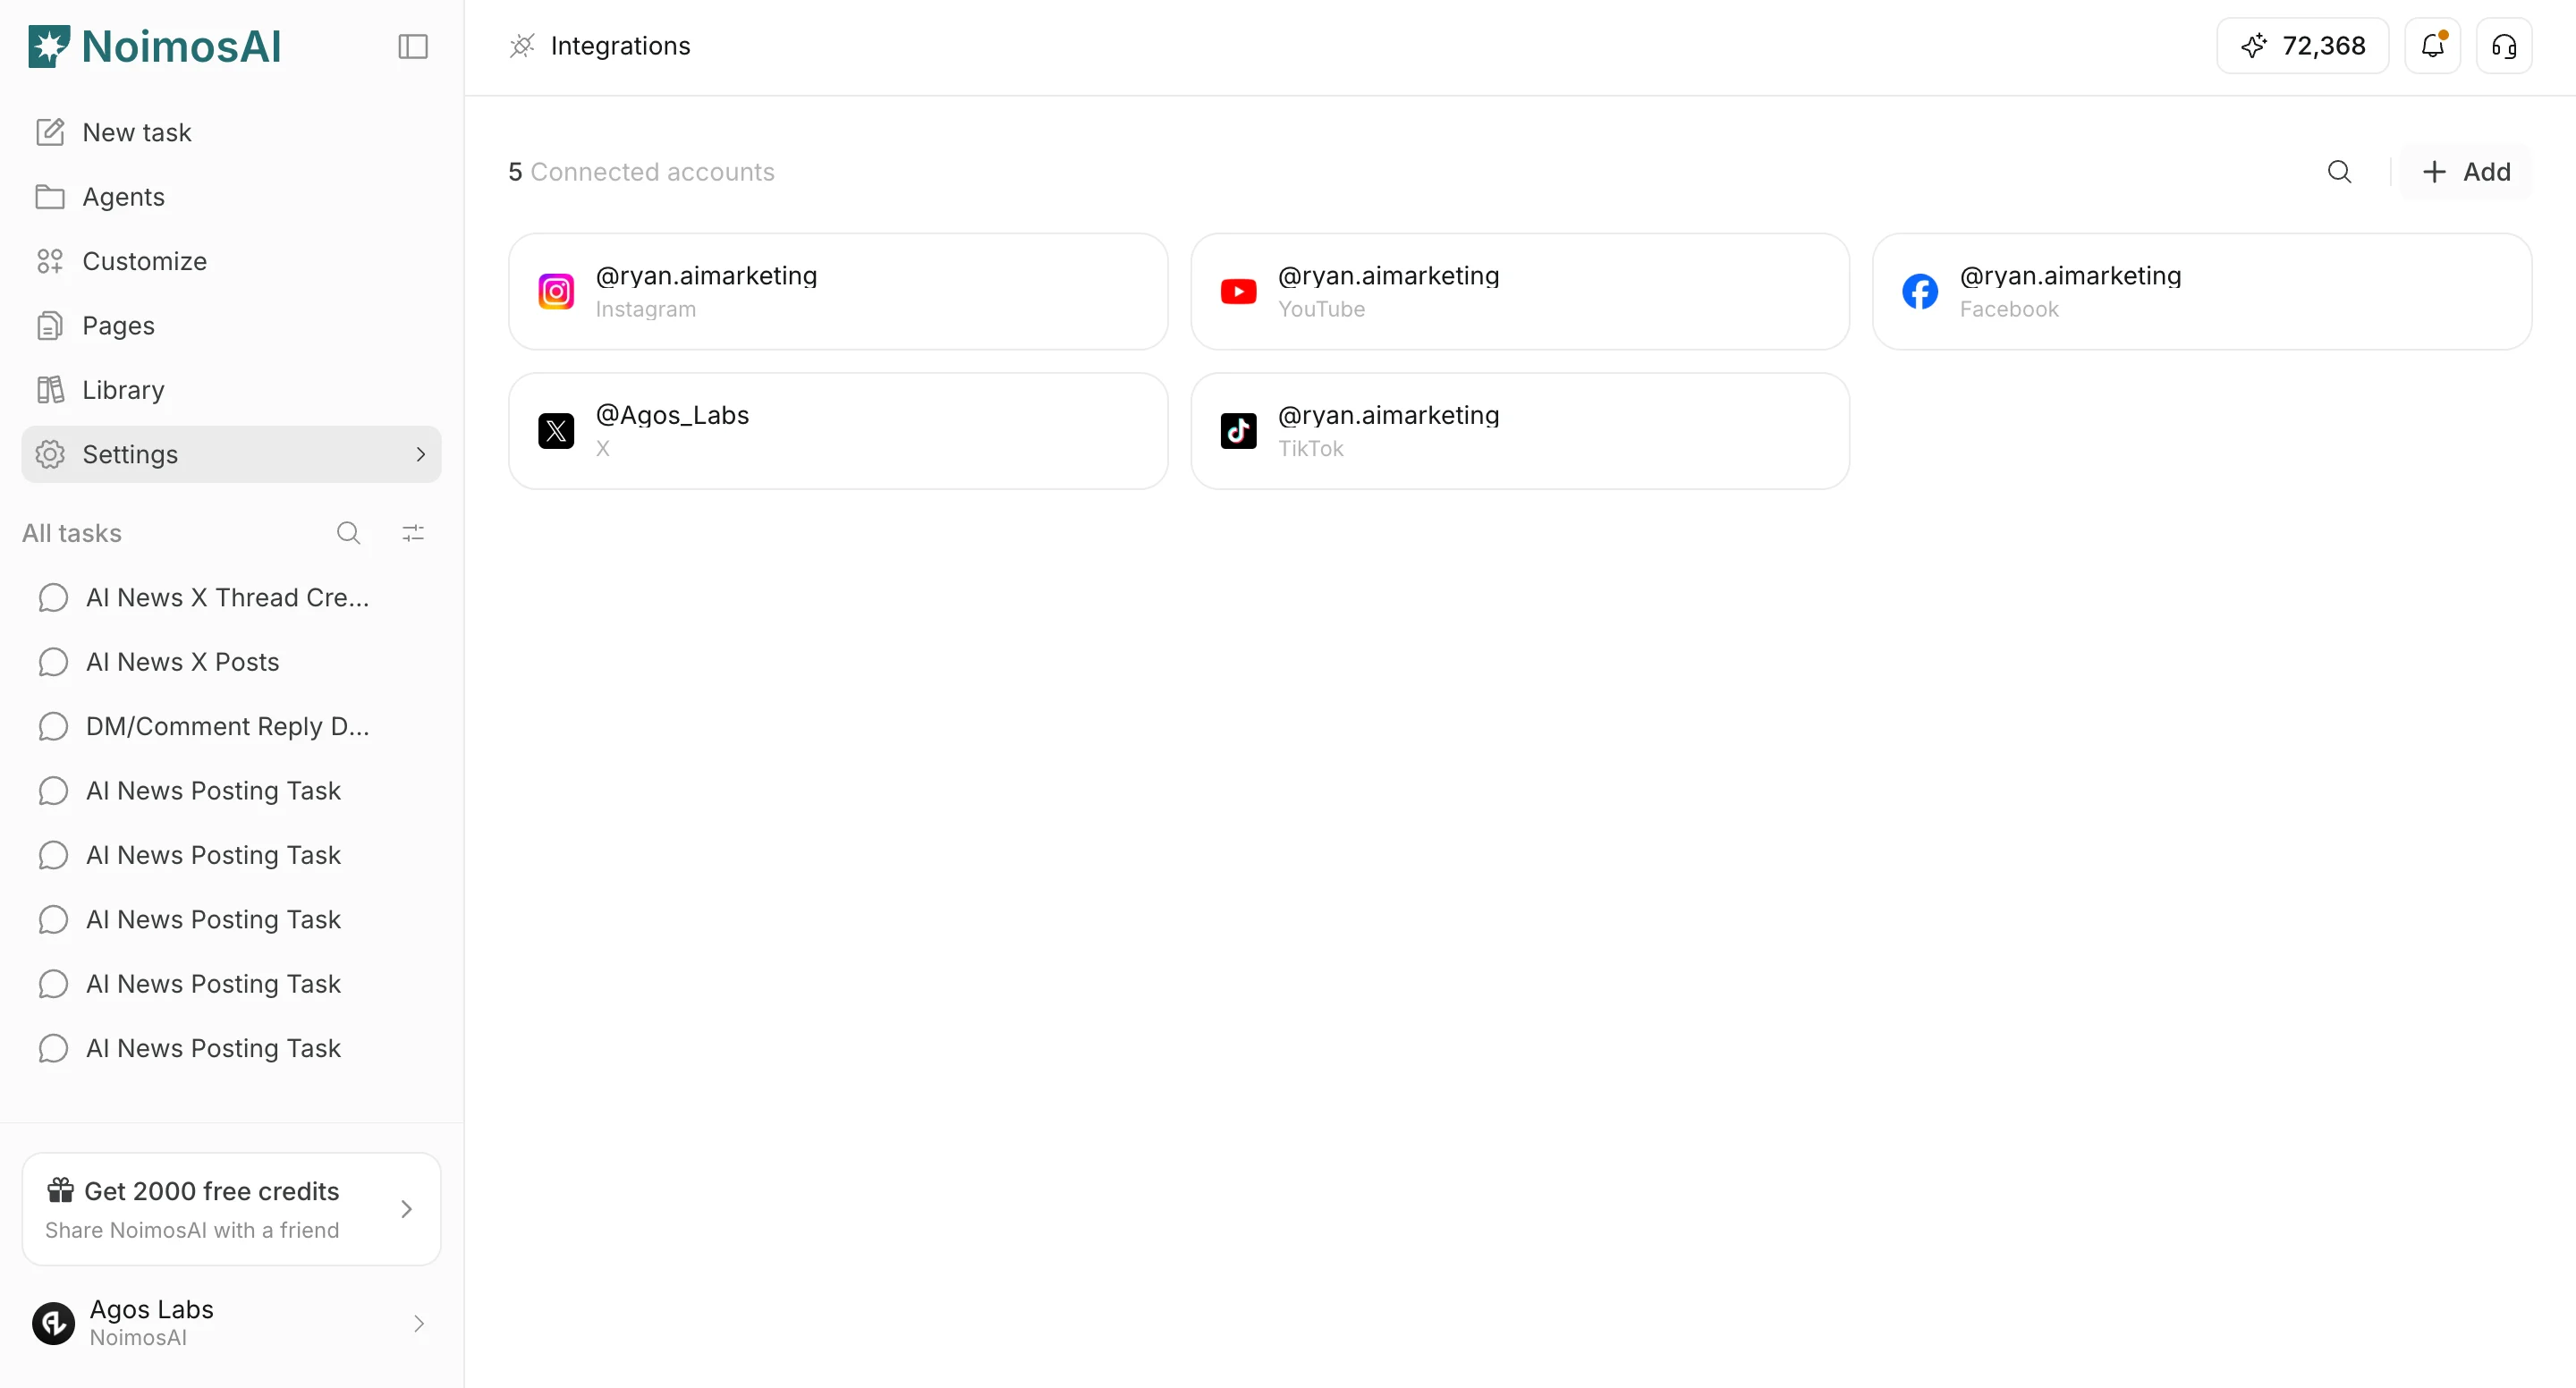
Open `Settings` in your workspace, then go to `Integrations`.
From there:
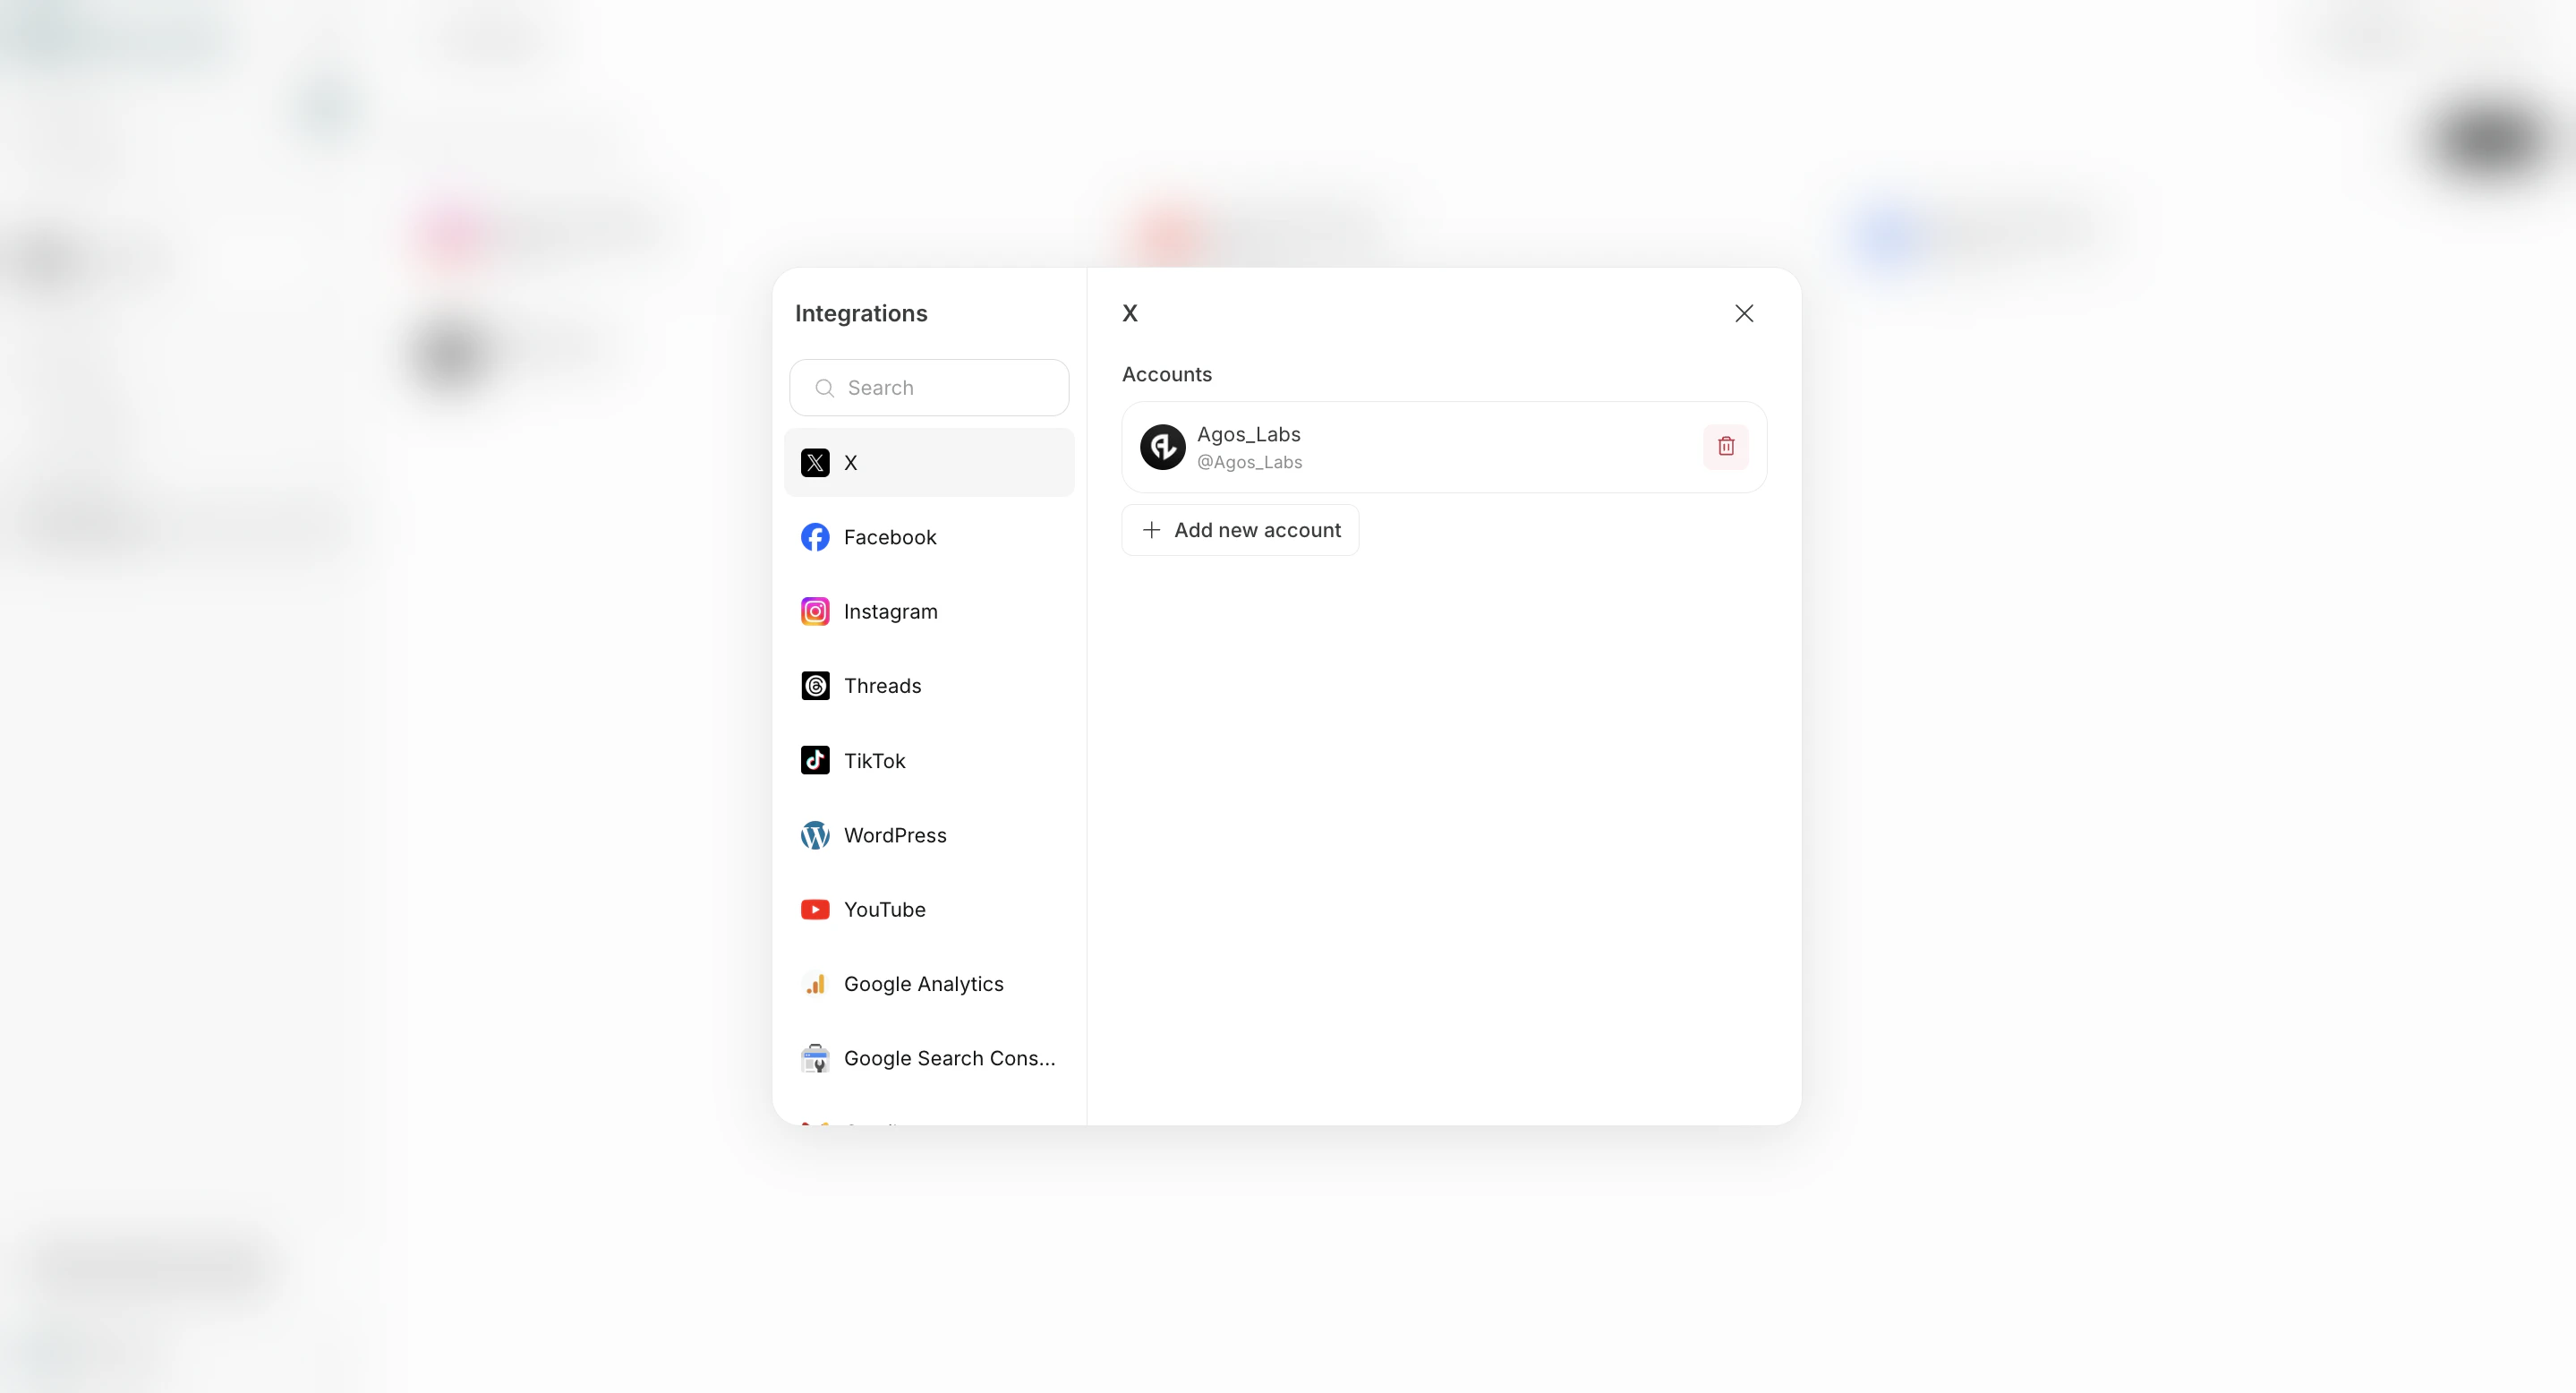
1. Click `Connect` from Integrations.
 2. Choose an app account and add it to the agent that needs it.
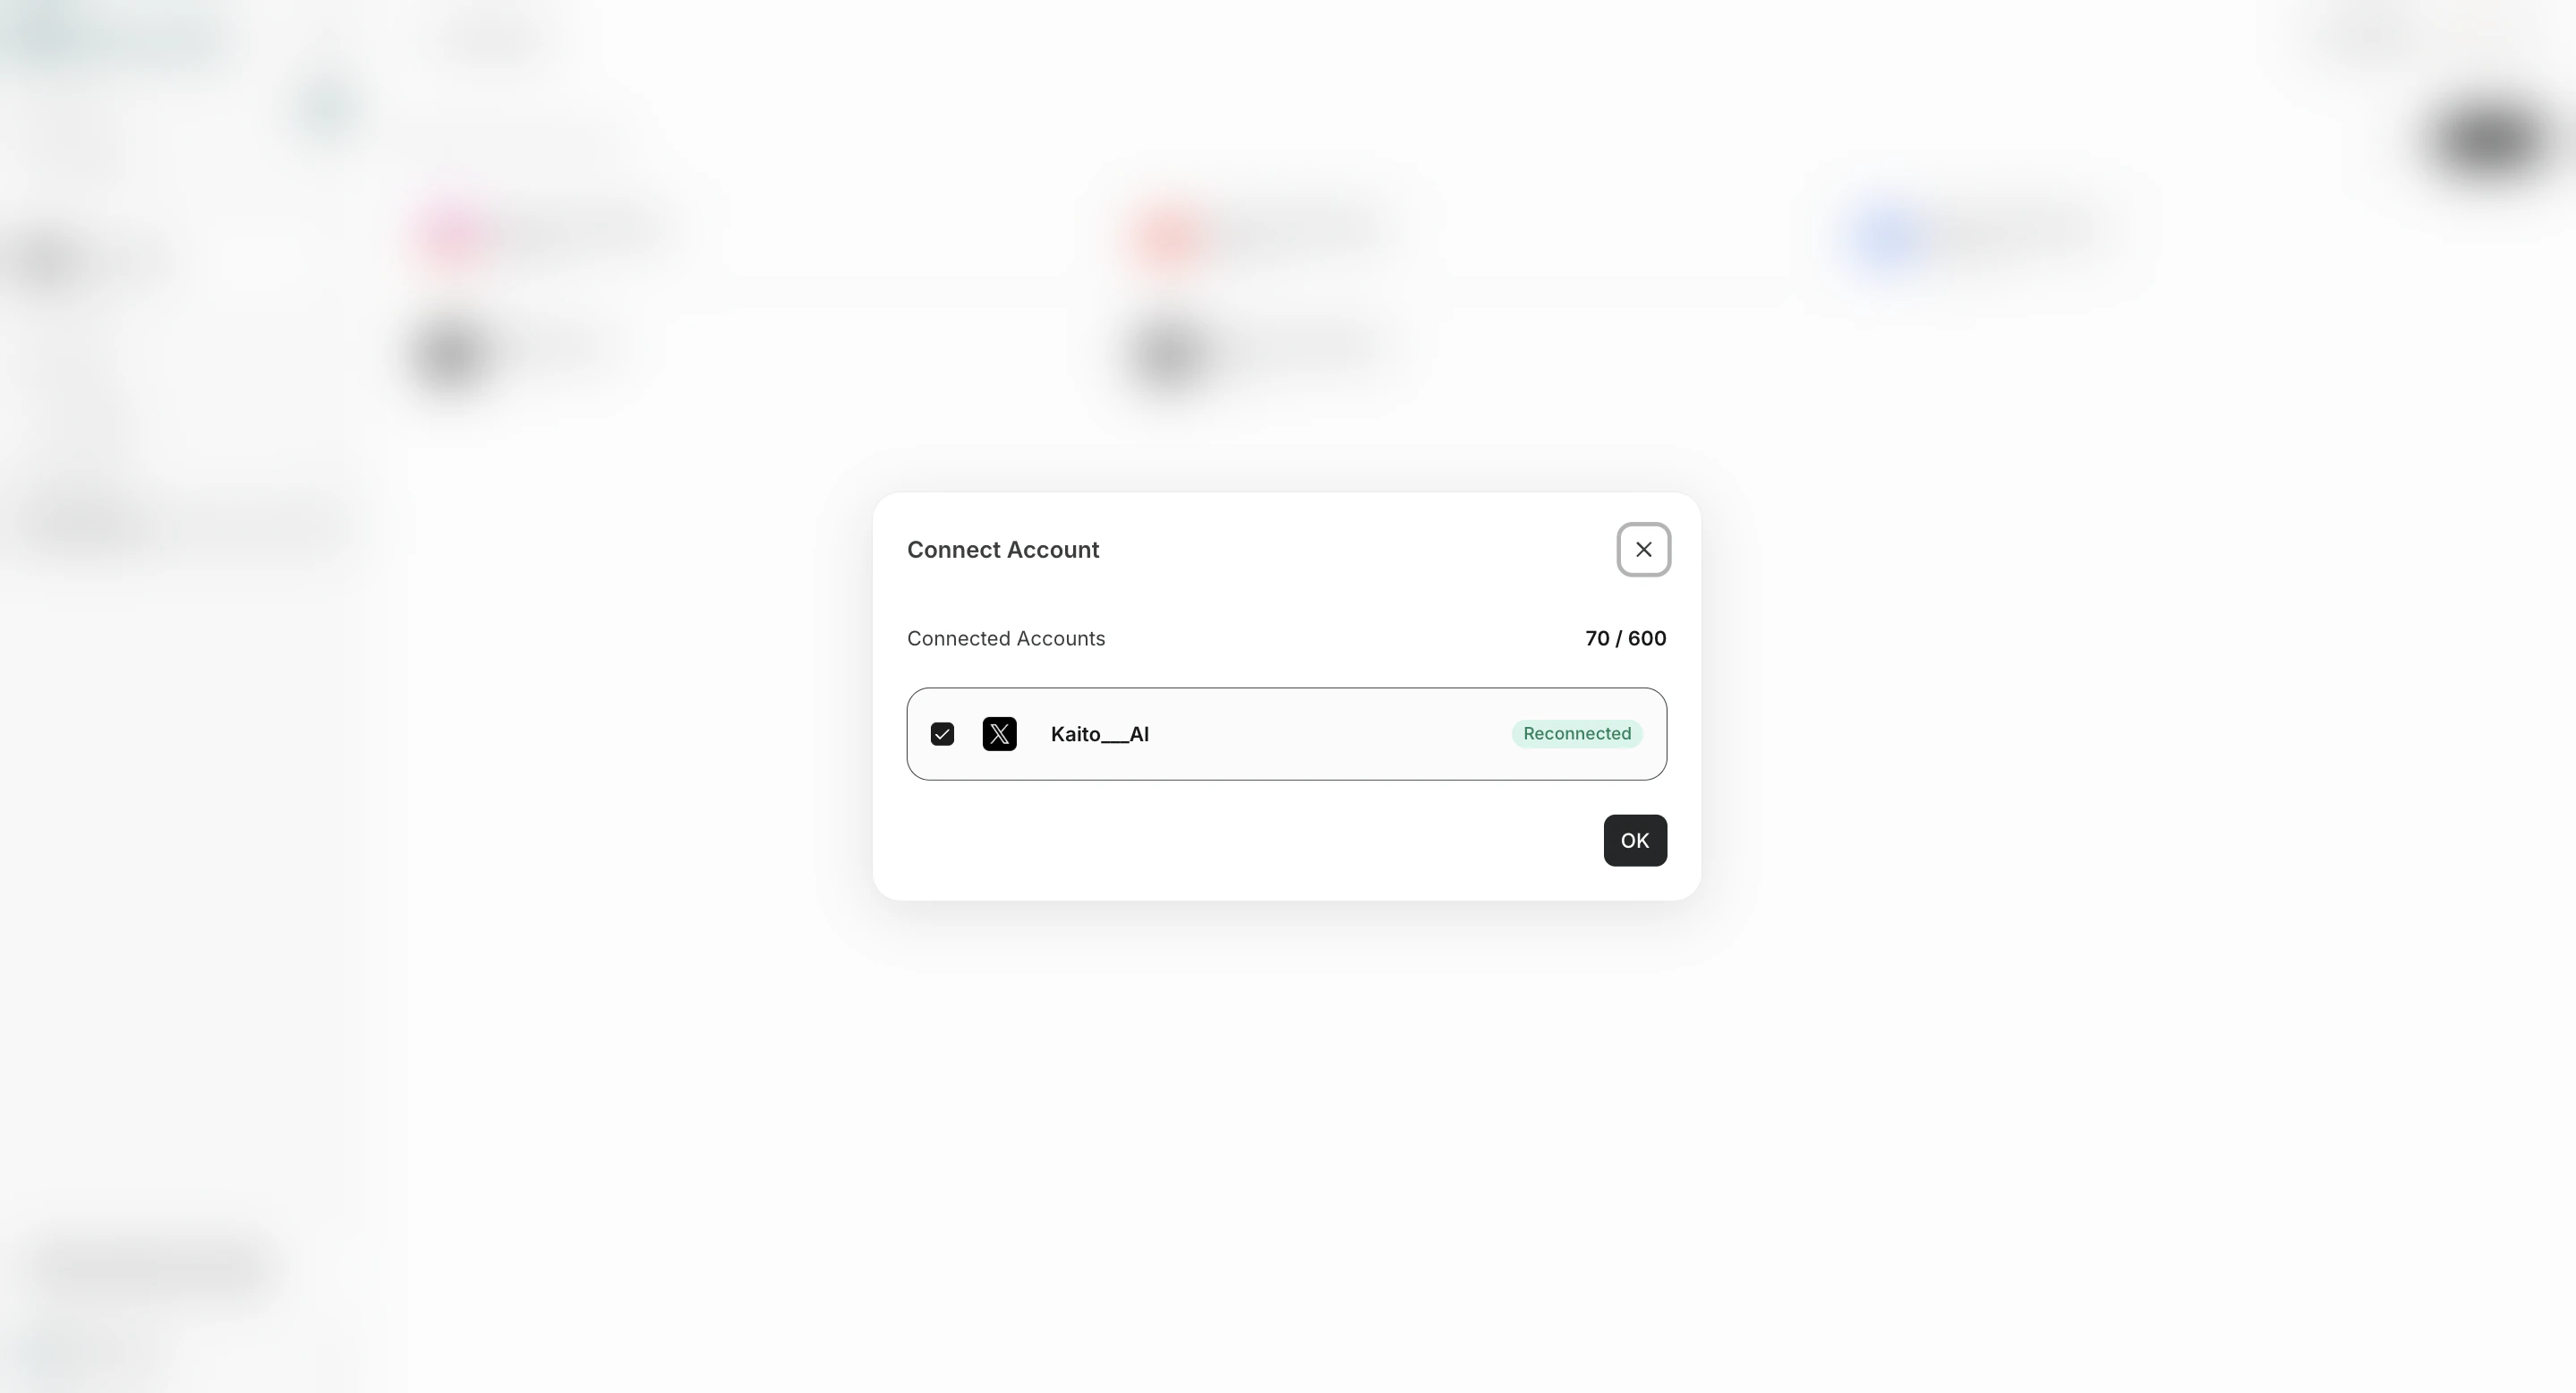
 3. Save your changes.
 ## Step 2: Create Your First Agent
Go to `Agents`, then click `Add Agent`.
Recommended first run:
1. Choose `Create from a template`.
## Step 2: Create Your First Agent
Go to `Agents`, then click `Add Agent`.
Recommended first run:
1. Choose `Create from a template`.
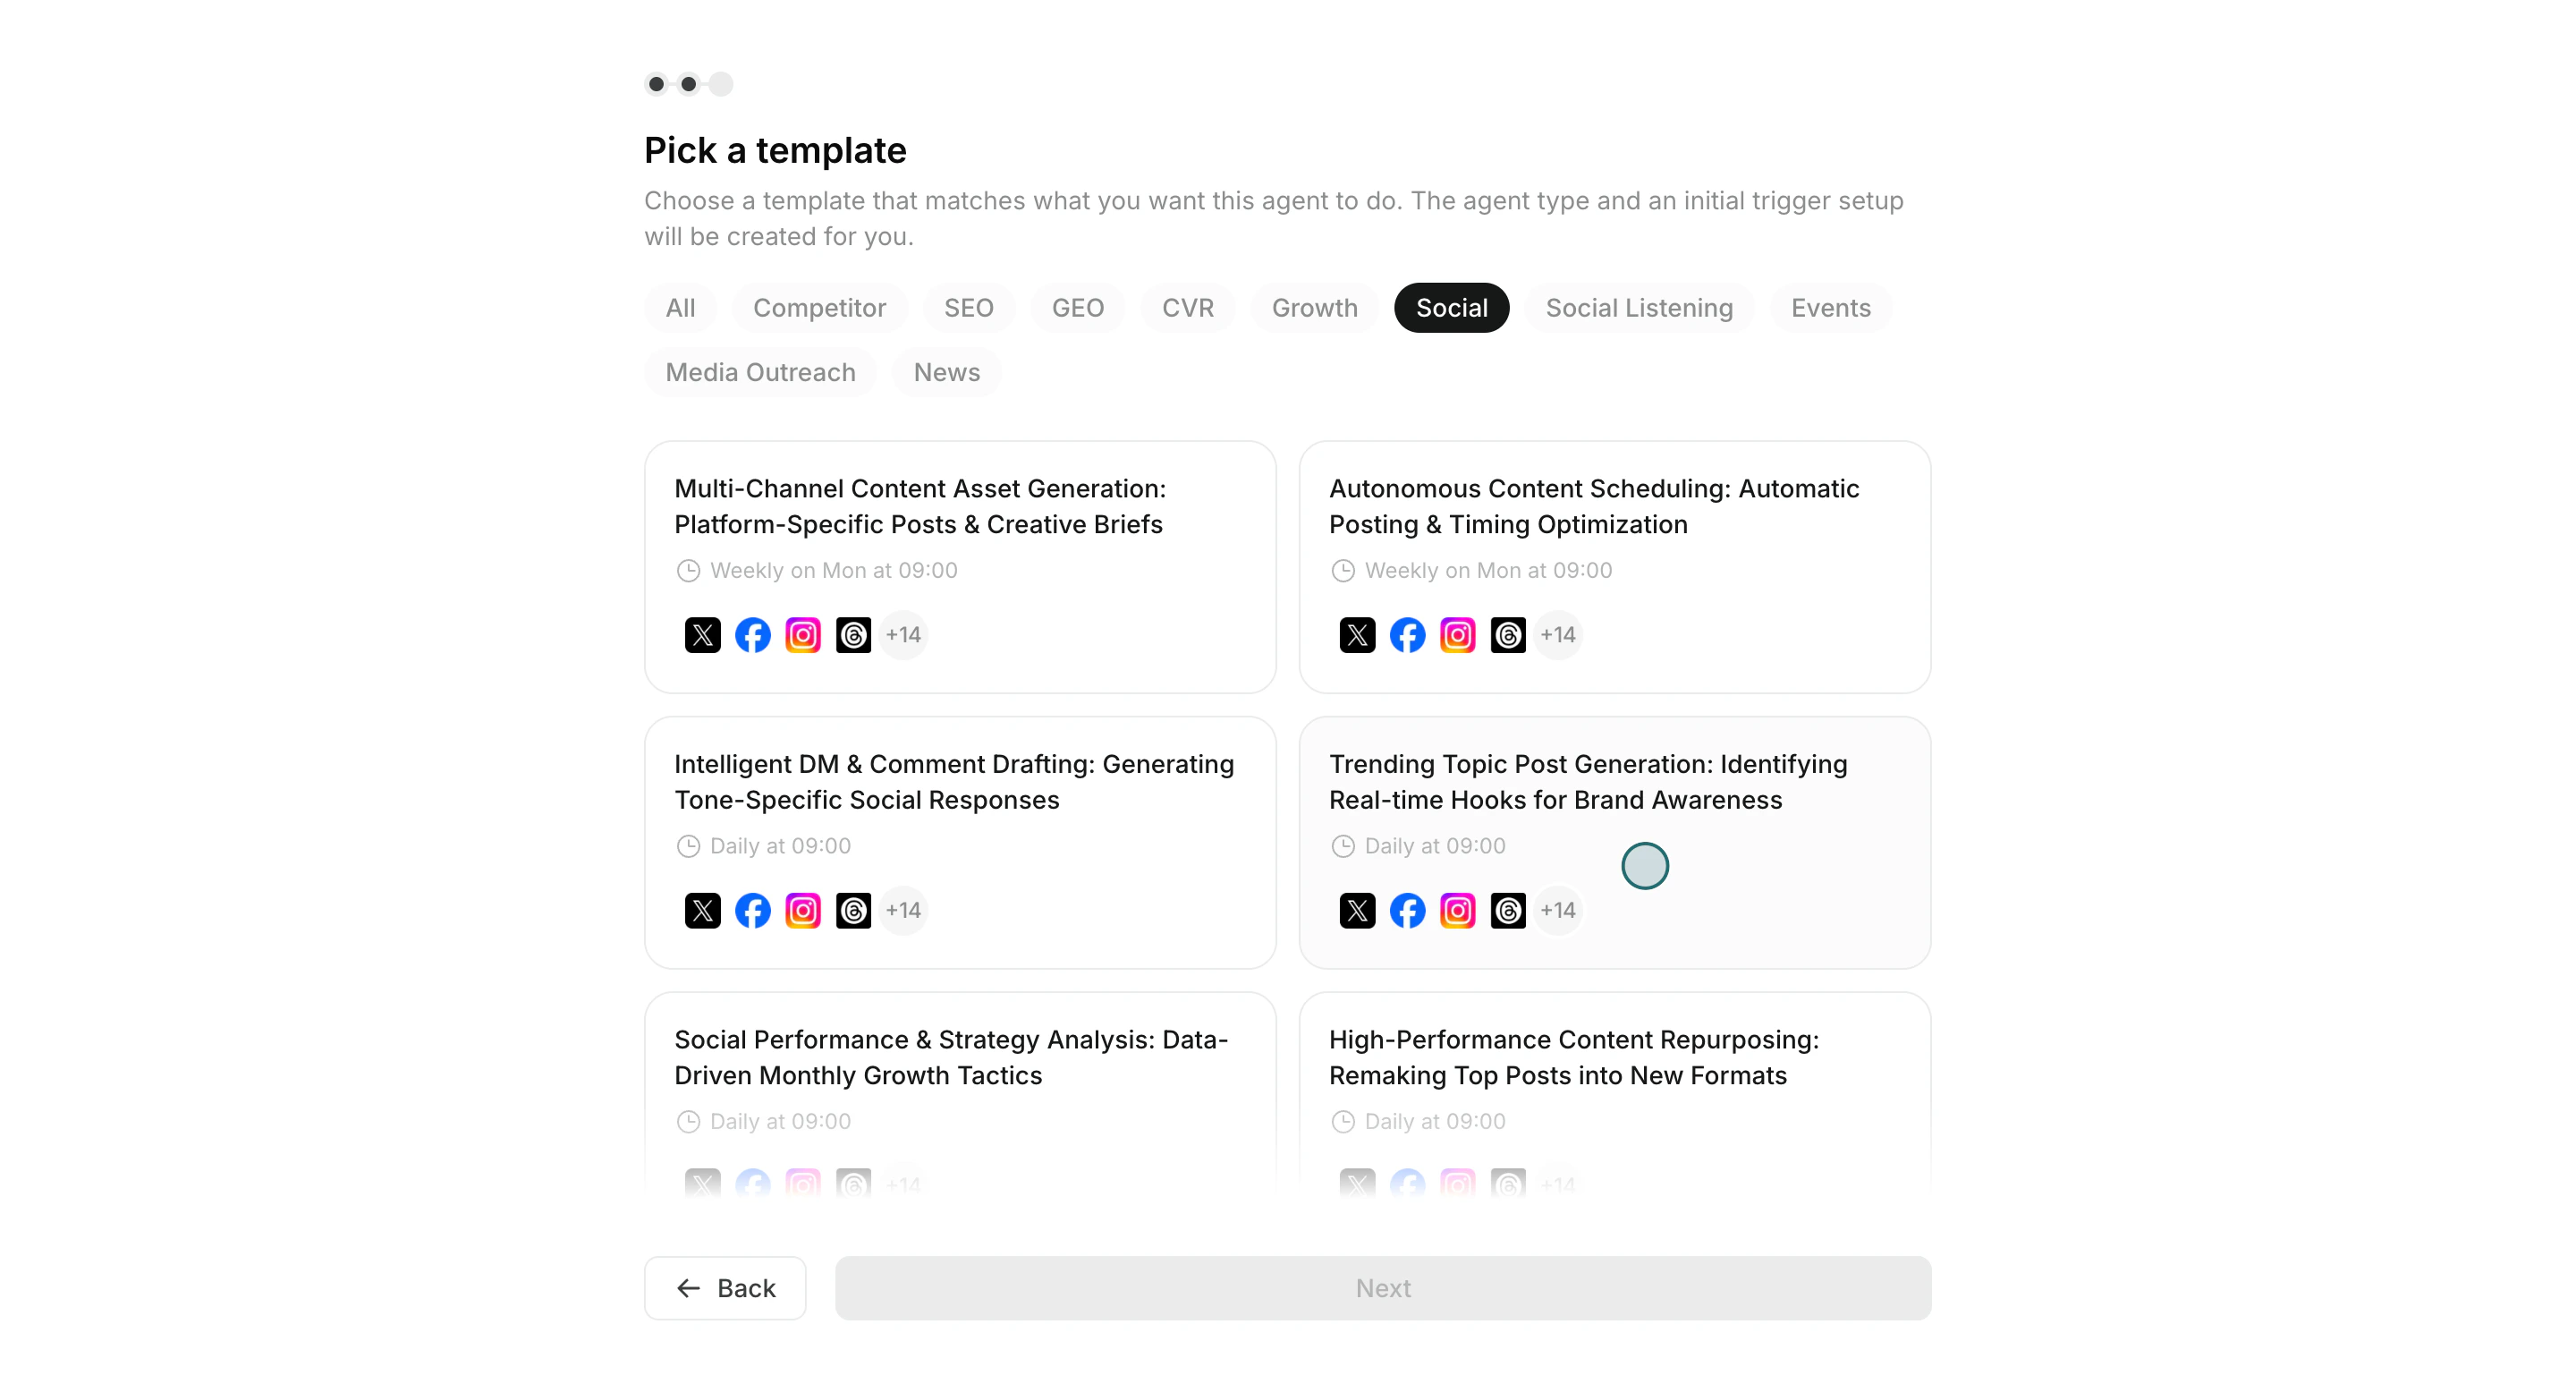
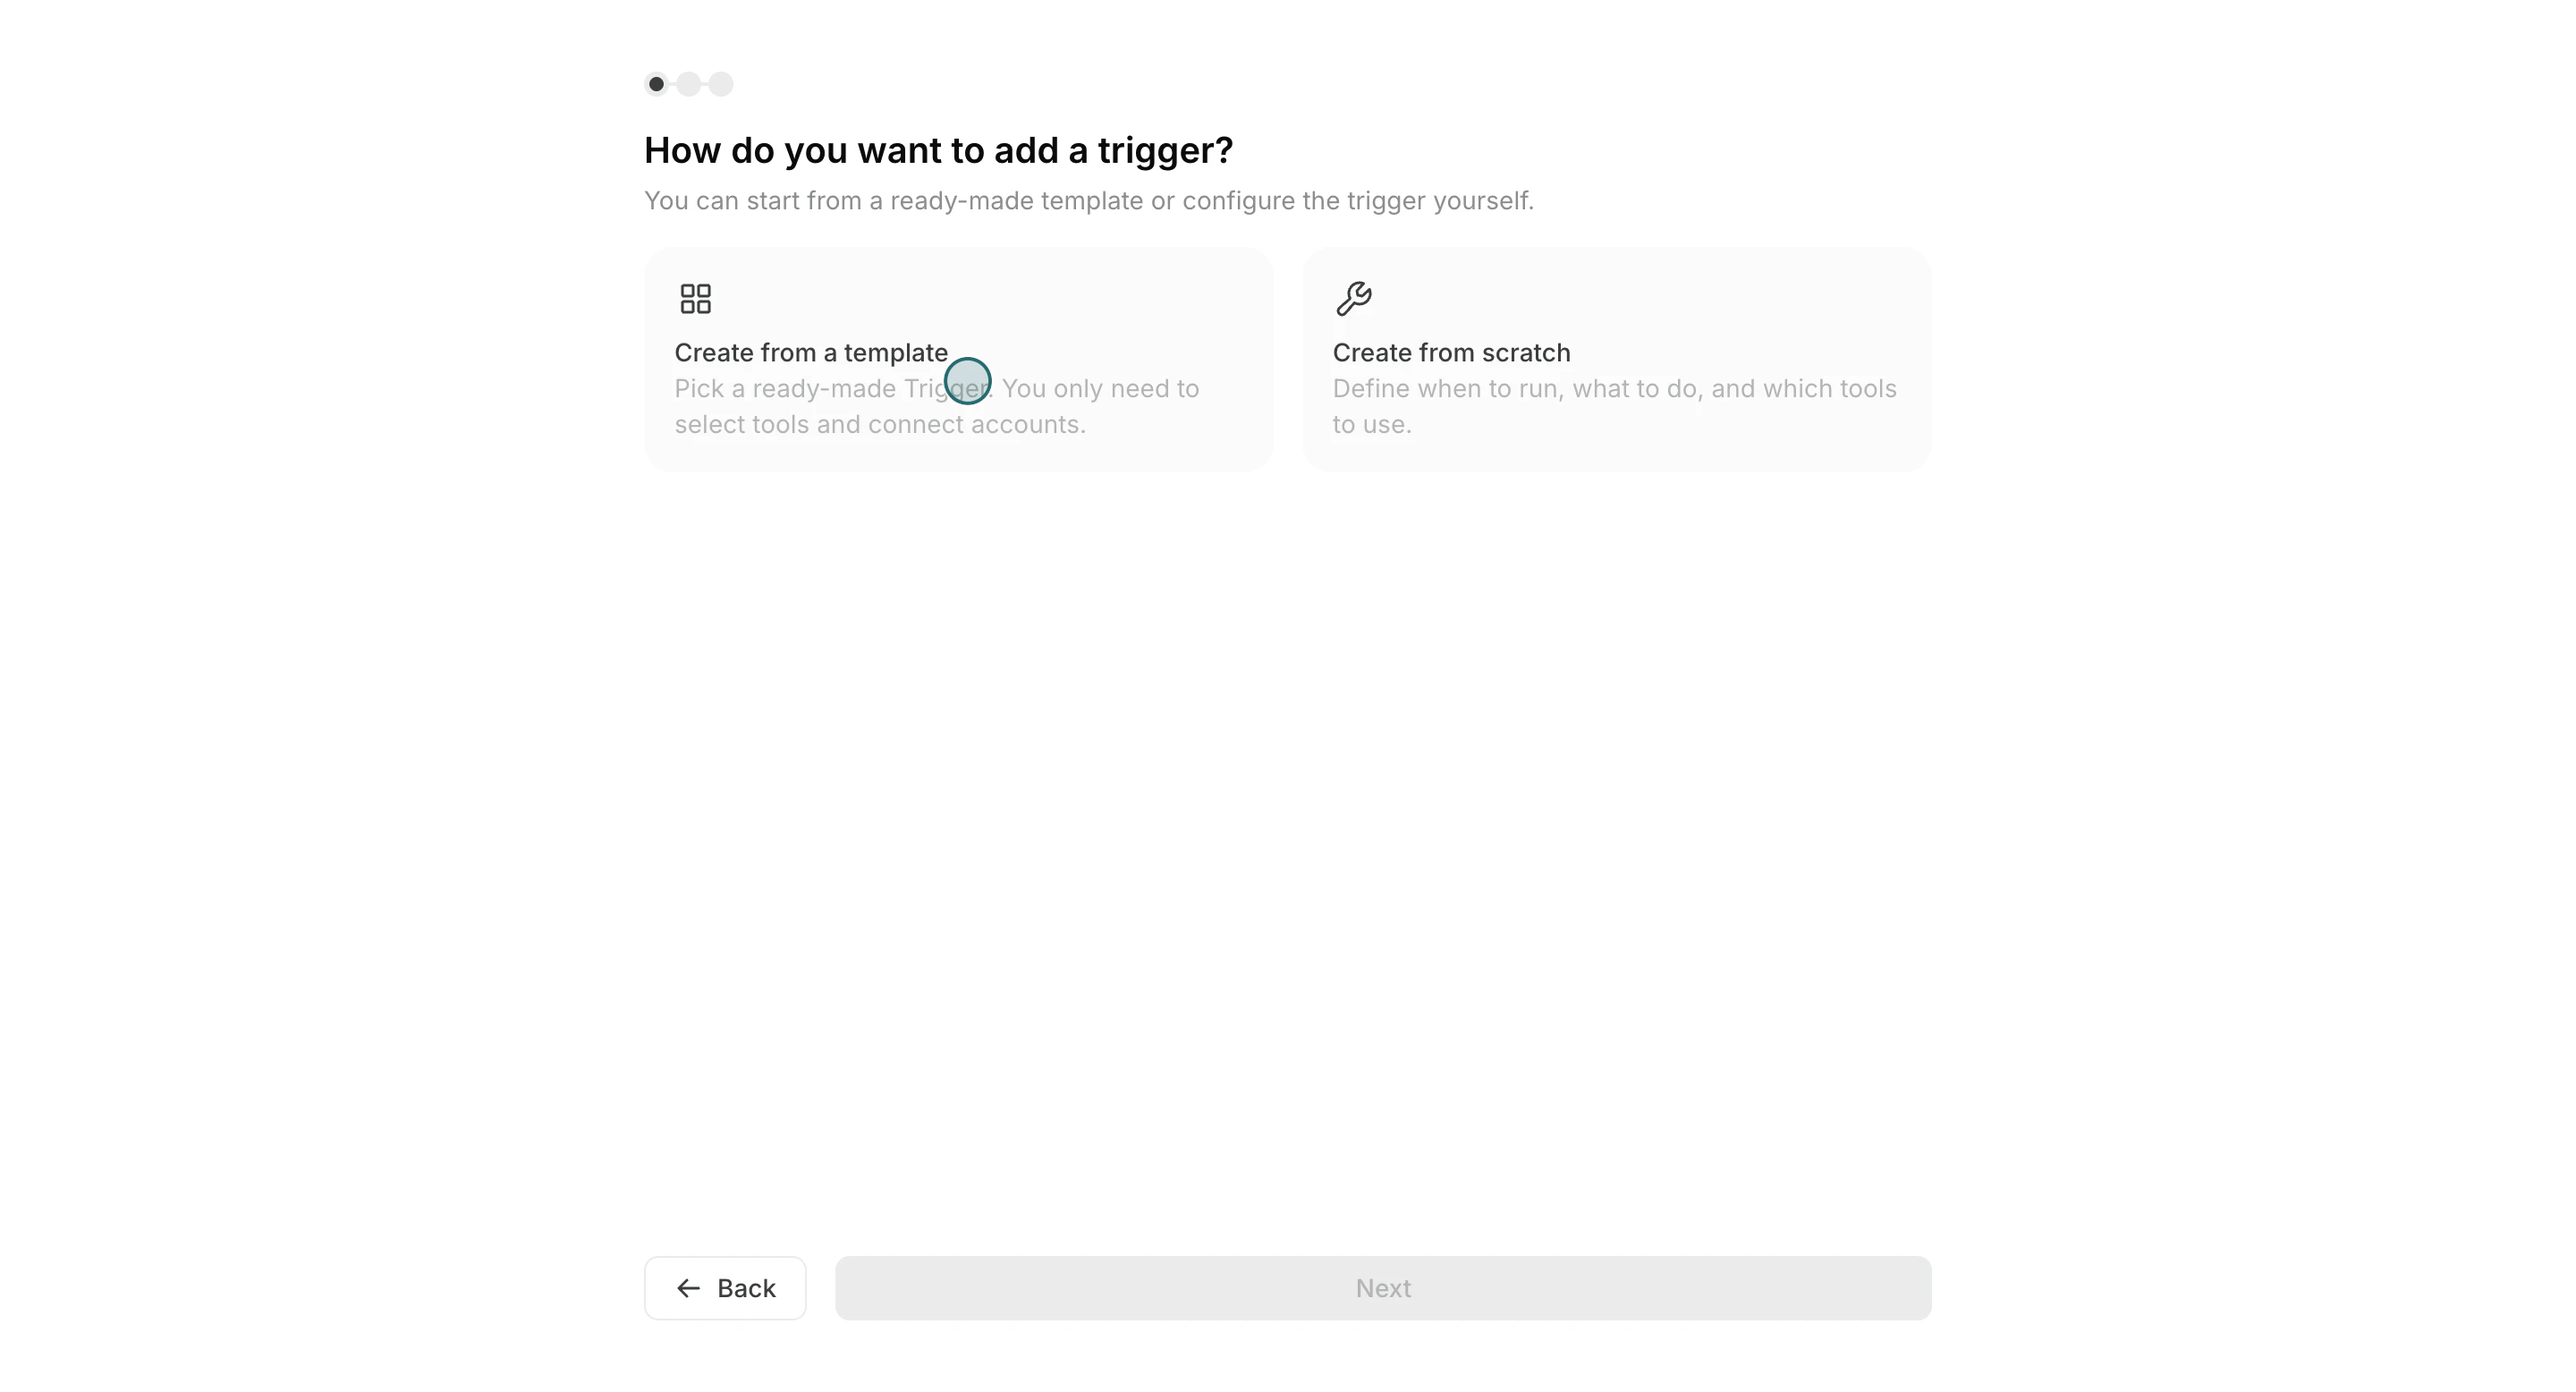 2. Pick a template close to your use case.
 3. Set schedule and instruction prompt.
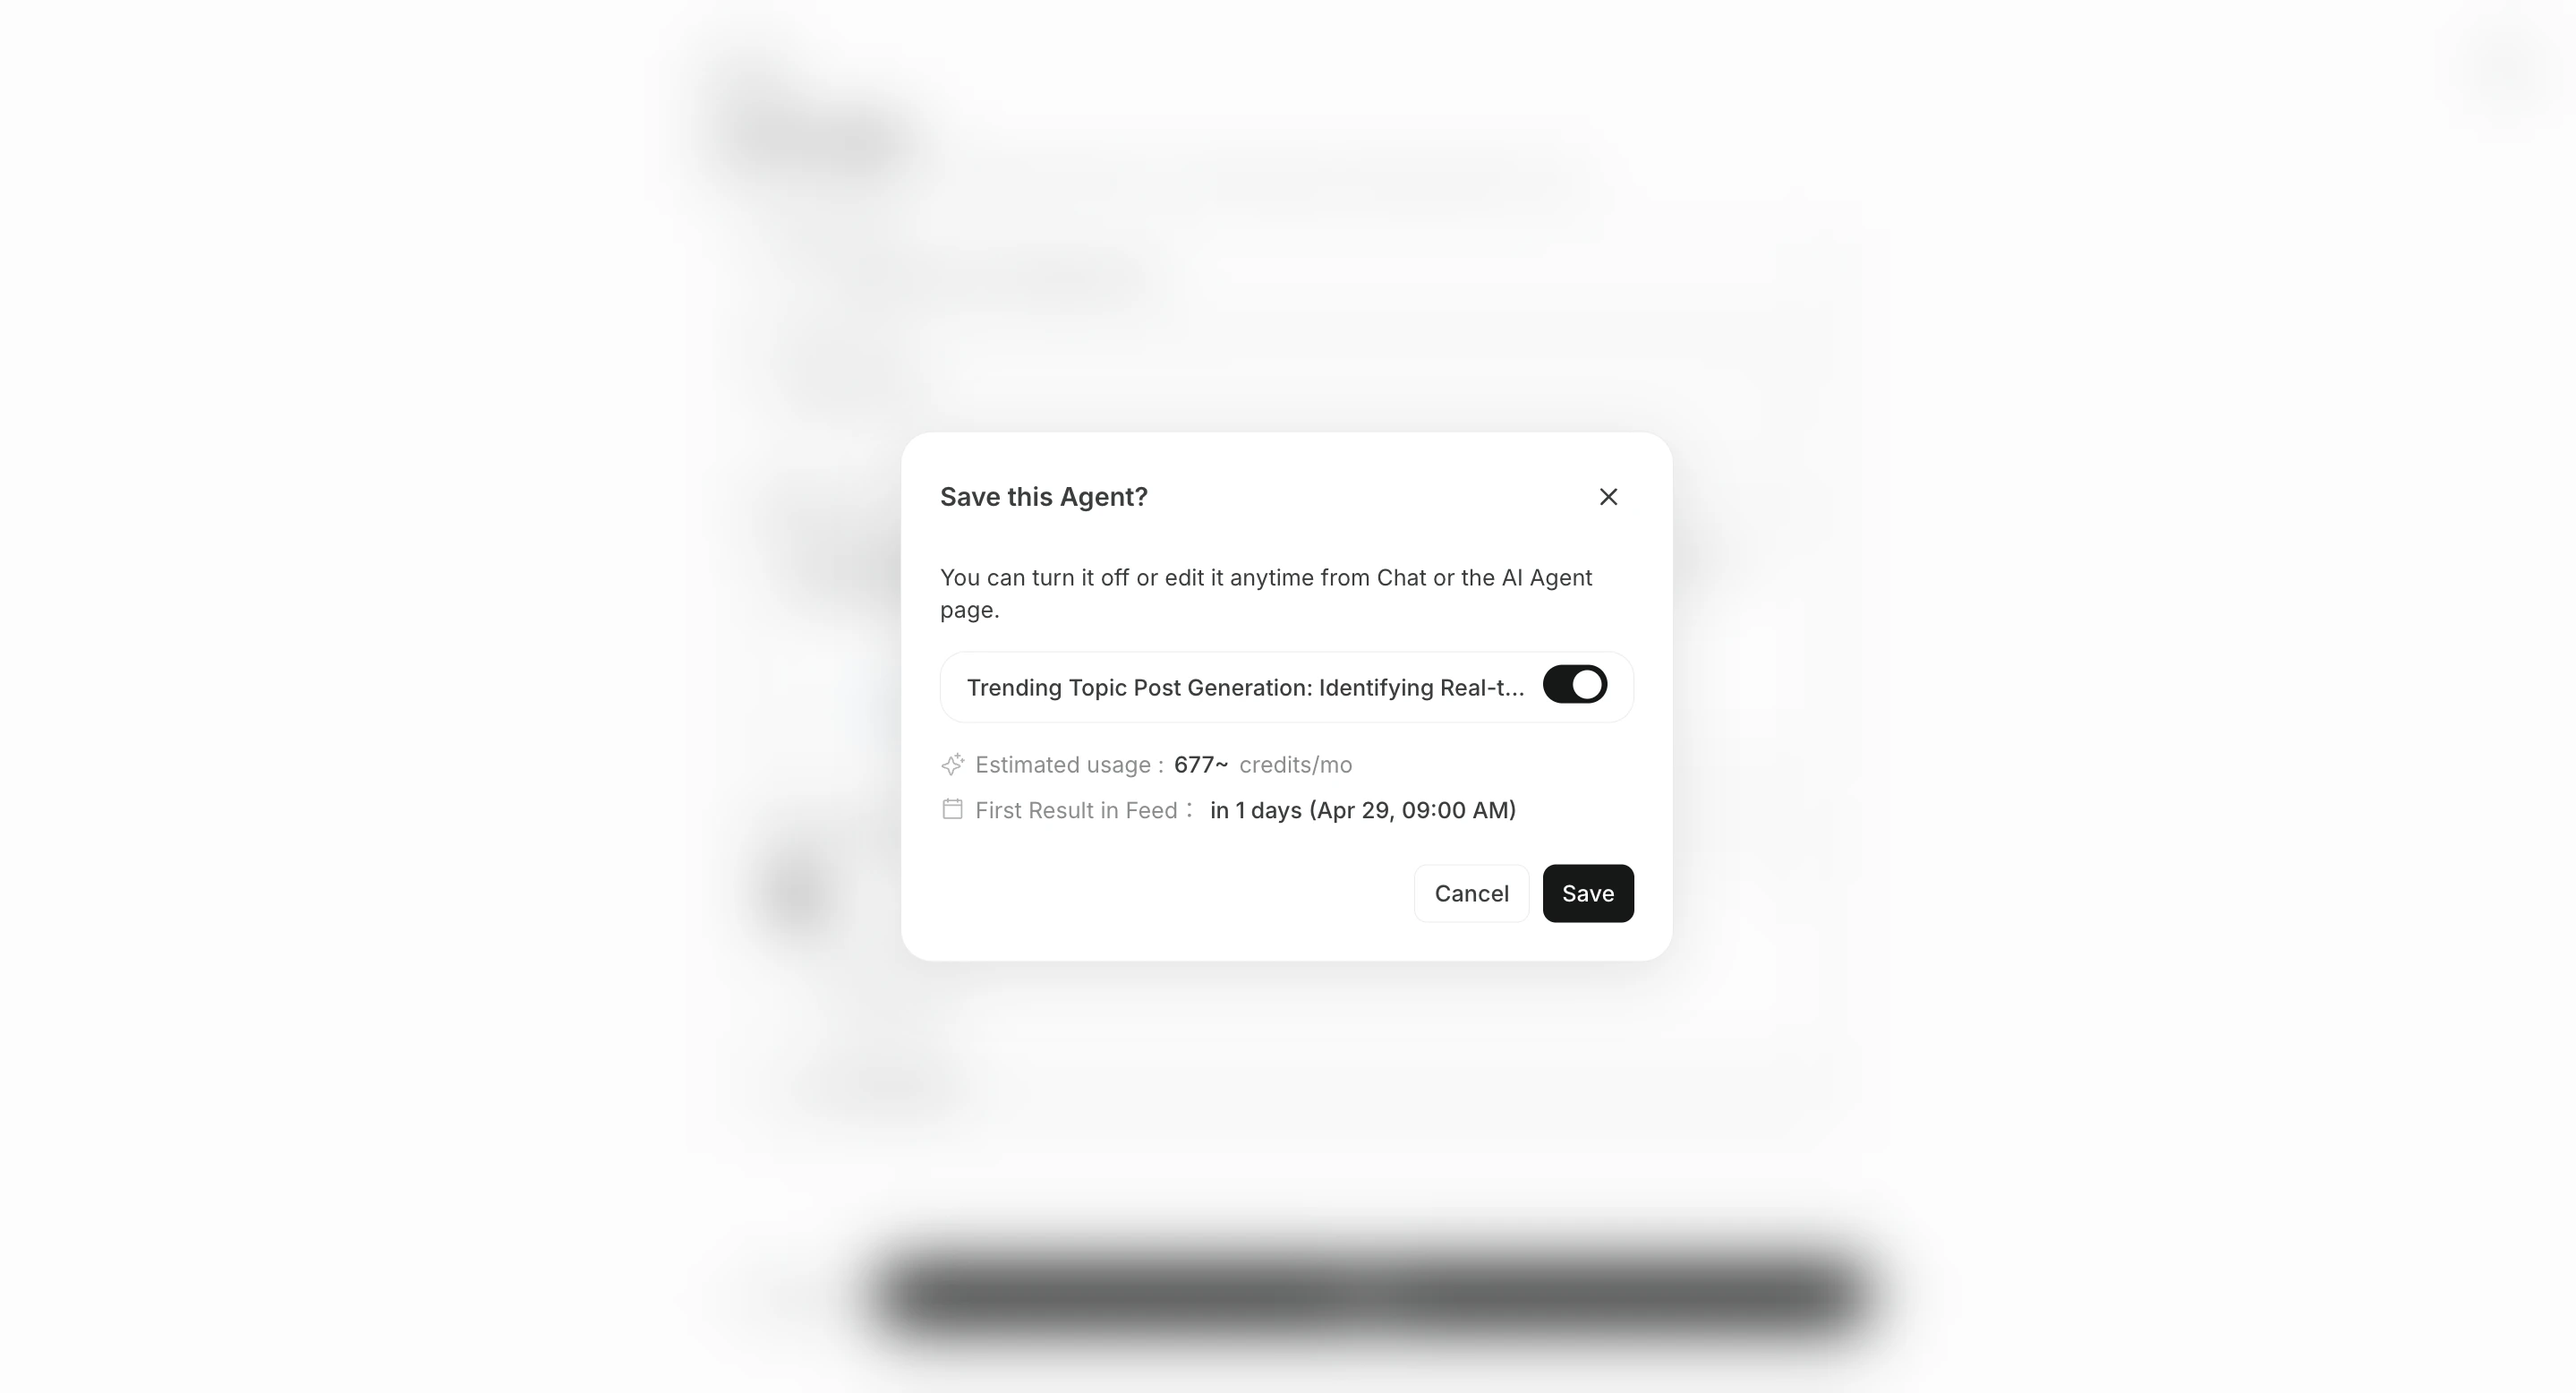
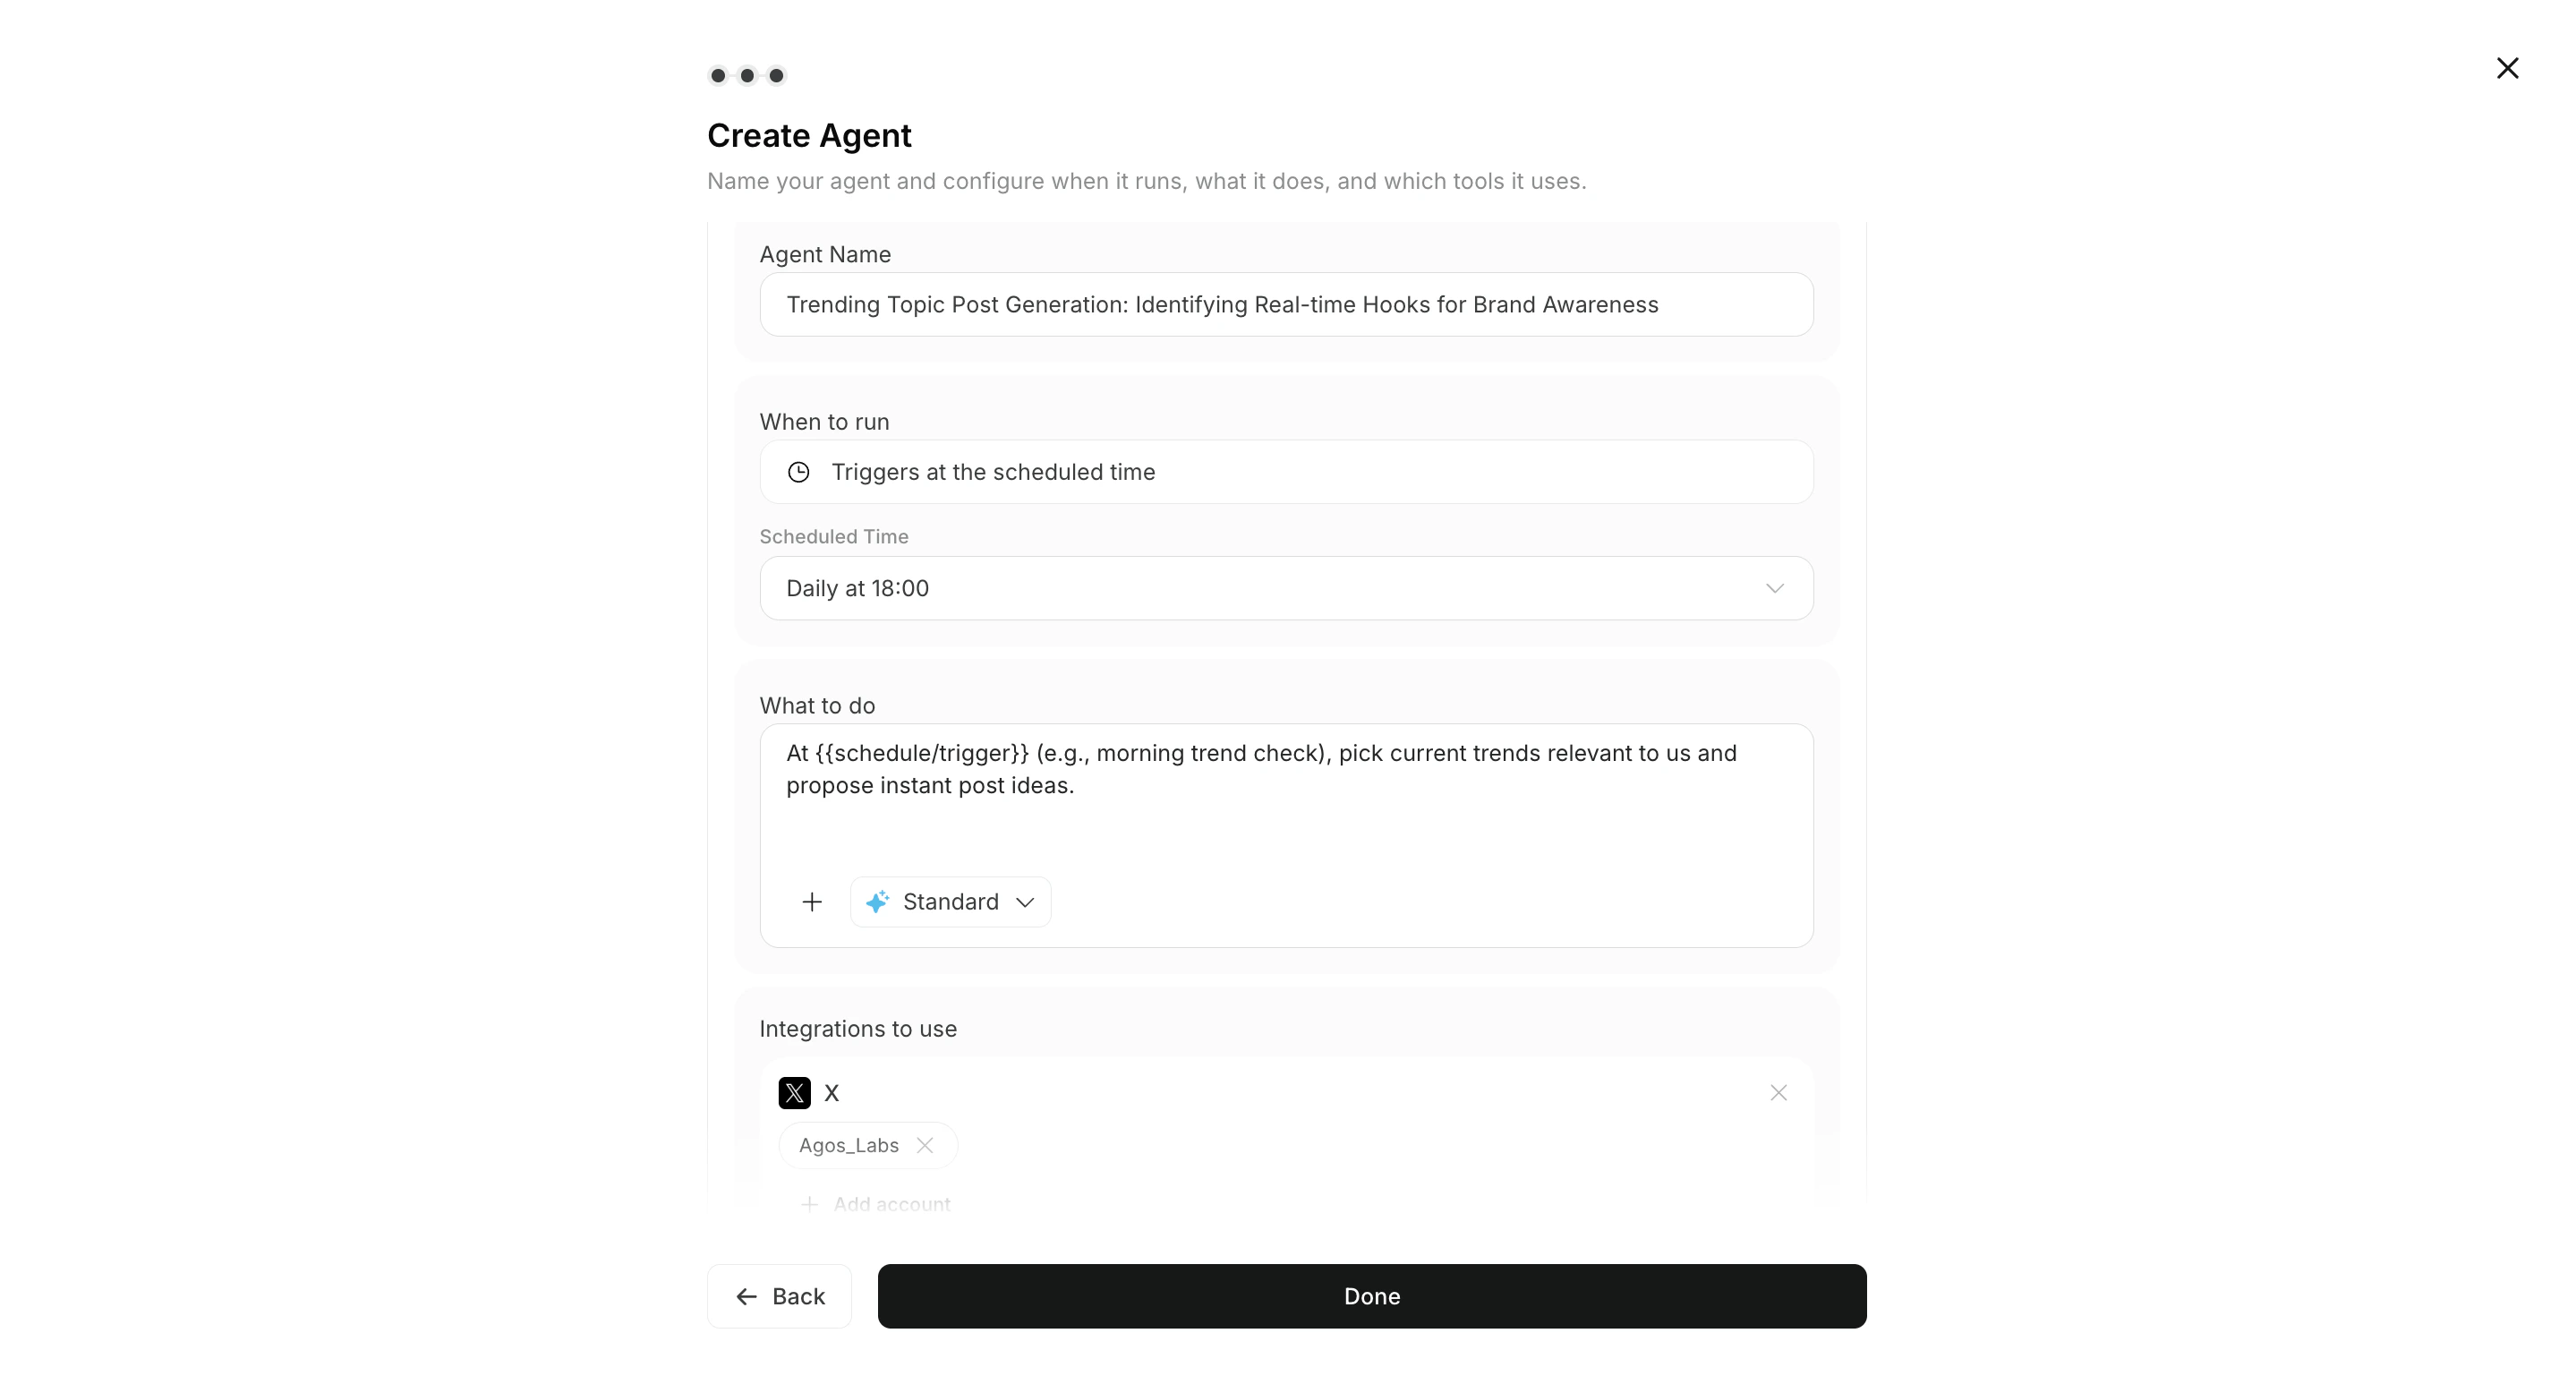 4. Select integrations/apps, then activate the trigger if needed.
 ## Step 3: Review Results in All Tasks
When an agent run is complete, the result appears in the related agent session.\
Open `All Tasks` and check the completed agent session.
Use this review loop:
1. Open the completed agent session from `All Tasks`.
2. Open `Execution Results`, then select the execution you want to review.
3. Check output details and source context.
4. Add refinement instructions in the same chat and review the response.
## Need the Interactive Walkthrough?
Use the Learning Center demos for full click-by-click guidance:
* [Connect Apps](/learning-center/quick-start/connect-apps)
* [Add Trigger](/learning-center/quick-start/add-trigger)
* [Review Agent Results](/learning-center/quick-start/review-agent-results)
## Start the first task from a recommendation
After connecting apps, you can start from an Advisor Agent recommendation instead of creating a normal agent immediately. Open `Advisor Agent recommendations` on the home screen, or open `Agents > Advisor Agent > Recommendations`, choose a recommendation, and click `Run`. A dedicated task chat opens with the execution prompt already placed in the input box.
See [Advisor Agent Basics](/help-center/ai-team/advisor-agent-basics) for details.
## Related
* [Navigate the Interface](/help-center/getting-started/navigate-the-interface)
* [Create an Agent from a Template](/help-center/ai-team/create-an-agent-from-a-template)
* [Check Agent Execution Results](/help-center/ai-team/check-agent-execution-results)
## Step 3: Review Results in All Tasks
When an agent run is complete, the result appears in the related agent session.\
Open `All Tasks` and check the completed agent session.
Use this review loop:
1. Open the completed agent session from `All Tasks`.
2. Open `Execution Results`, then select the execution you want to review.
3. Check output details and source context.
4. Add refinement instructions in the same chat and review the response.
## Need the Interactive Walkthrough?
Use the Learning Center demos for full click-by-click guidance:
* [Connect Apps](/learning-center/quick-start/connect-apps)
* [Add Trigger](/learning-center/quick-start/add-trigger)
* [Review Agent Results](/learning-center/quick-start/review-agent-results)
## Start the first task from a recommendation
After connecting apps, you can start from an Advisor Agent recommendation instead of creating a normal agent immediately. Open `Advisor Agent recommendations` on the home screen, or open `Agents > Advisor Agent > Recommendations`, choose a recommendation, and click `Run`. A dedicated task chat opens with the execution prompt already placed in the input box.
See [Advisor Agent Basics](/help-center/ai-team/advisor-agent-basics) for details.
## Related
* [Navigate the Interface](/help-center/getting-started/navigate-the-interface)
* [Create an Agent from a Template](/help-center/ai-team/create-an-agent-from-a-template)
* [Check Agent Execution Results](/help-center/ai-team/check-agent-execution-results)