> ## Documentation Index
> Fetch the complete documentation index at: https://docs.noimosai.com/llms.txt
> Use this file to discover all available pages before exploring further.
# Table Block
> Learn how to create custom tables on pages and manage properties, statuses, and connected data.
## Overview
The `Table` block is for managing tabular information on a page.
You can create a custom table from scratch or add data from connected accounts as `Linked Data` columns.
## When to use it
Use a table when you want to organize information like this on one page.
* Manage initiative lists, tasks, and review items.
* Compare posts, pages, search queries, or similar records by row.
* Manage statuses, owners, dates, and URLs in columns.
* Review connected account metrics in the same table.
## Add a table
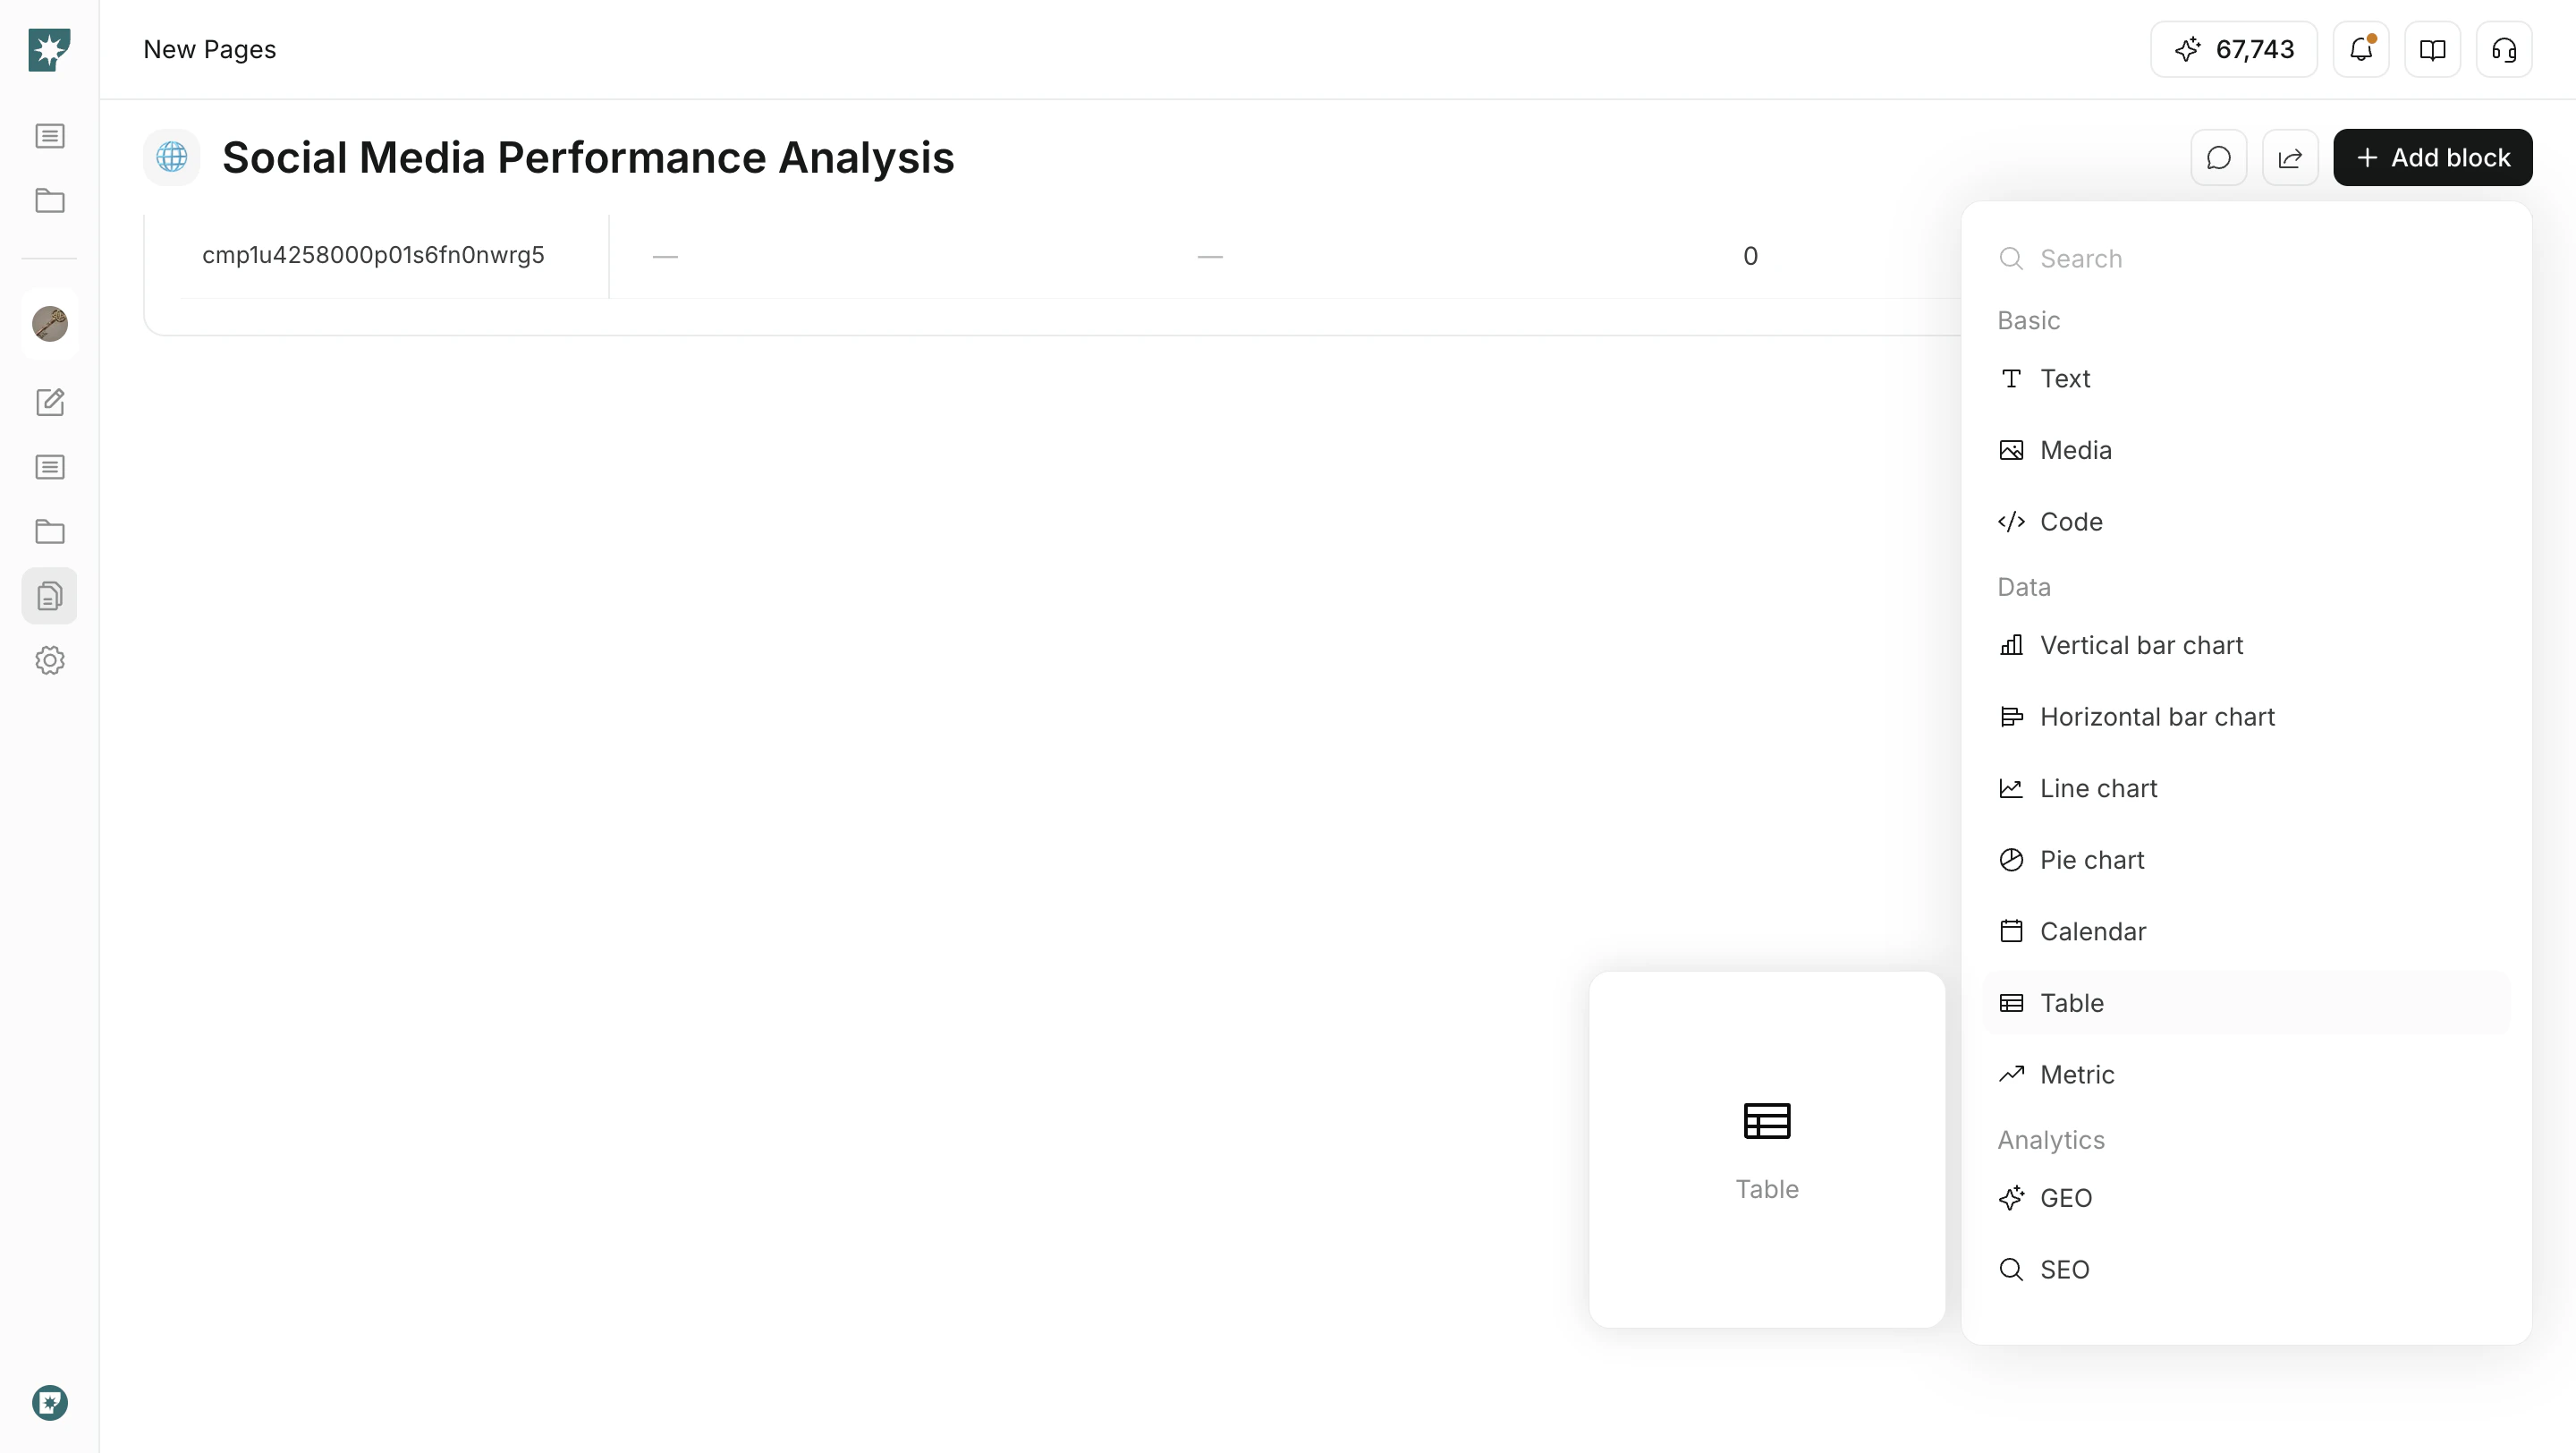
Insert a table from the add block menu.
1. Open the target page.
2. Click `Add block`.
3. Select `Table` from `Data`.
4. Add the rows and properties you need.
 ## Add properties
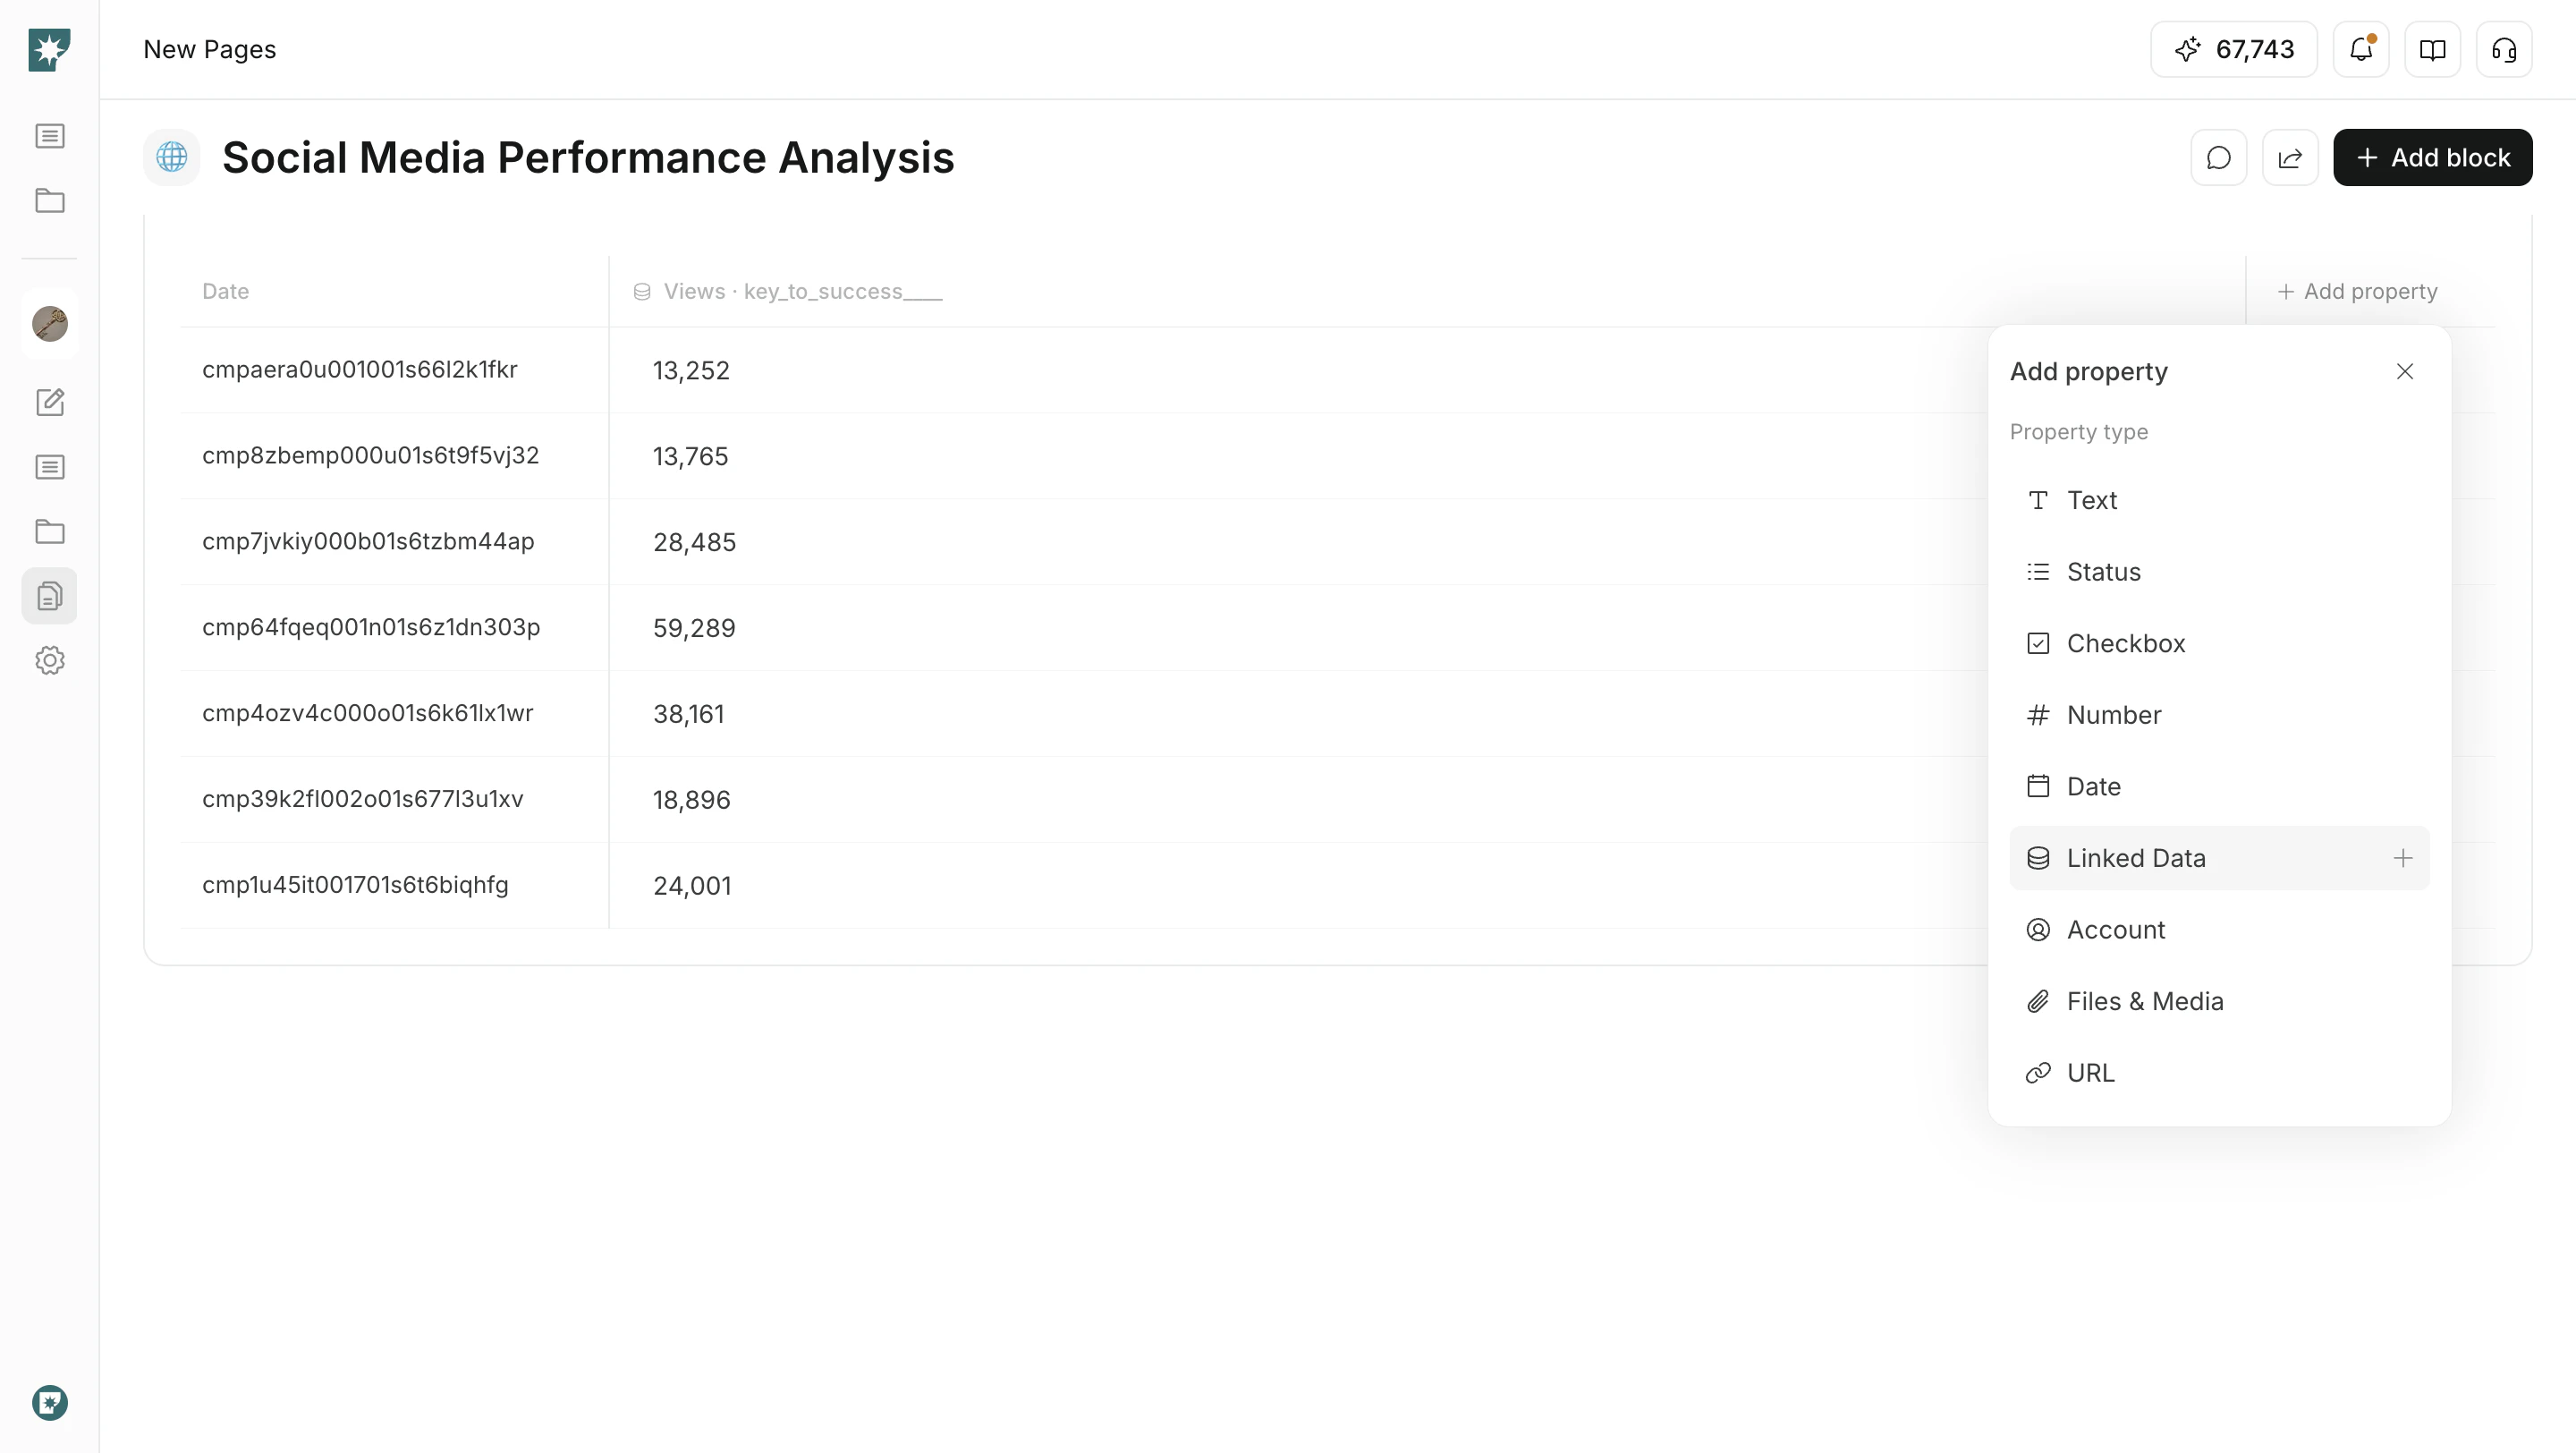
Properties are the types of information used as table columns.
| Property | Purpose |
| --------------- | ------------------------------------------------------------- |
| `Text` | Enter names, notes, categories, or similar text. |
| `Status` | Manage progress or publication state with selectable options. |
| `Checkbox` | Track a binary value such as done or not done. |
| `Number` | Enter counts, amounts, scores, or similar values. |
| `Date` | Manage deadlines, publish dates, and review dates. |
| `Linked Data` | Display metrics from connected accounts. |
| `Account` | Show the related connected account. |
| `Files & Media` | Attach images or documents. |
| `URL` | Record reference links or public URLs. |
## Add properties
Properties are the types of information used as table columns.
| Property | Purpose |
| --------------- | ------------------------------------------------------------- |
| `Text` | Enter names, notes, categories, or similar text. |
| `Status` | Manage progress or publication state with selectable options. |
| `Checkbox` | Track a binary value such as done or not done. |
| `Number` | Enter counts, amounts, scores, or similar values. |
| `Date` | Manage deadlines, publish dates, and review dates. |
| `Linked Data` | Display metrics from connected accounts. |
| `Account` | Show the related connected account. |
| `Files & Media` | Attach images or documents. |
| `URL` | Record reference links or public URLs. |
 ## Configure statuses
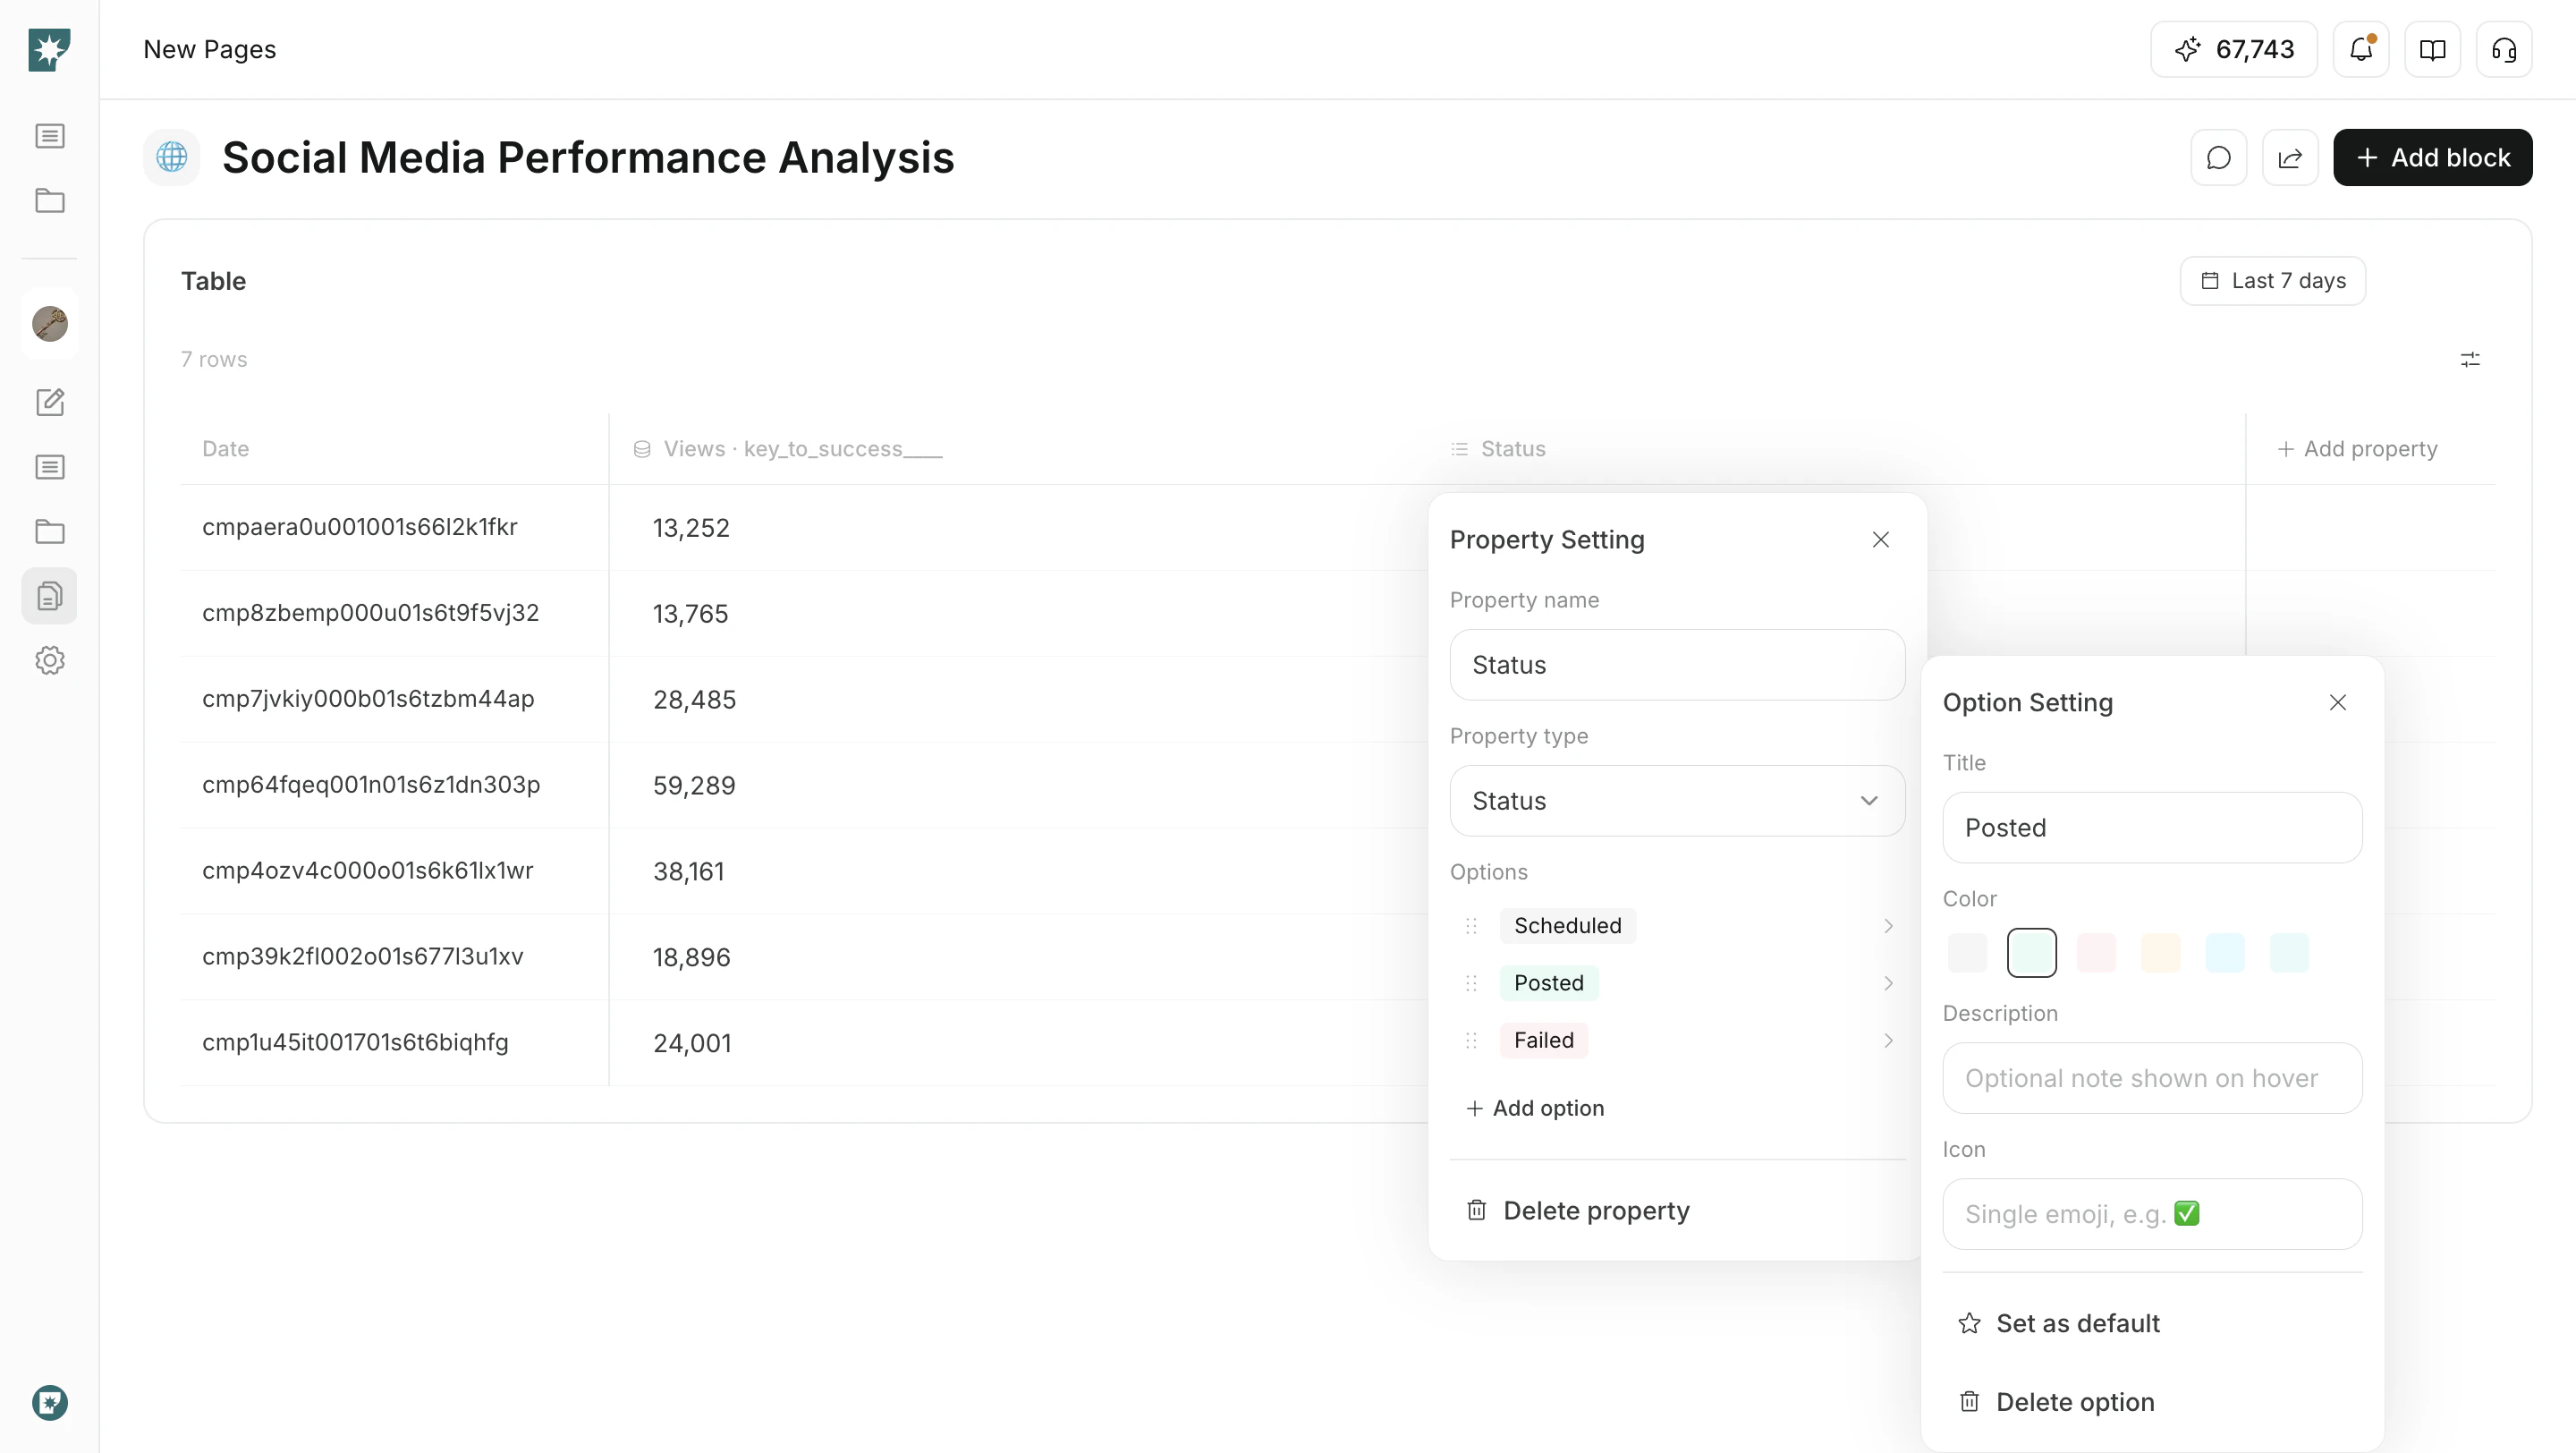
Use the `Status` property to tailor options to your workflow.
* Rename options.
* Set colors, descriptions, and icons.
* Make a frequently used status the `Default`.
* Drag statuses to change their order.
Statuses are useful when a team needs a shared view of production progress, publication state, or review status.
## Configure statuses
Use the `Status` property to tailor options to your workflow.
* Rename options.
* Set colors, descriptions, and icons.
* Make a frequently used status the `Default`.
* Drag statuses to change their order.
Statuses are useful when a team needs a shared view of production progress, publication state, or review status.
 ## Add Linked Data
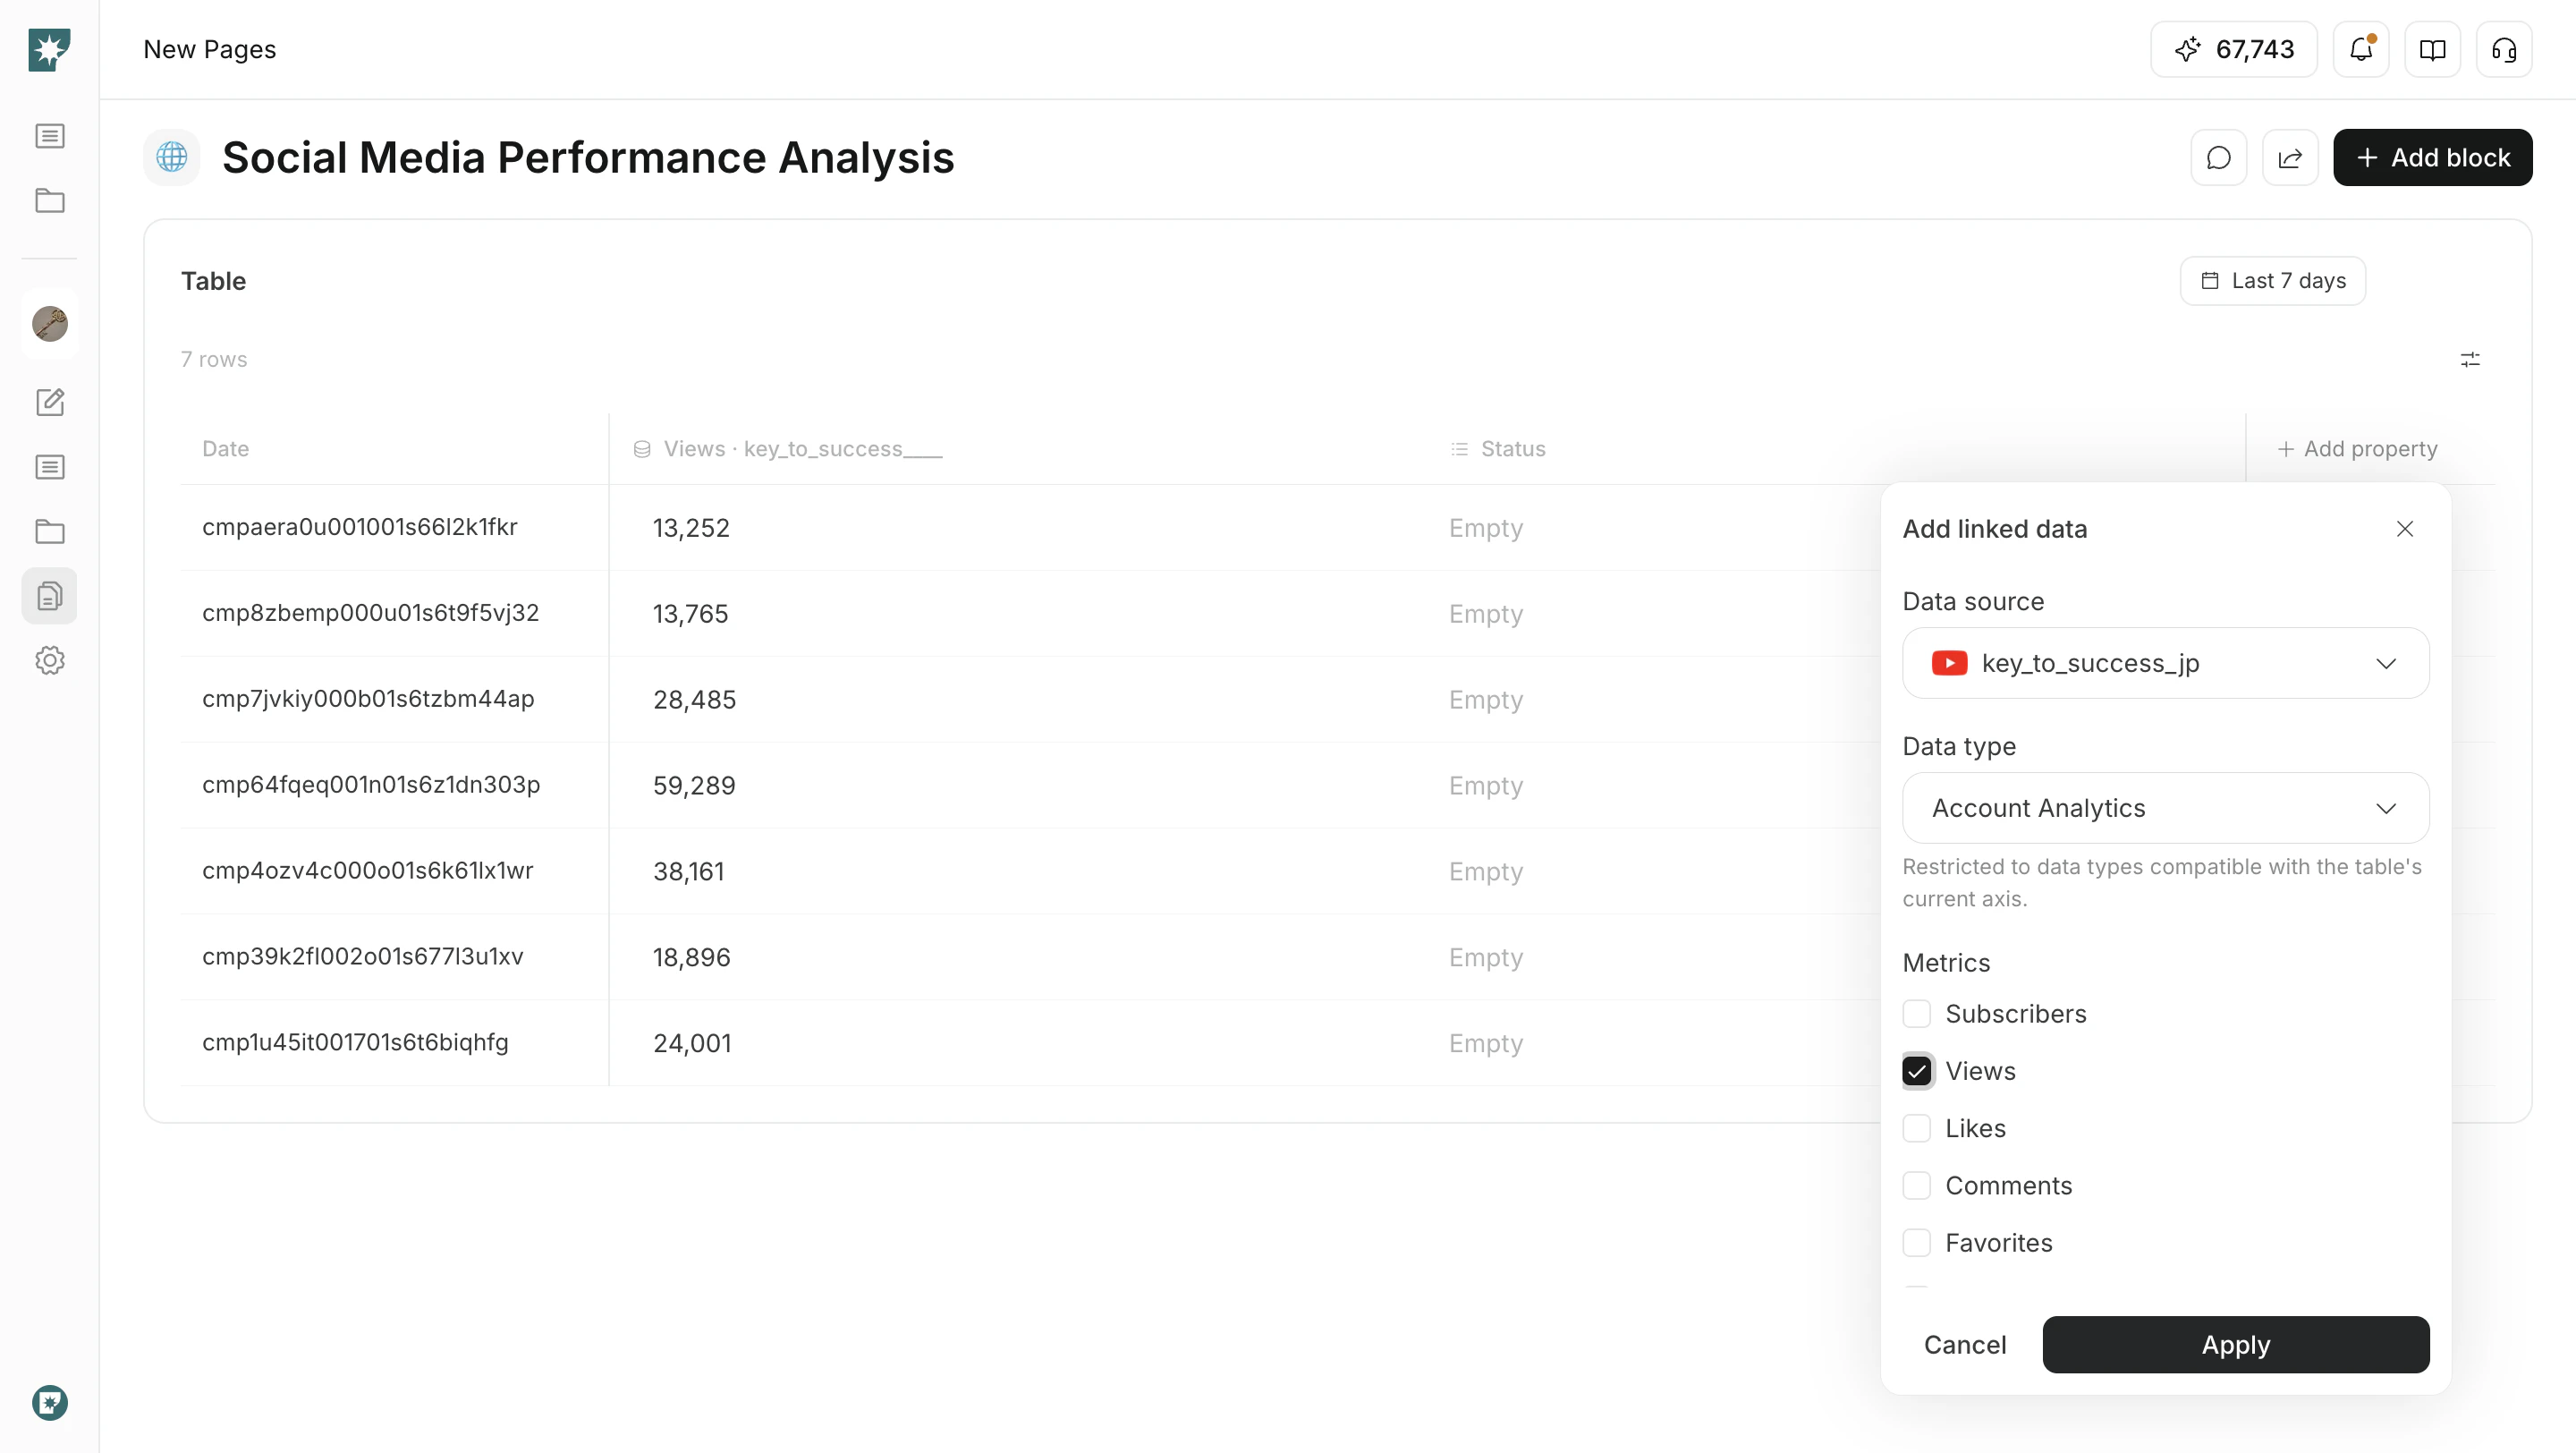
Use `Linked Data` to show data from connected accounts as table columns.
1. Open `Add property`.
2. Select `Linked Data`.
3. Choose the data source, data type, metrics, and period.
4. Click `Apply` to add it to the table.
The existing table content may be rebuilt from the selected data source.
Before applying, confirm there is no manually entered information you need to keep.
## Add Linked Data
Use `Linked Data` to show data from connected accounts as table columns.
1. Open `Add property`.
2. Select `Linked Data`.
3. Choose the data source, data type, metrics, and period.
4. Click `Apply` to add it to the table.
The existing table content may be rebuilt from the selected data source.
Before applying, confirm there is no manually entered information you need to keep.
 ## Filter and sort
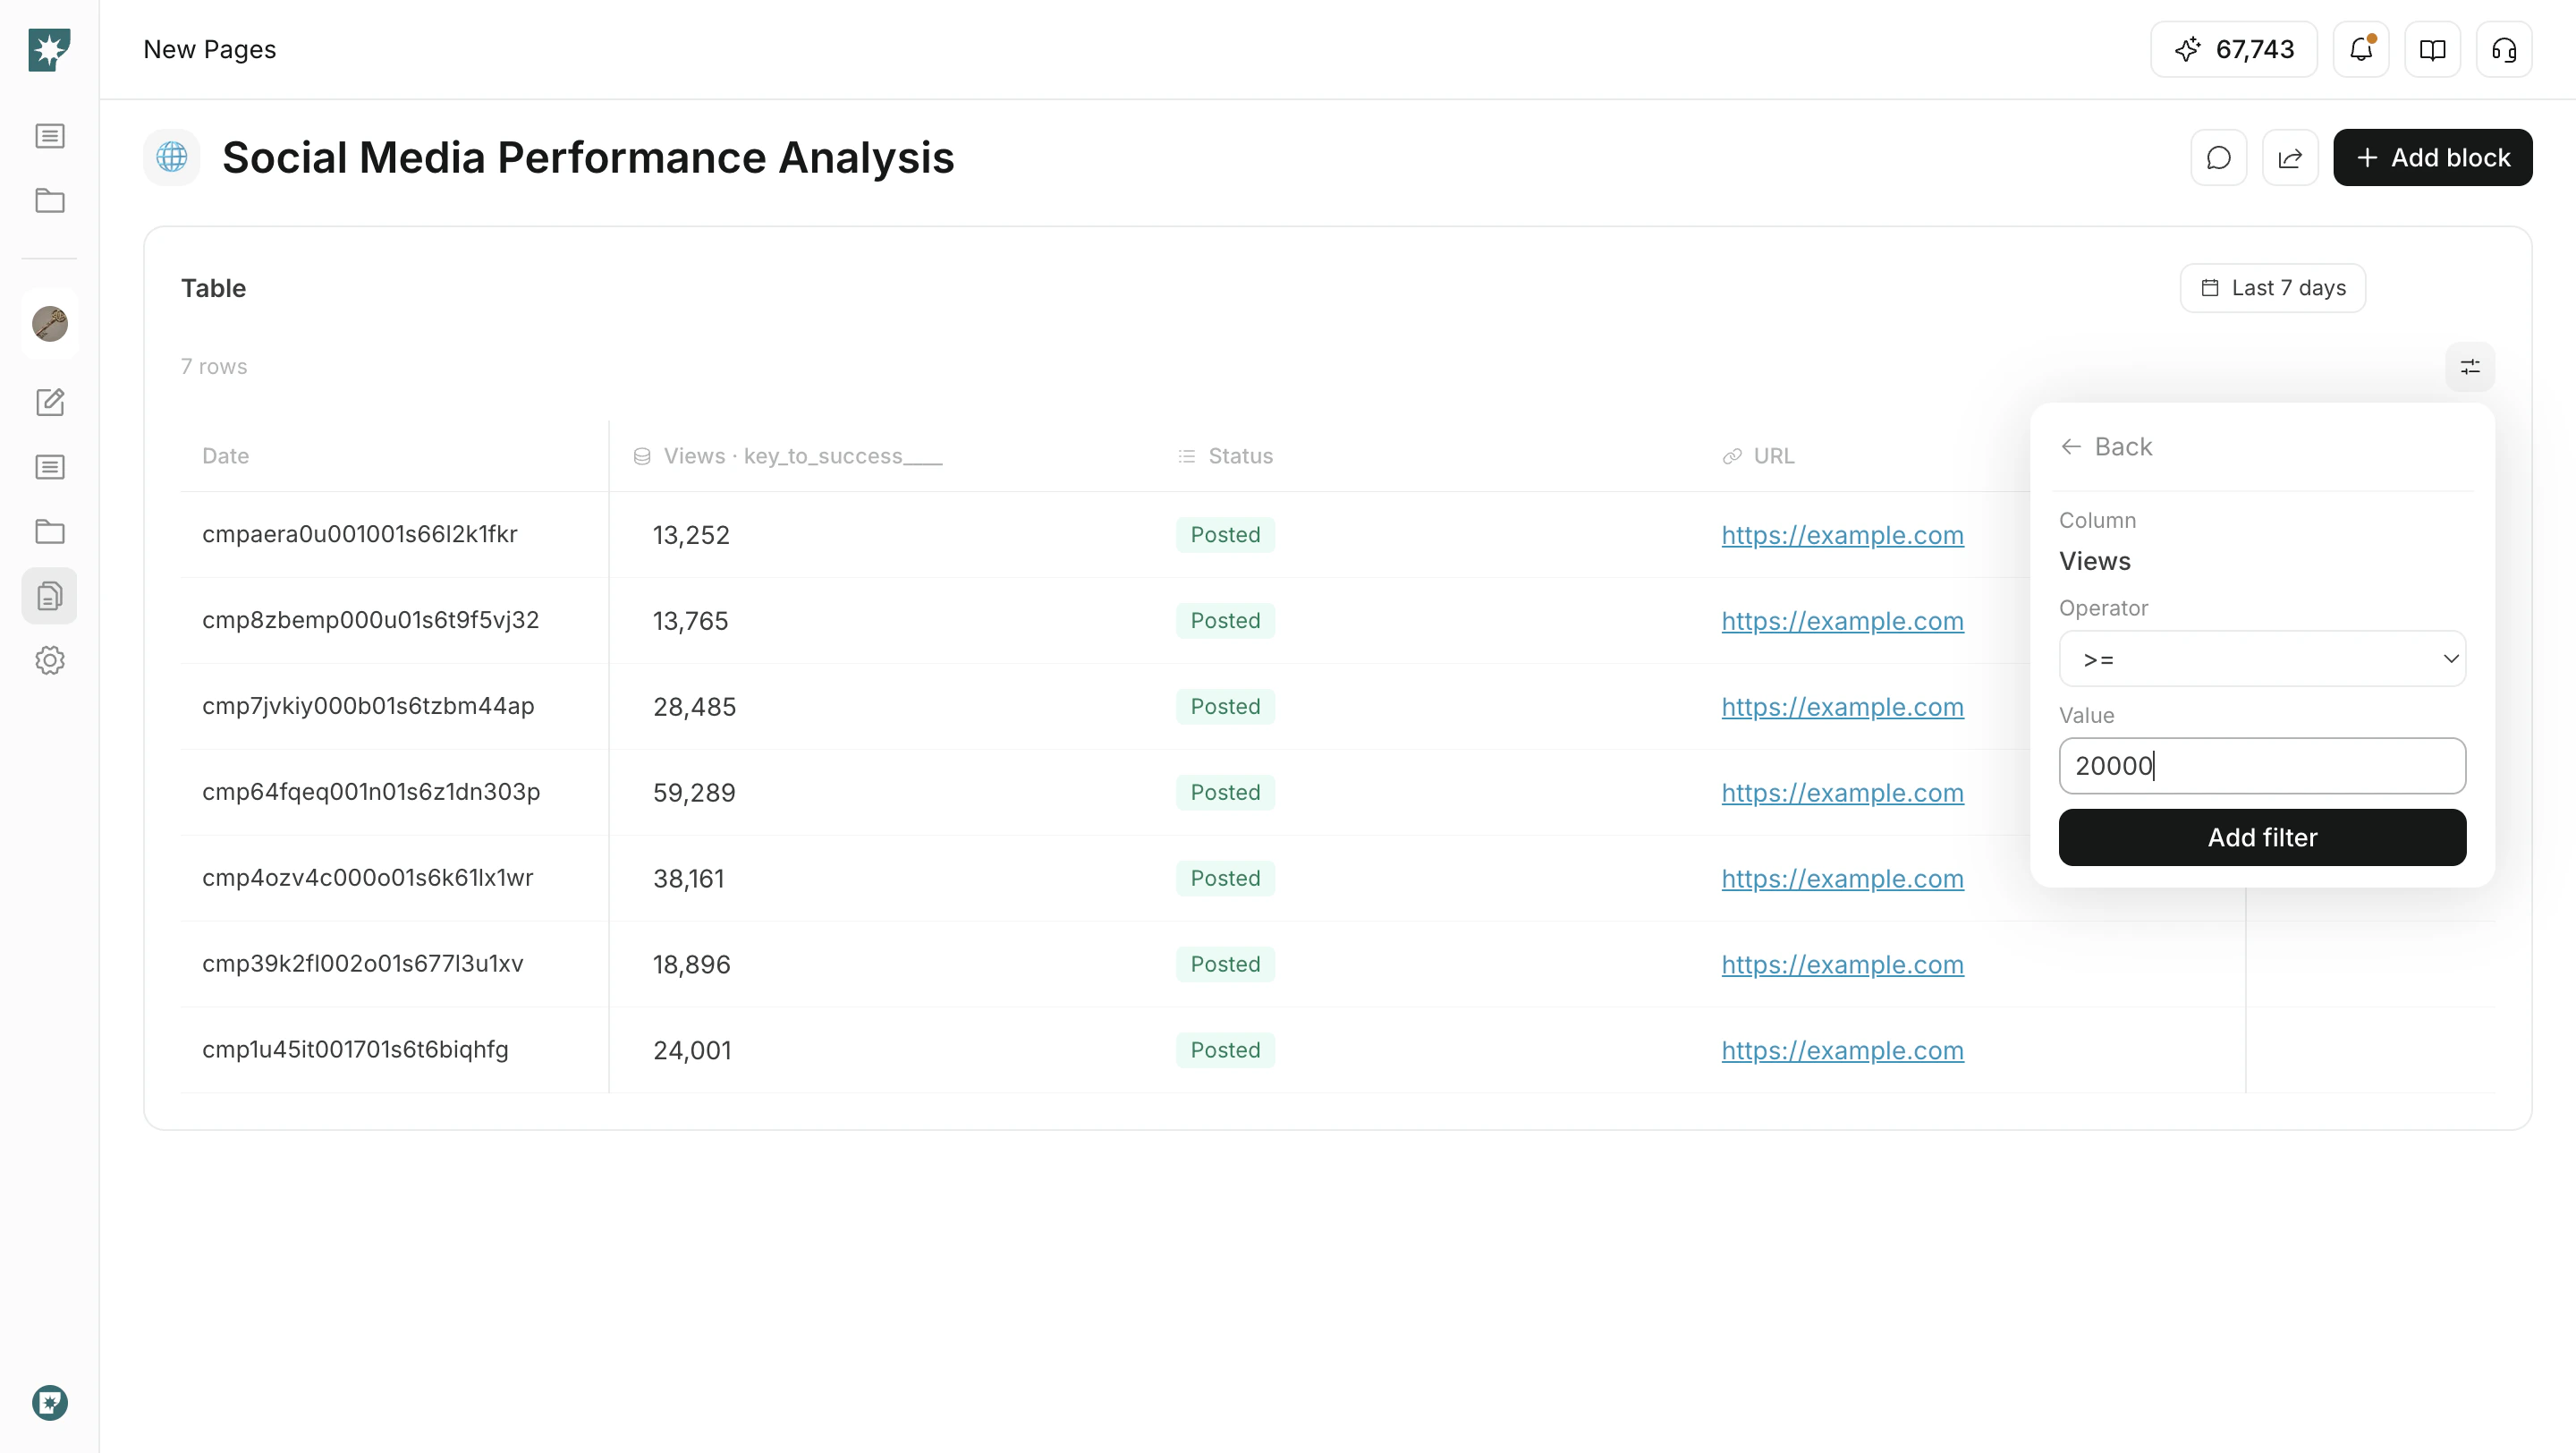
When a table has many rows, use filters and sorting to focus what you review.
* `Filter`: Specify a column, condition, and value to show matching rows.
* `Sort`: Sort numeric or date columns in ascending or descending order.
* `Pagination`: Review large tables page by page.
## Filter and sort
When a table has many rows, use filters and sorting to focus what you review.
* `Filter`: Specify a column, condition, and value to show matching rows.
* `Sort`: Sort numeric or date columns in ascending or descending order.
* `Pagination`: Review large tables page by page.
 ## Related pages
* [Pages basics](/help-center/pages/pages-basics)
* [Create and edit pages](/help-center/pages/create-and-edit-pages)
* [Block types](/help-center/pages/block-types)
## Related pages
* [Pages basics](/help-center/pages/pages-basics)
* [Create and edit pages](/help-center/pages/create-and-edit-pages)
* [Block types](/help-center/pages/block-types)