> ## Documentation Index
> Fetch the complete documentation index at: https://docs.noimosai.com/llms.txt
> Use this file to discover all available pages before exploring further.
# Table block
> Page पर custom table बनाने और properties, statuses व linked data प्रबंधित करने का तरीका बताता है।
## सिंहावलोकन
`Table` block page पर table format में जानकारी प्रबंधित करता है। आप custom table शुरुआत से बना सकते हैं या connected accounts के data को `Linked Data` columns के रूप में जोड़ सकते हैं।
## कब उपयोग करें
जब आप इस तरह की जानकारी एक page पर व्यवस्थित करना चाहते हैं, तब इसका उपयोग करें।
* initiatives, tasks और review items प्रबंधित करें
* posts, pages, search queries या अन्य records को row के अनुसार compare करें
* status, owner, dates और URLs को columns में प्रबंधित करें
* connected accounts की metrics को उसी table में देखें
## Table जोड़ें
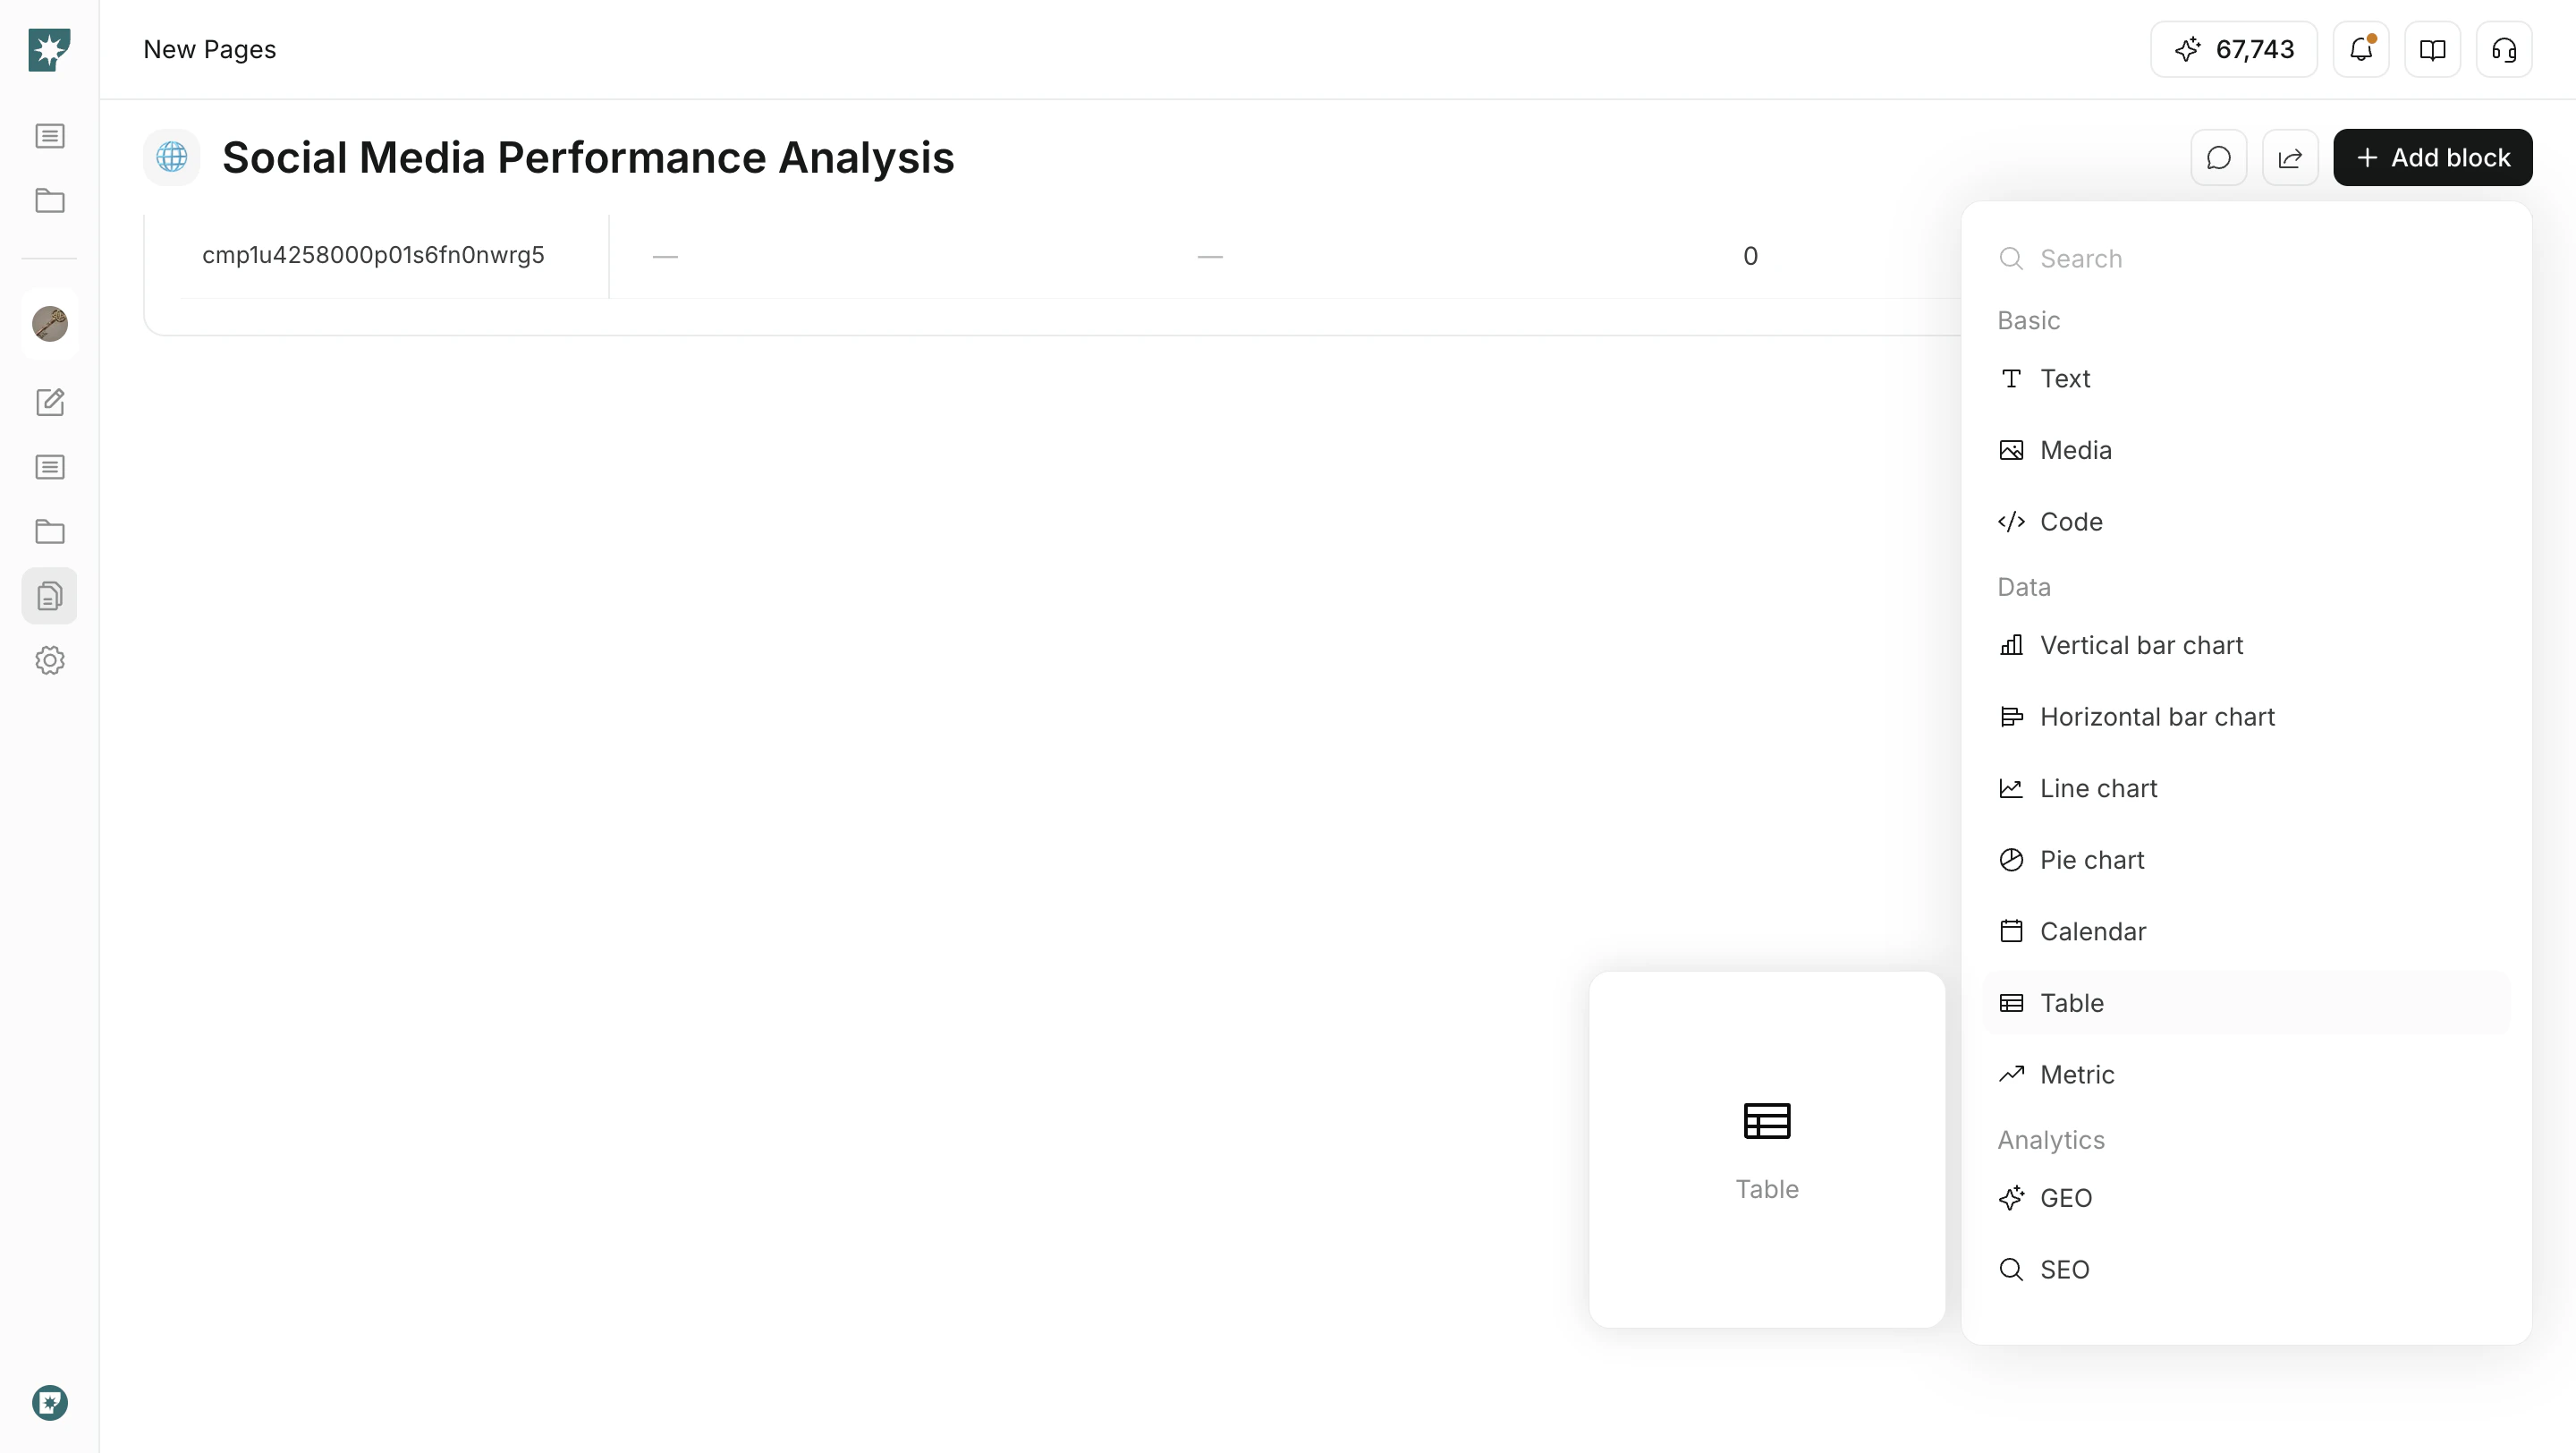
block menu से table insert करें।
1. target page खोलें
2. `Add block` पर क्लिक करें
3. `Data` से `Table` चुनें
4. ज़रूरी rows और properties जोड़ें
 ## Properties जोड़ें
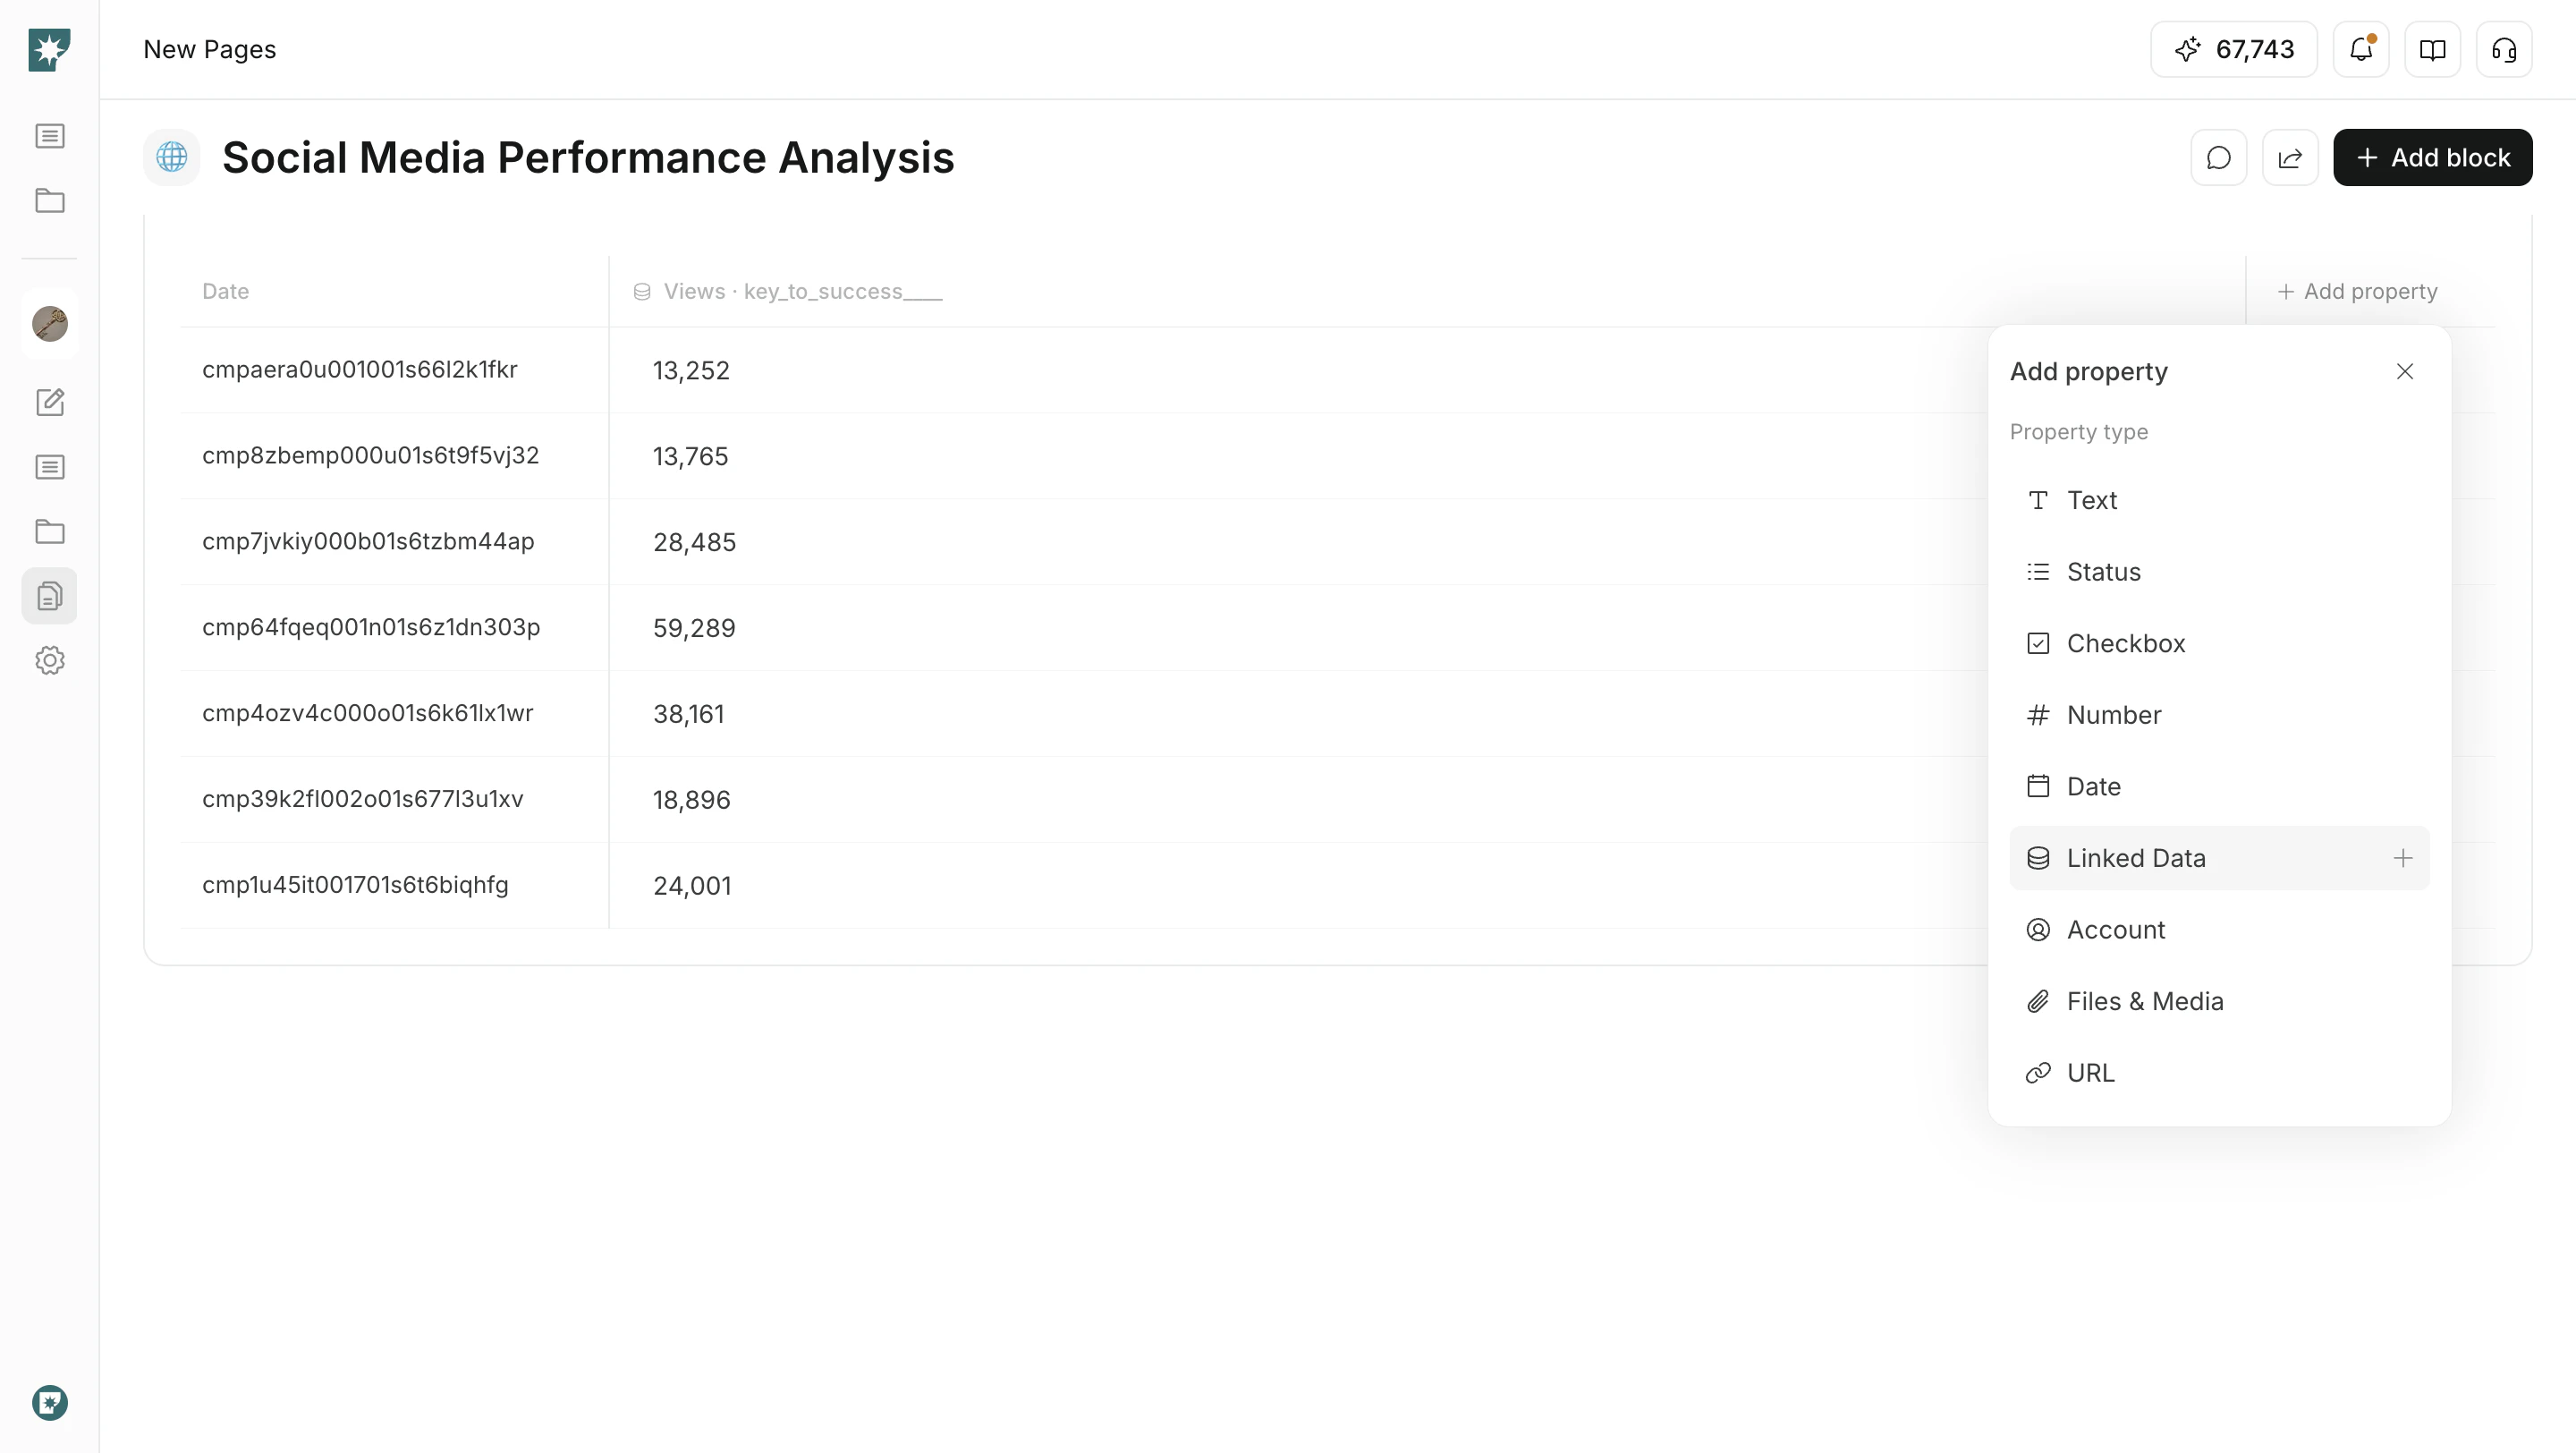
Properties वे information types हैं जो table columns के रूप में उपयोग होते हैं।
| Property | उपयोग |
| --------------- | ---------------------------------------------------------------- |
| `Text` | नाम, notes, categories और अन्य text दर्ज करें |
| `Status` | selectable options से progress या publishing state प्रबंधित करें |
| `Checkbox` | done/not done जैसे binary states track करें |
| `Number` | counts, amounts, scores और अन्य numeric values दर्ज करें |
| `Date` | deadlines, publish dates और review dates प्रबंधित करें |
| `Linked Data` | connected accounts की metrics दिखाएं |
| `Account` | संबंधित connected account दिखाएं |
| `Files & Media` | images या documents अटैच करें |
| `URL` | reference links या public URLs दर्ज करें |
## Properties जोड़ें
Properties वे information types हैं जो table columns के रूप में उपयोग होते हैं।
| Property | उपयोग |
| --------------- | ---------------------------------------------------------------- |
| `Text` | नाम, notes, categories और अन्य text दर्ज करें |
| `Status` | selectable options से progress या publishing state प्रबंधित करें |
| `Checkbox` | done/not done जैसे binary states track करें |
| `Number` | counts, amounts, scores और अन्य numeric values दर्ज करें |
| `Date` | deadlines, publish dates और review dates प्रबंधित करें |
| `Linked Data` | connected accounts की metrics दिखाएं |
| `Account` | संबंधित connected account दिखाएं |
| `Files & Media` | images या documents अटैच करें |
| `URL` | reference links या public URLs दर्ज करें |
 ## Status configure करें
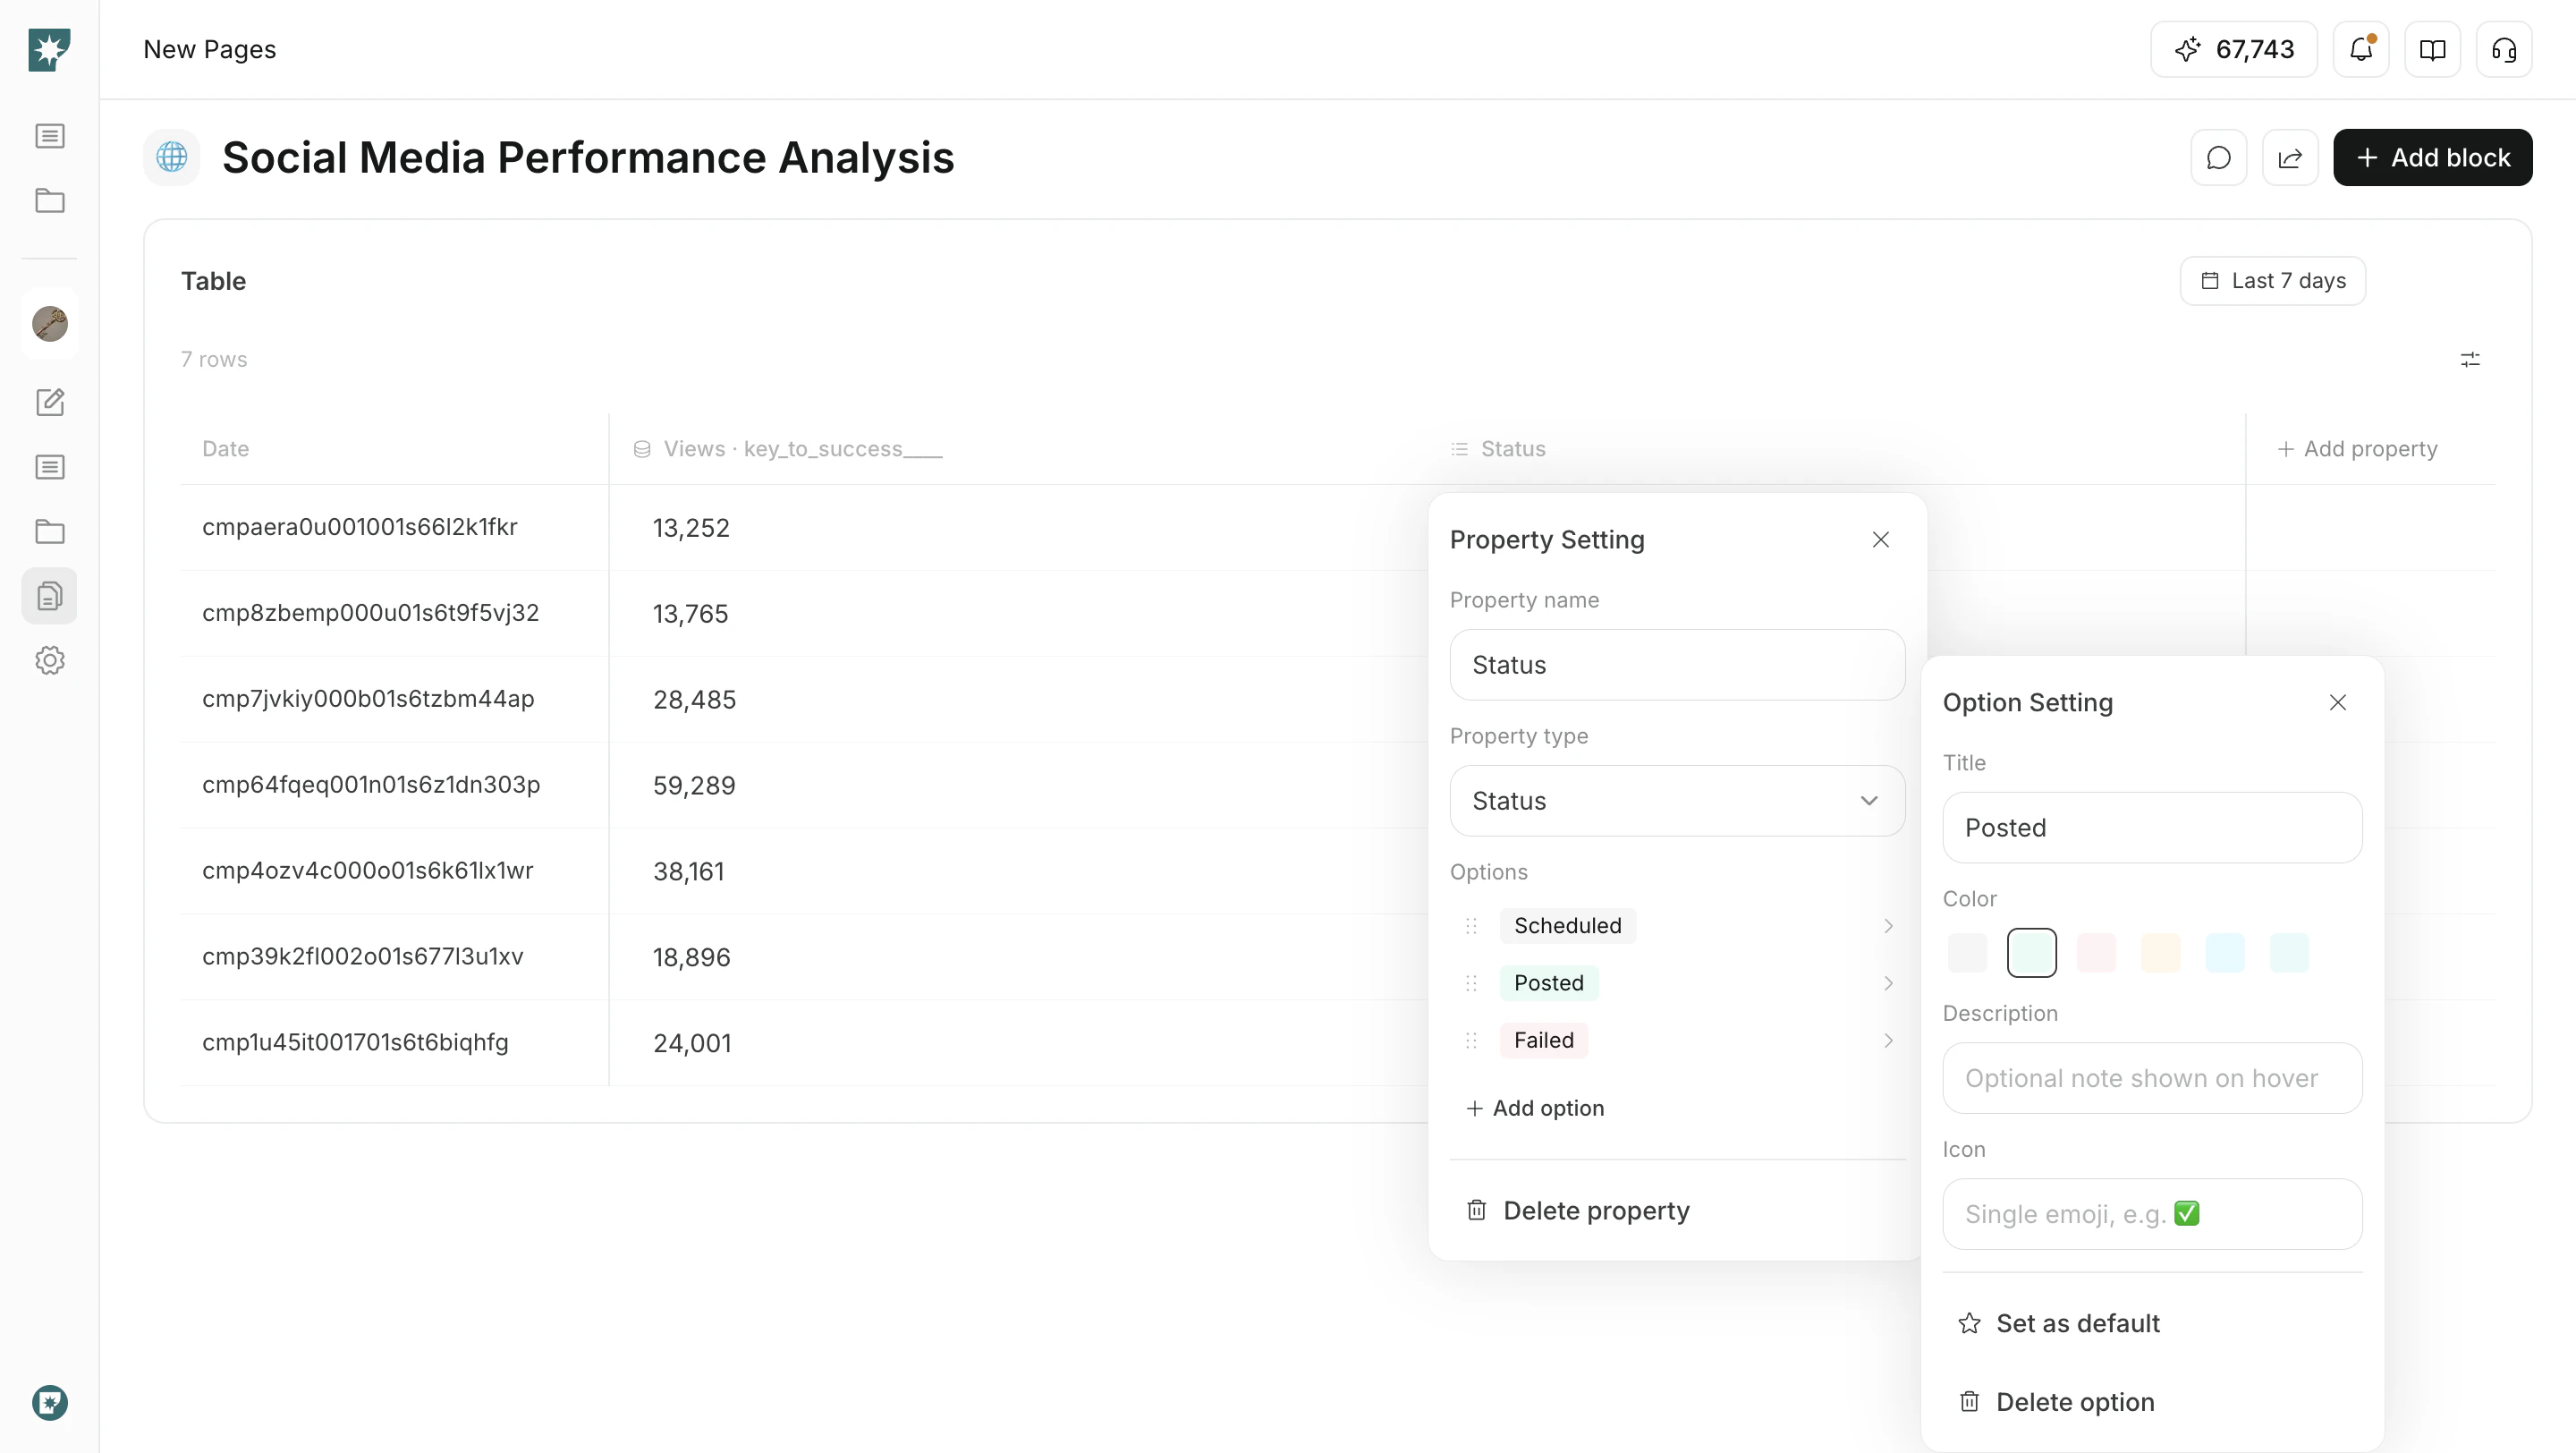
`Status` property में आप options को अपने workflow के अनुसार समायोजित कर सकते हैं।
* options के नाम बदलें
* colors, descriptions और icons सेट करें
* अक्सर उपयोग होने वाले status को default बनाएं
* statuses को reorder करने के लिए drag करें
Status तब उपयोगी है जब team को production progress, publishing state या review state में consistency चाहिए।
## Status configure करें
`Status` property में आप options को अपने workflow के अनुसार समायोजित कर सकते हैं।
* options के नाम बदलें
* colors, descriptions और icons सेट करें
* अक्सर उपयोग होने वाले status को default बनाएं
* statuses को reorder करने के लिए drag करें
Status तब उपयोगी है जब team को production progress, publishing state या review state में consistency चाहिए।
 ## Linked data जोड़ें
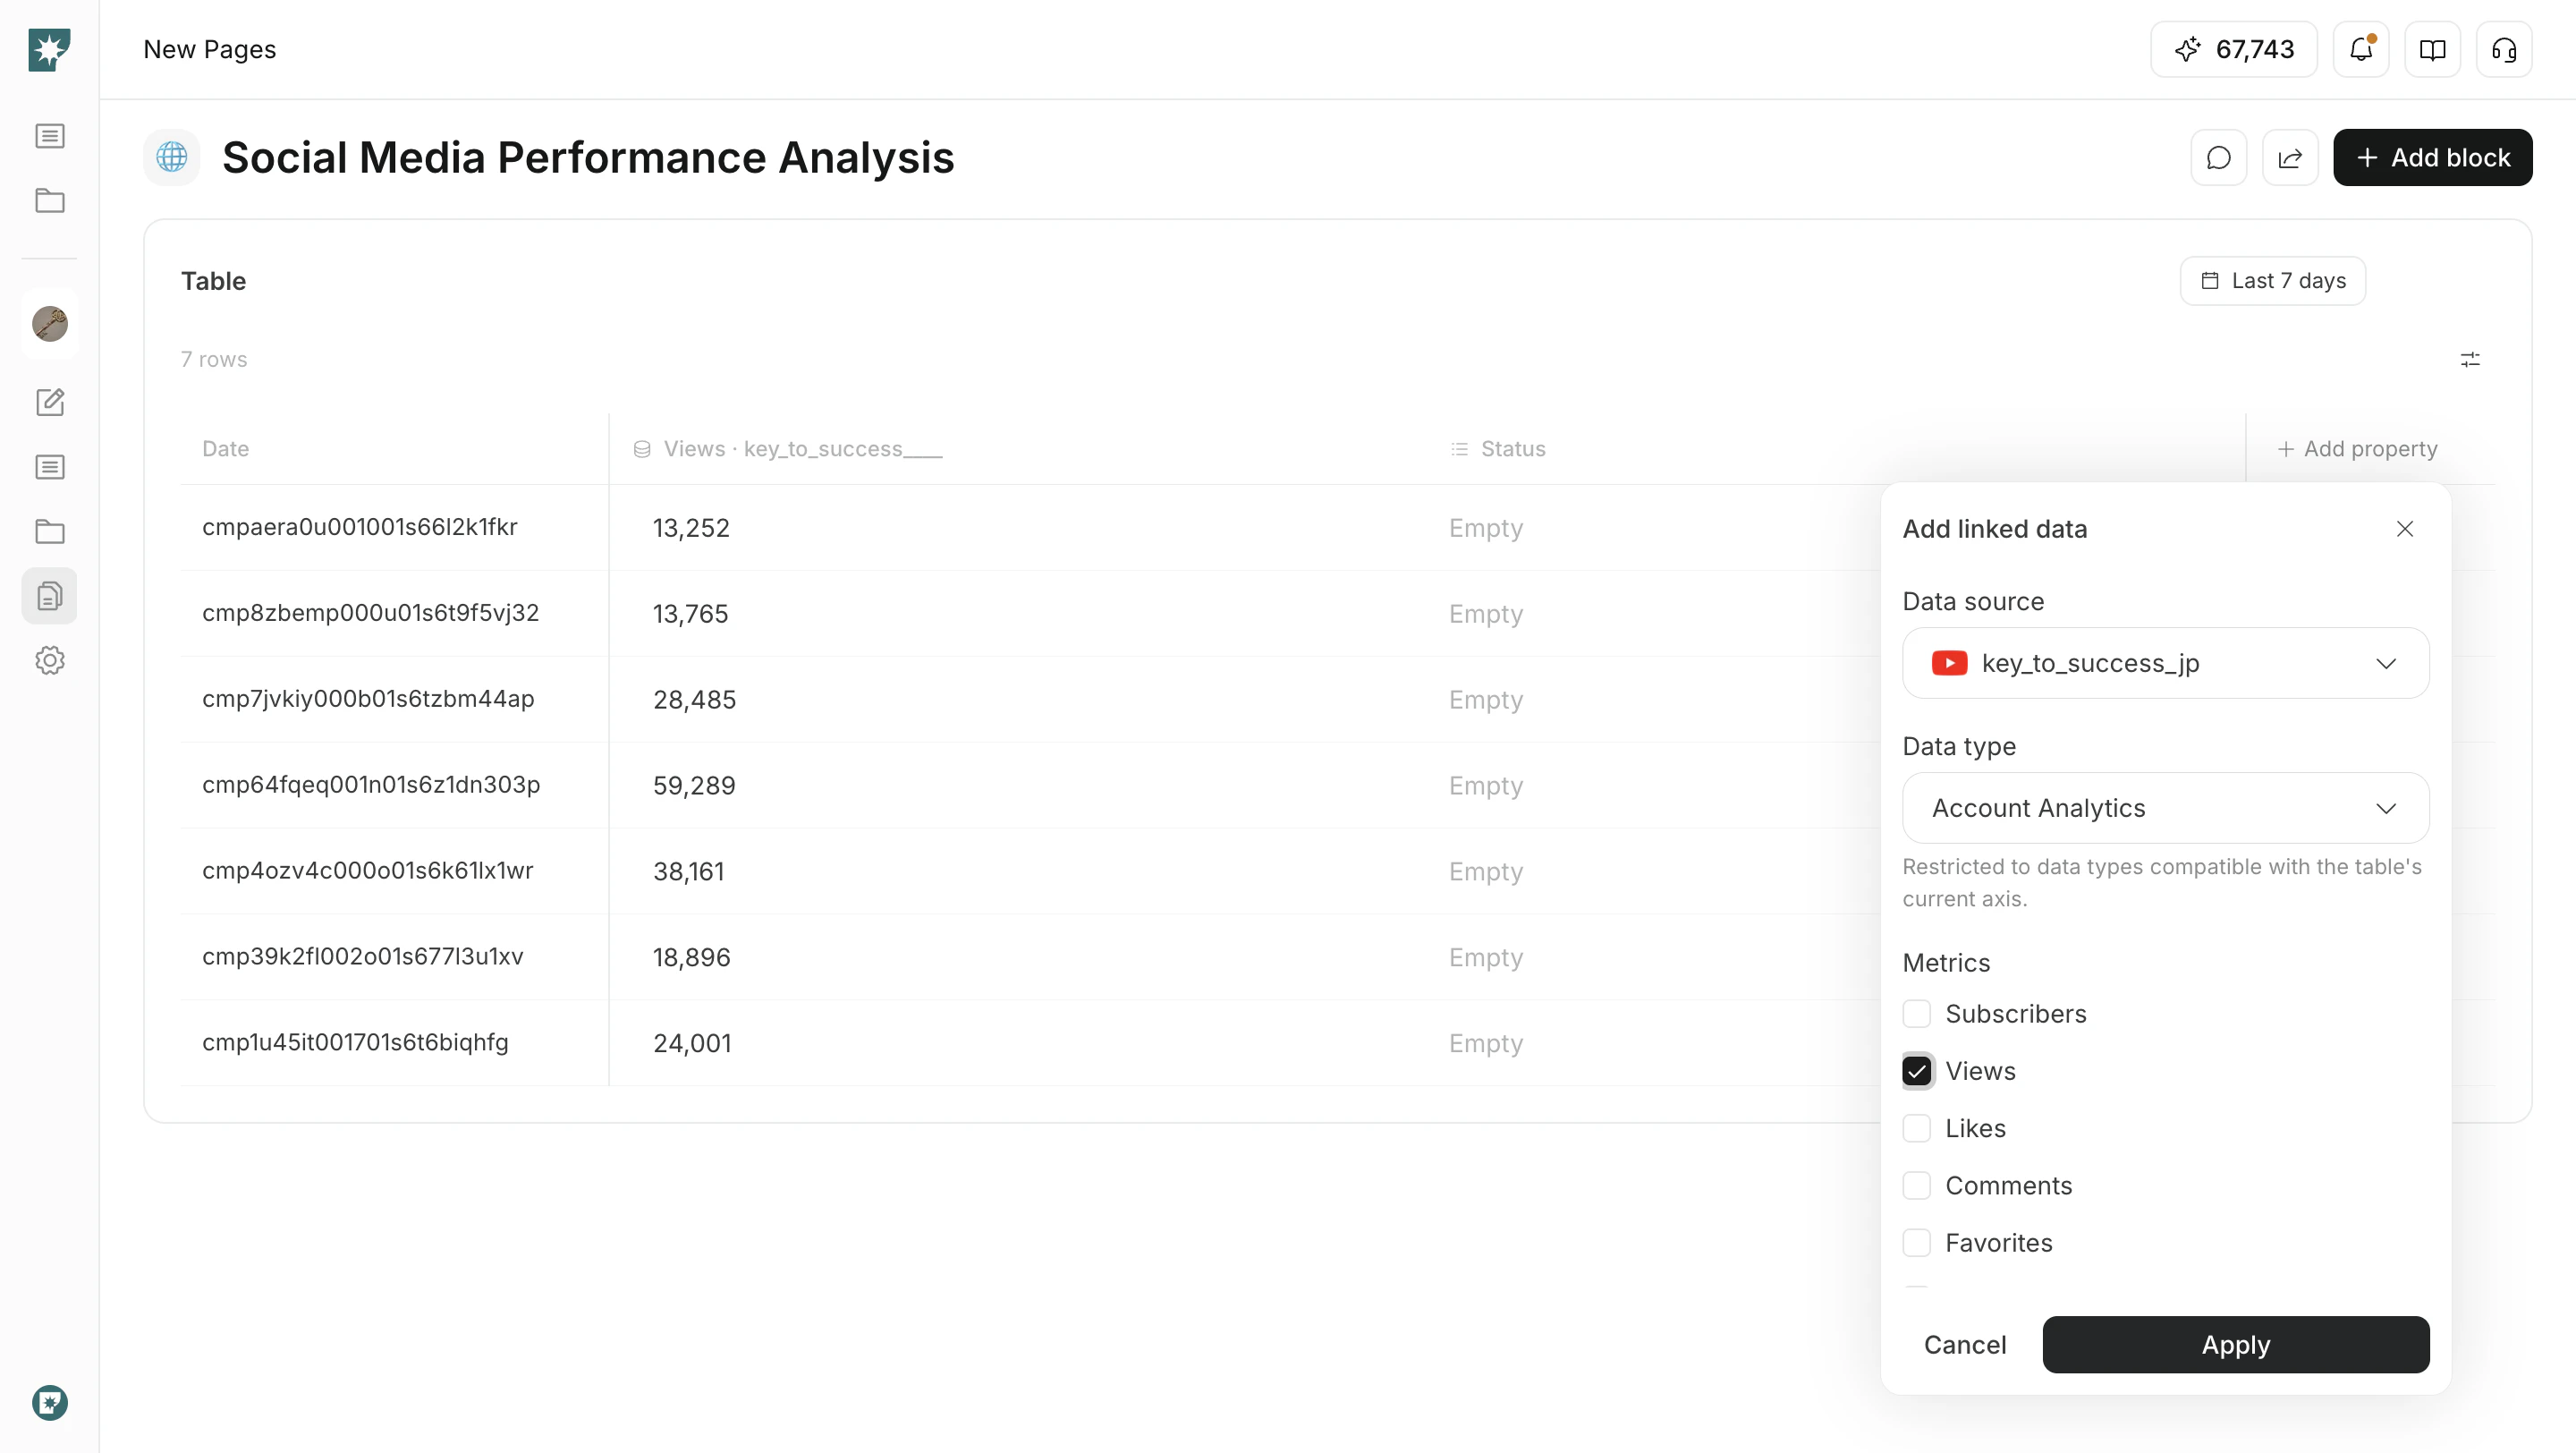
`Linked Data` connected accounts के data को table columns के रूप में दिखाने देता है।
1. `Add property` खोलें
2. `Linked Data` चुनें
3. data source, data type, metrics और period चुनें
4. इसे table में जोड़ने के लिए `Apply` पर क्लिक करें
चुने गए data source के लिए मौजूदा table content फिर से बन सकता है। Apply करने से पहले देखें कि कोई manually entered information बचानी है या नहीं।
## Linked data जोड़ें
`Linked Data` connected accounts के data को table columns के रूप में दिखाने देता है।
1. `Add property` खोलें
2. `Linked Data` चुनें
3. data source, data type, metrics और period चुनें
4. इसे table में जोड़ने के लिए `Apply` पर क्लिक करें
चुने गए data source के लिए मौजूदा table content फिर से बन सकता है। Apply करने से पहले देखें कि कोई manually entered information बचानी है या नहीं।
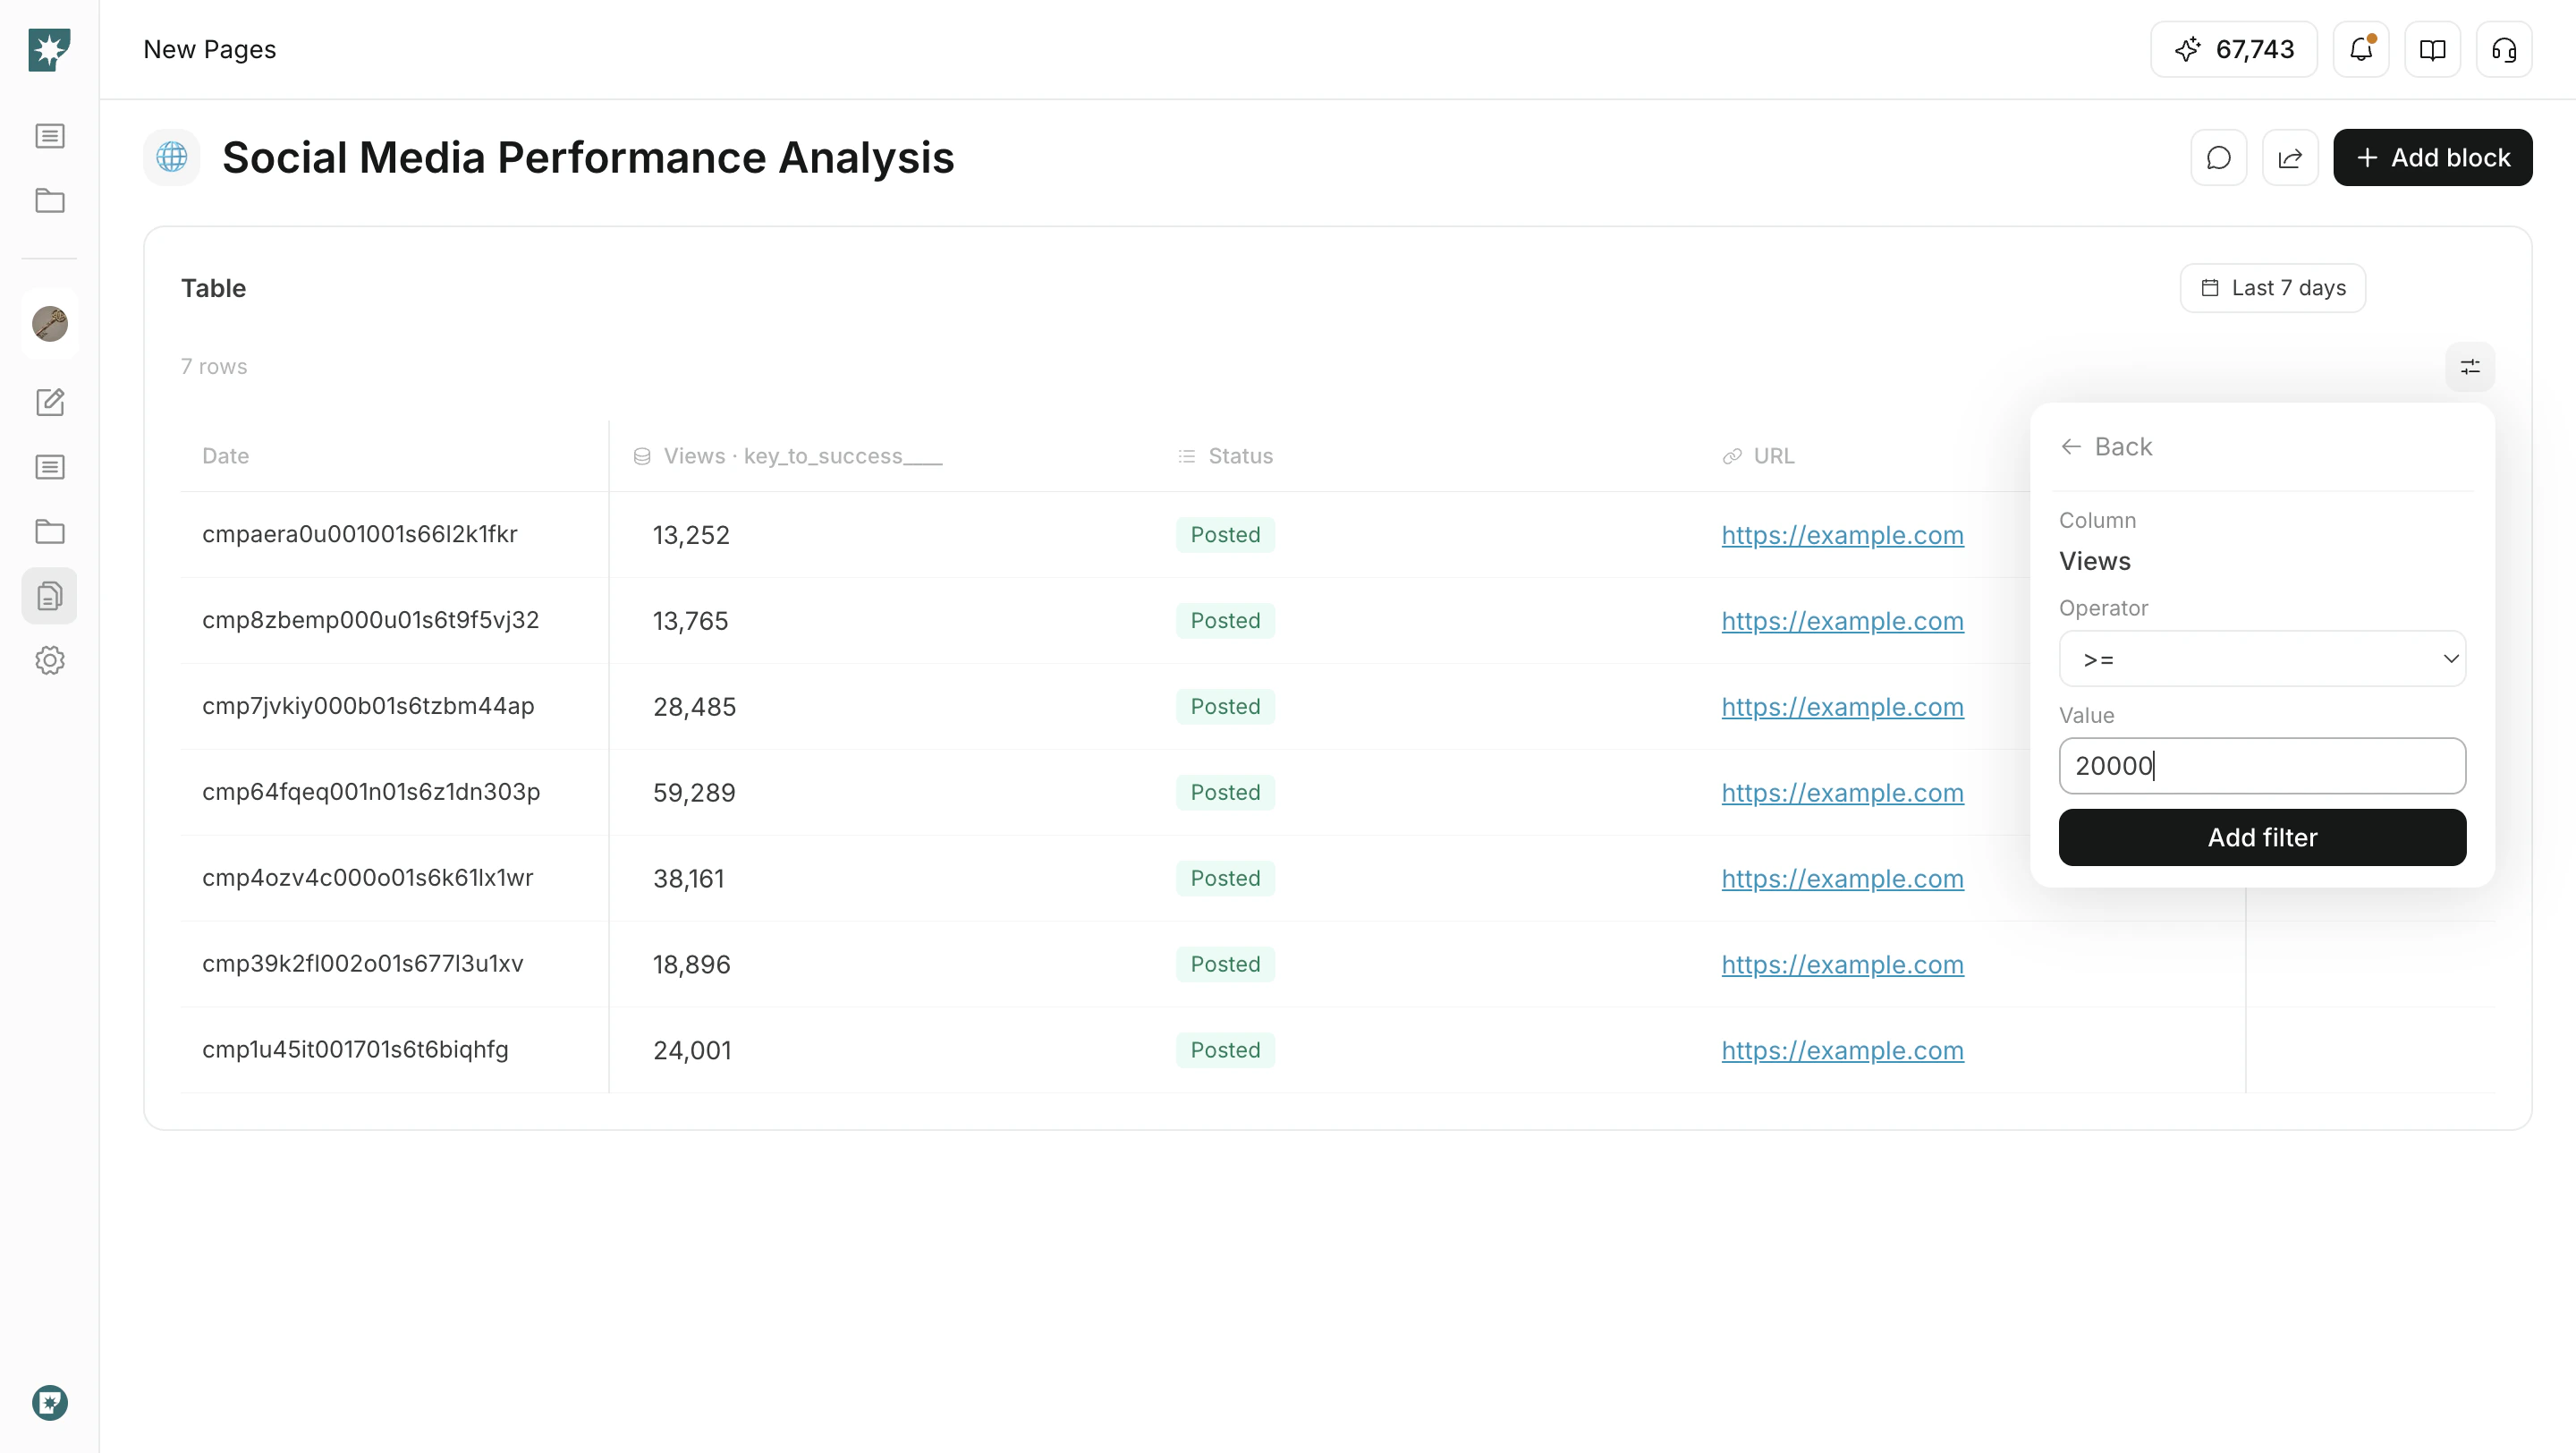
 ## Filter और sort
जब table में कई rows हों, तो review को सीमित करने के लिए filters और sorting का उपयोग करें।
* `Filter`: matching rows दिखाने के लिए column, condition और value specify करें
* `Sort`: number, date या किसी अन्य column से rows को ascending या descending order में रखें
* `Pagination`: बड़ी tables को page by page review करें
## Filter और sort
जब table में कई rows हों, तो review को सीमित करने के लिए filters और sorting का उपयोग करें।
* `Filter`: matching rows दिखाने के लिए column, condition और value specify करें
* `Sort`: number, date या किसी अन्य column से rows को ascending या descending order में रखें
* `Pagination`: बड़ी tables को page by page review करें
 ## संबंधित पेज
* [पेज मूल बातें](/hi/help-center/pages/pages-basics)
* [Pages बनाएं और संपादित करें](/hi/help-center/pages/create-and-edit-pages)
* [ब्लॉक प्रकार](/hi/help-center/pages/block-types)
## संबंधित पेज
* [पेज मूल बातें](/hi/help-center/pages/pages-basics)
* [Pages बनाएं और संपादित करें](/hi/help-center/pages/create-and-edit-pages)
* [ब्लॉक प्रकार](/hi/help-center/pages/block-types)