> ## Documentation Index
> Fetch the complete documentation index at: https://docs.noimosai.com/llms.txt
> Use this file to discover all available pages before exploring further.
# 채팅에서 트리거 만들기
> 성공한 채팅 지시를 AI가 제안한 트리거로 바꾸고 반복 자율 실행을 시작합니다.
## 개요
일회성 채팅 지시가 잘 작동했고 이를 트리거로 반복하고 싶을 때 이 흐름을 사용합니다.
NoimosAI는 채팅 컨텍스트를 읽고 이름, 일정, 지시, 필요한 도구 같은 트리거 설정을 제안합니다.
## 위치
아래 순서로 이 작업을 엽니다.
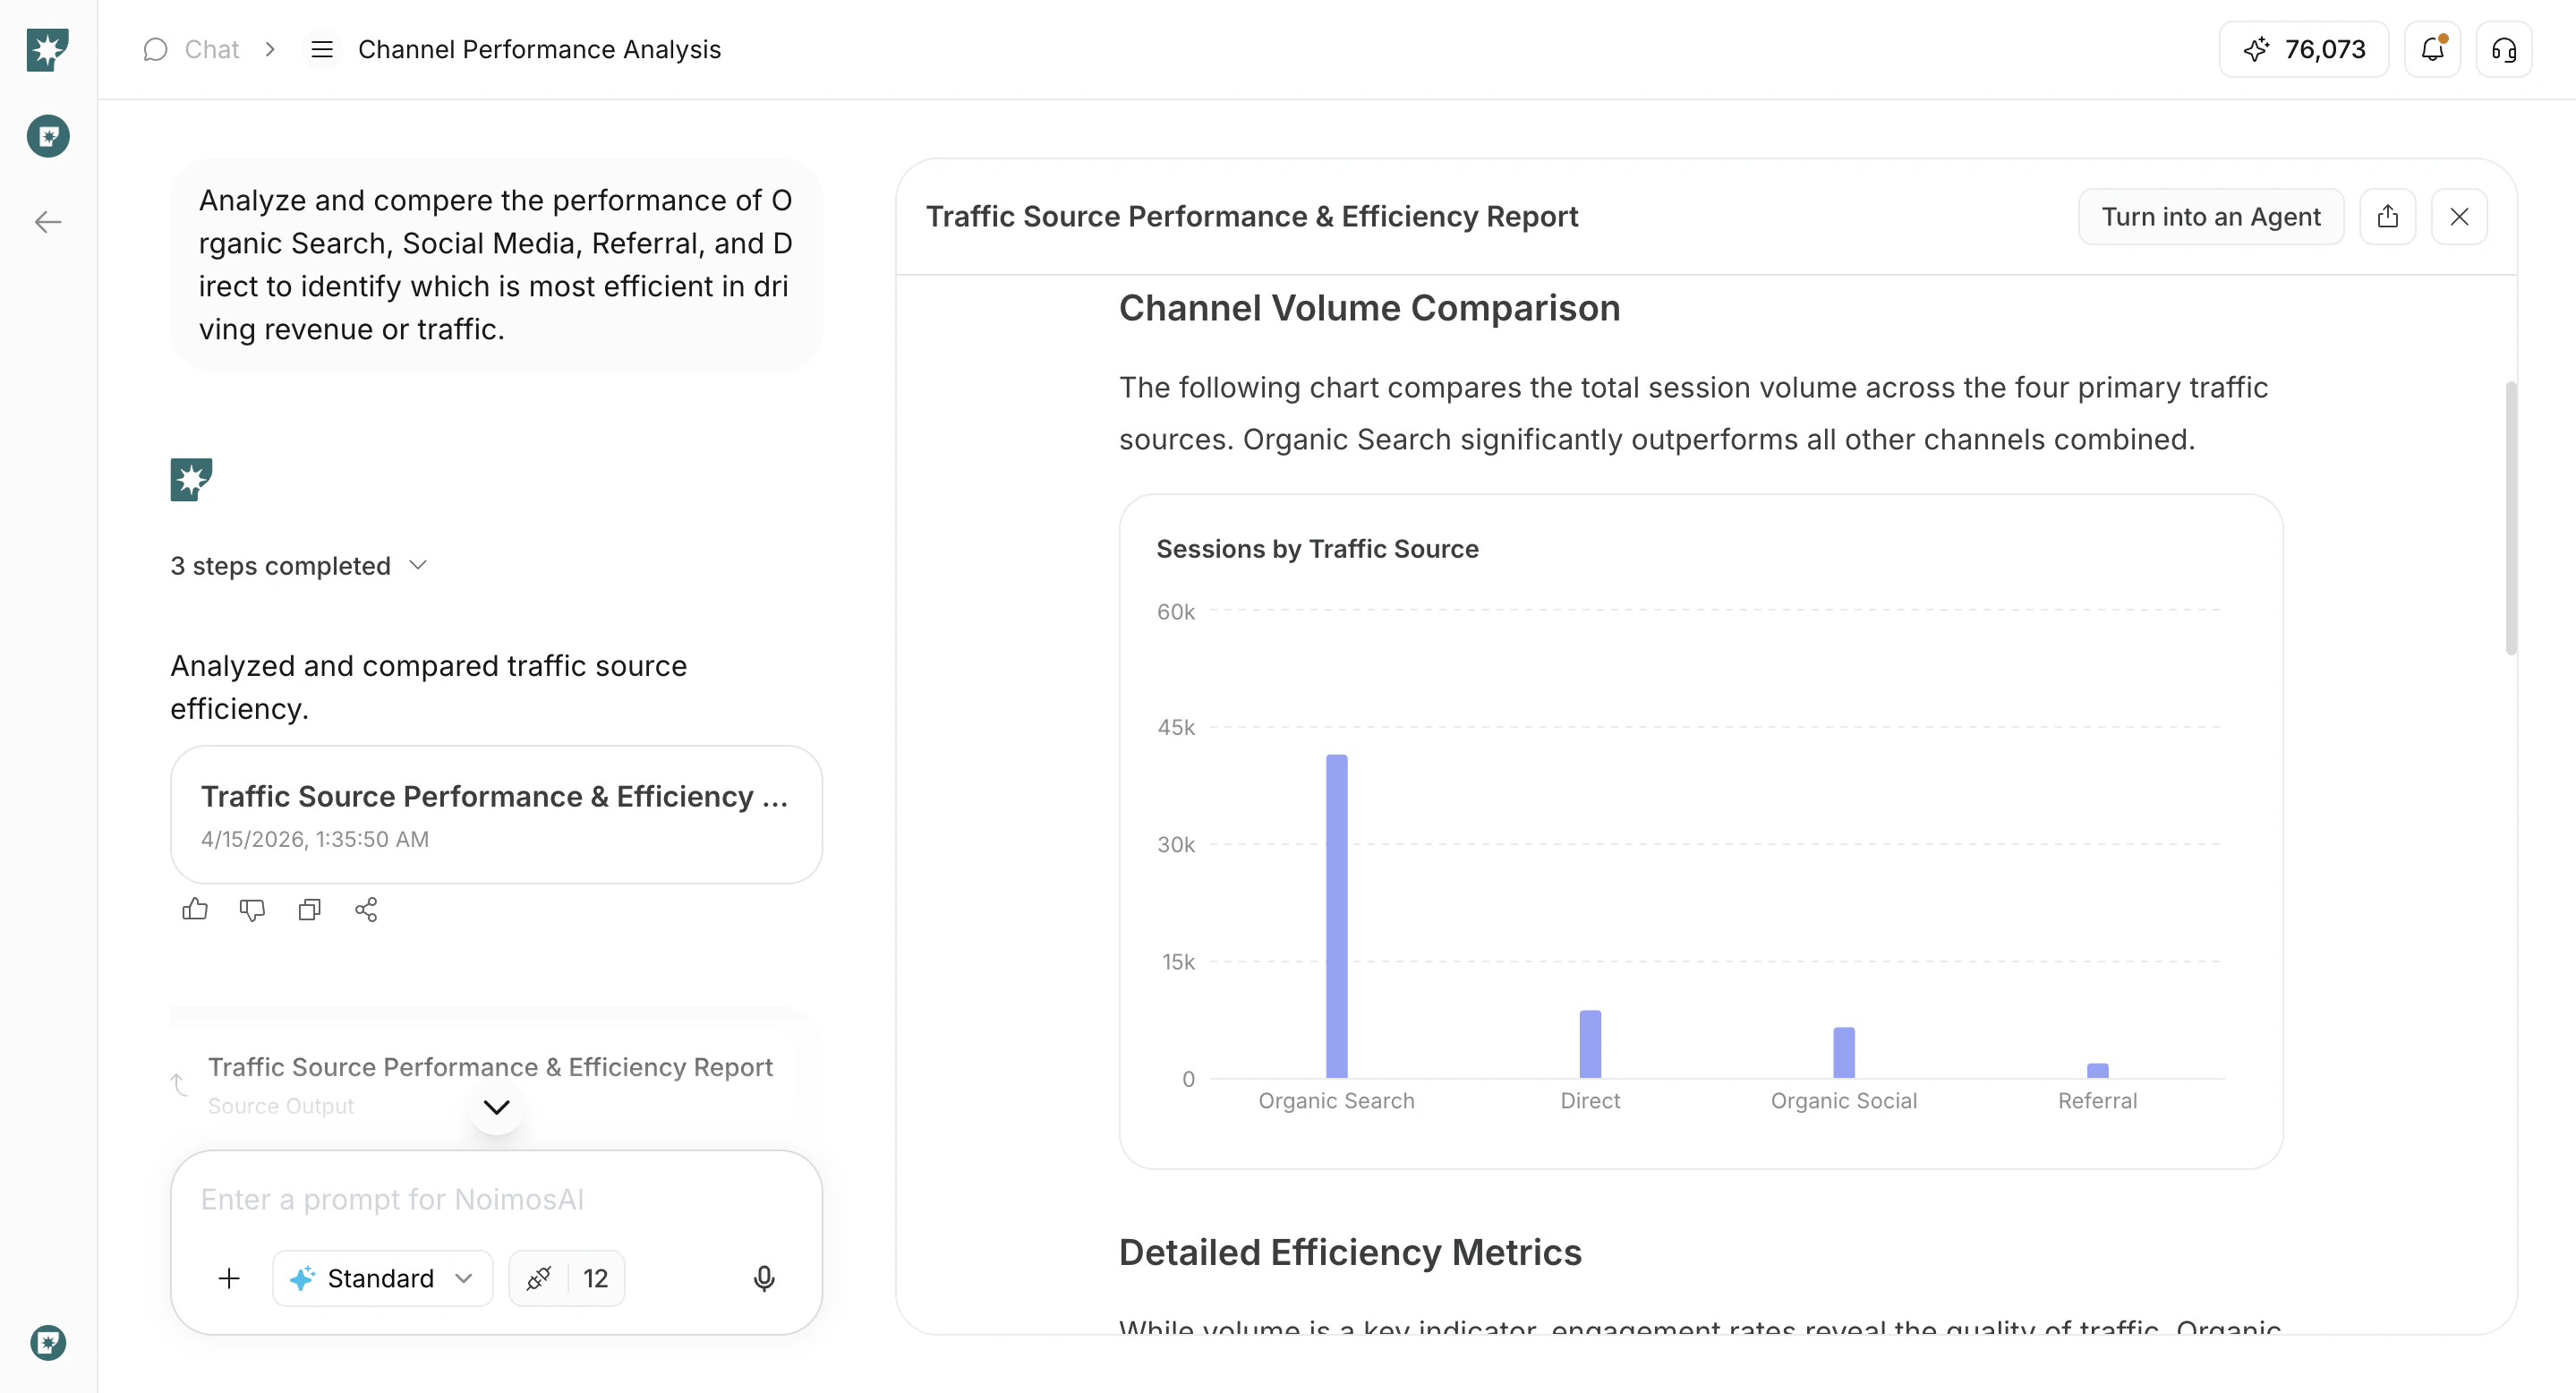
1. 다시 사용하려는 채팅 결과를 엽니다.
2. `에이전트로 전환`을 클릭합니다.
 ## AI가 제안한 설정 검토
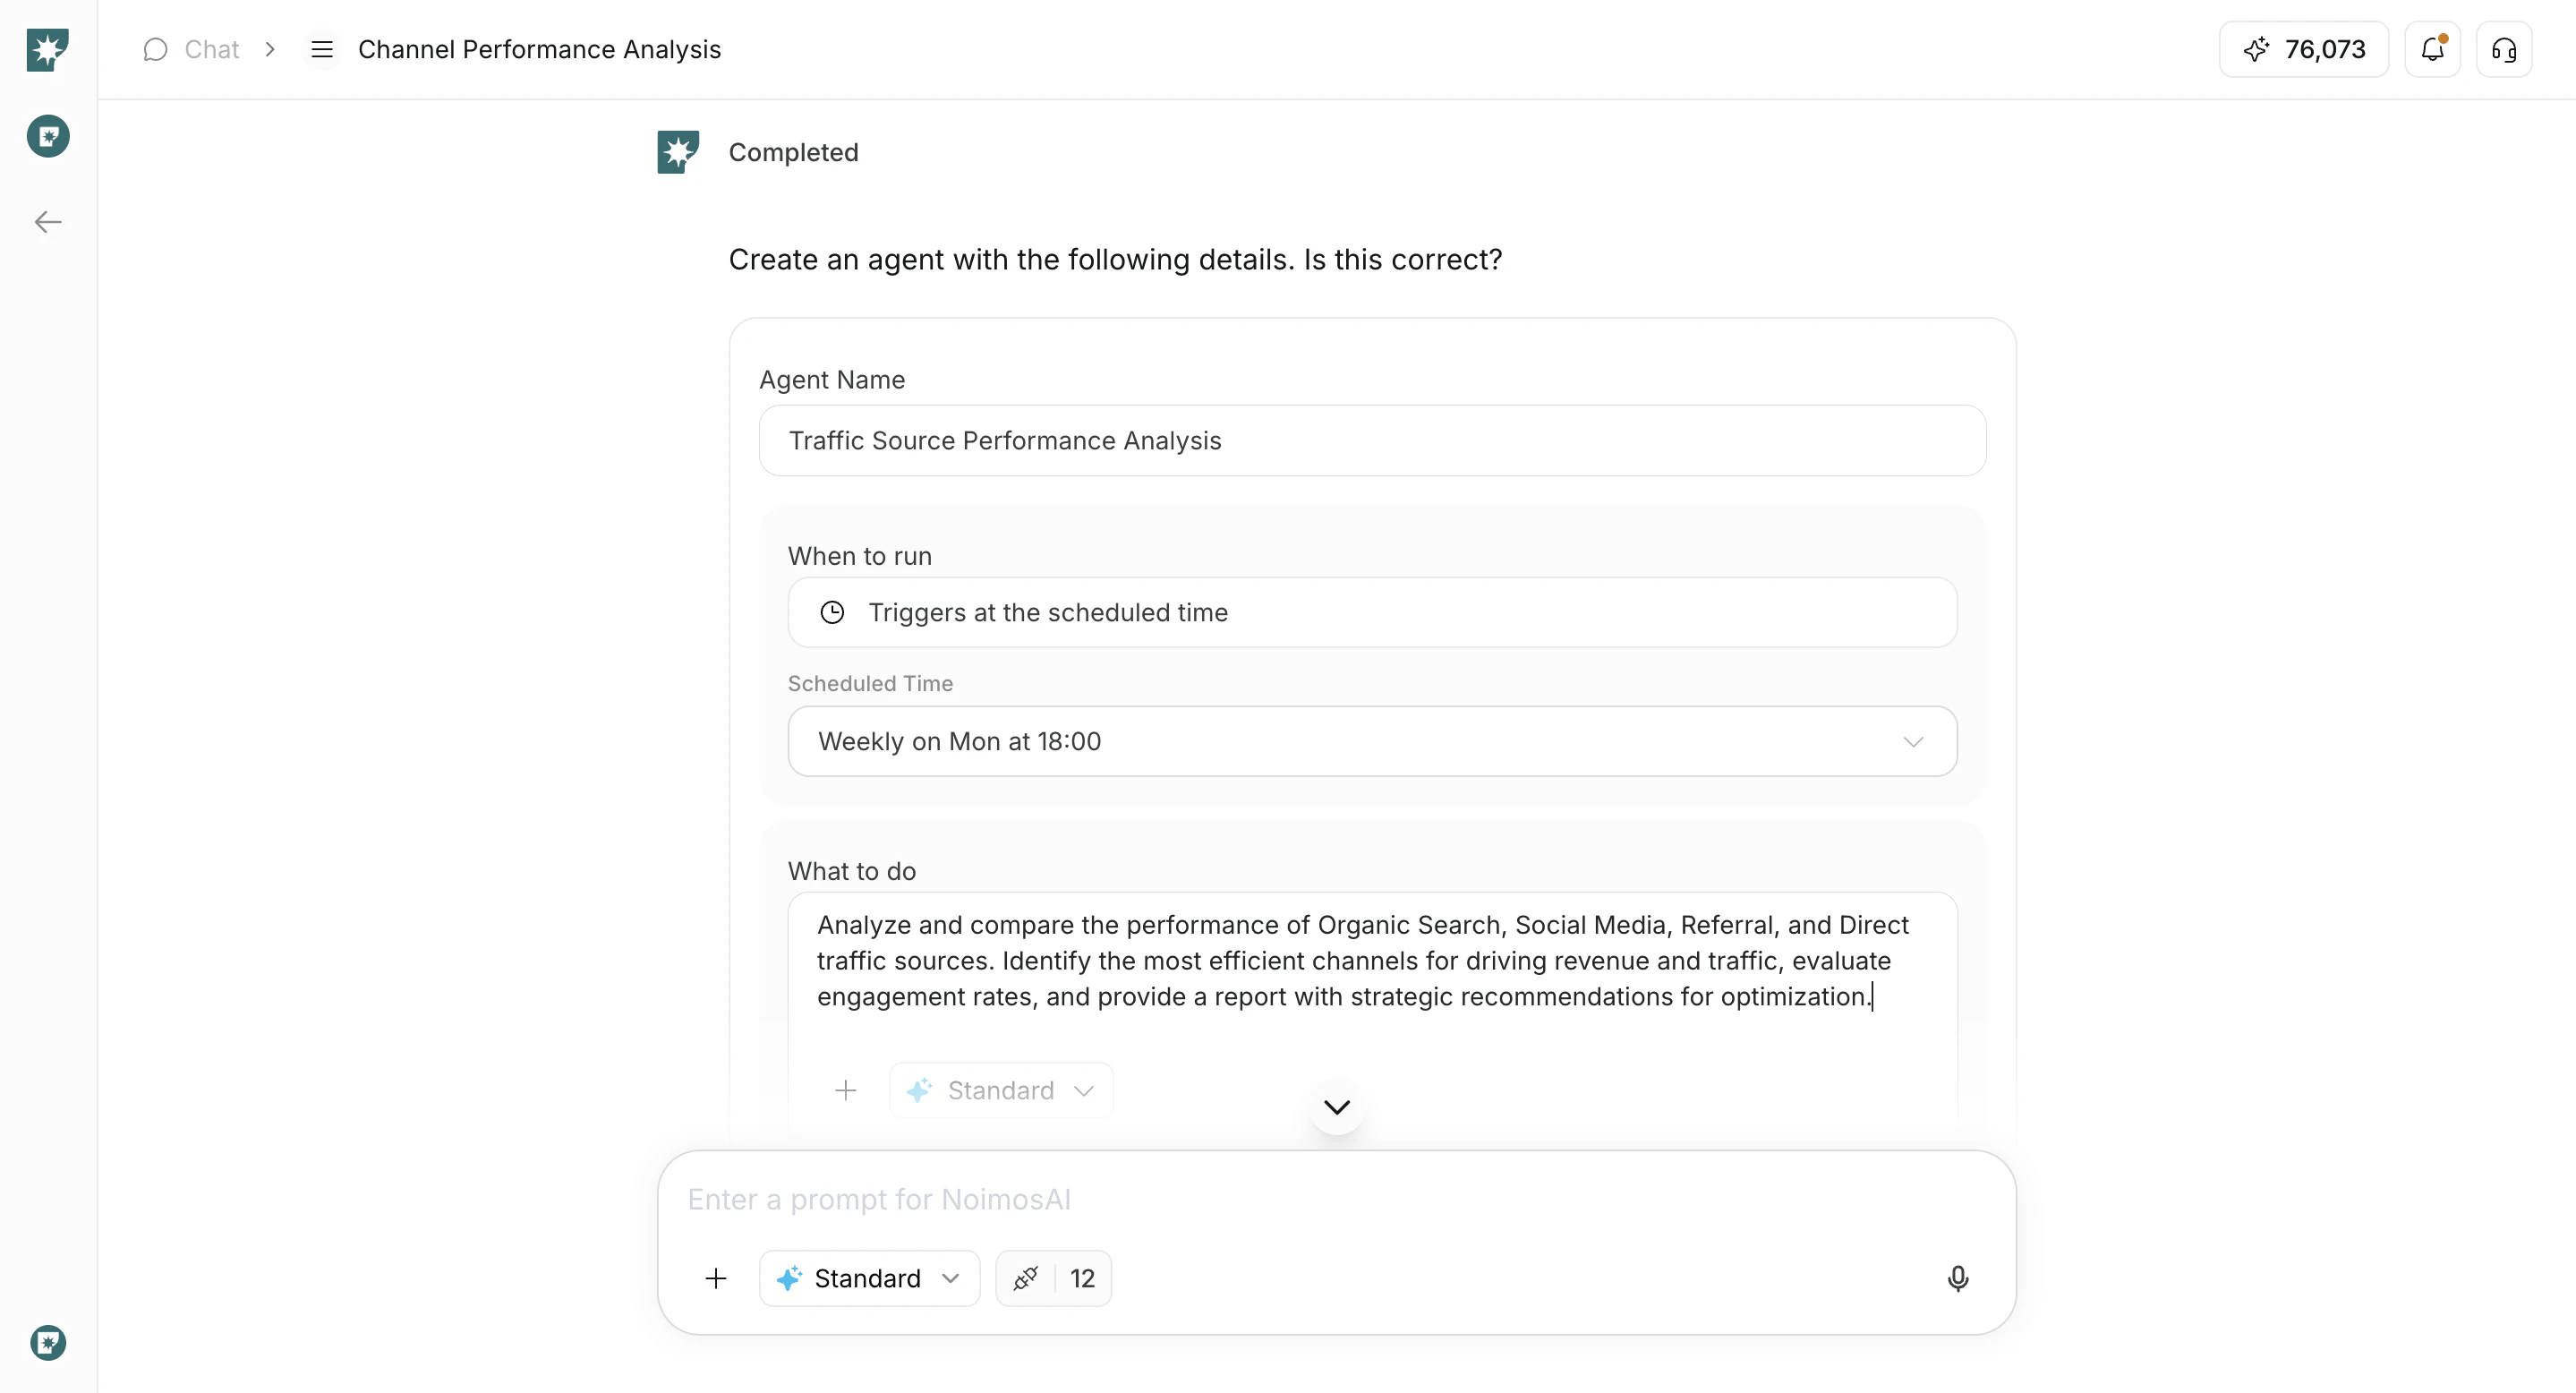
트리거를 만들기 전에 AI가 준비한 내용을 확인합니다.
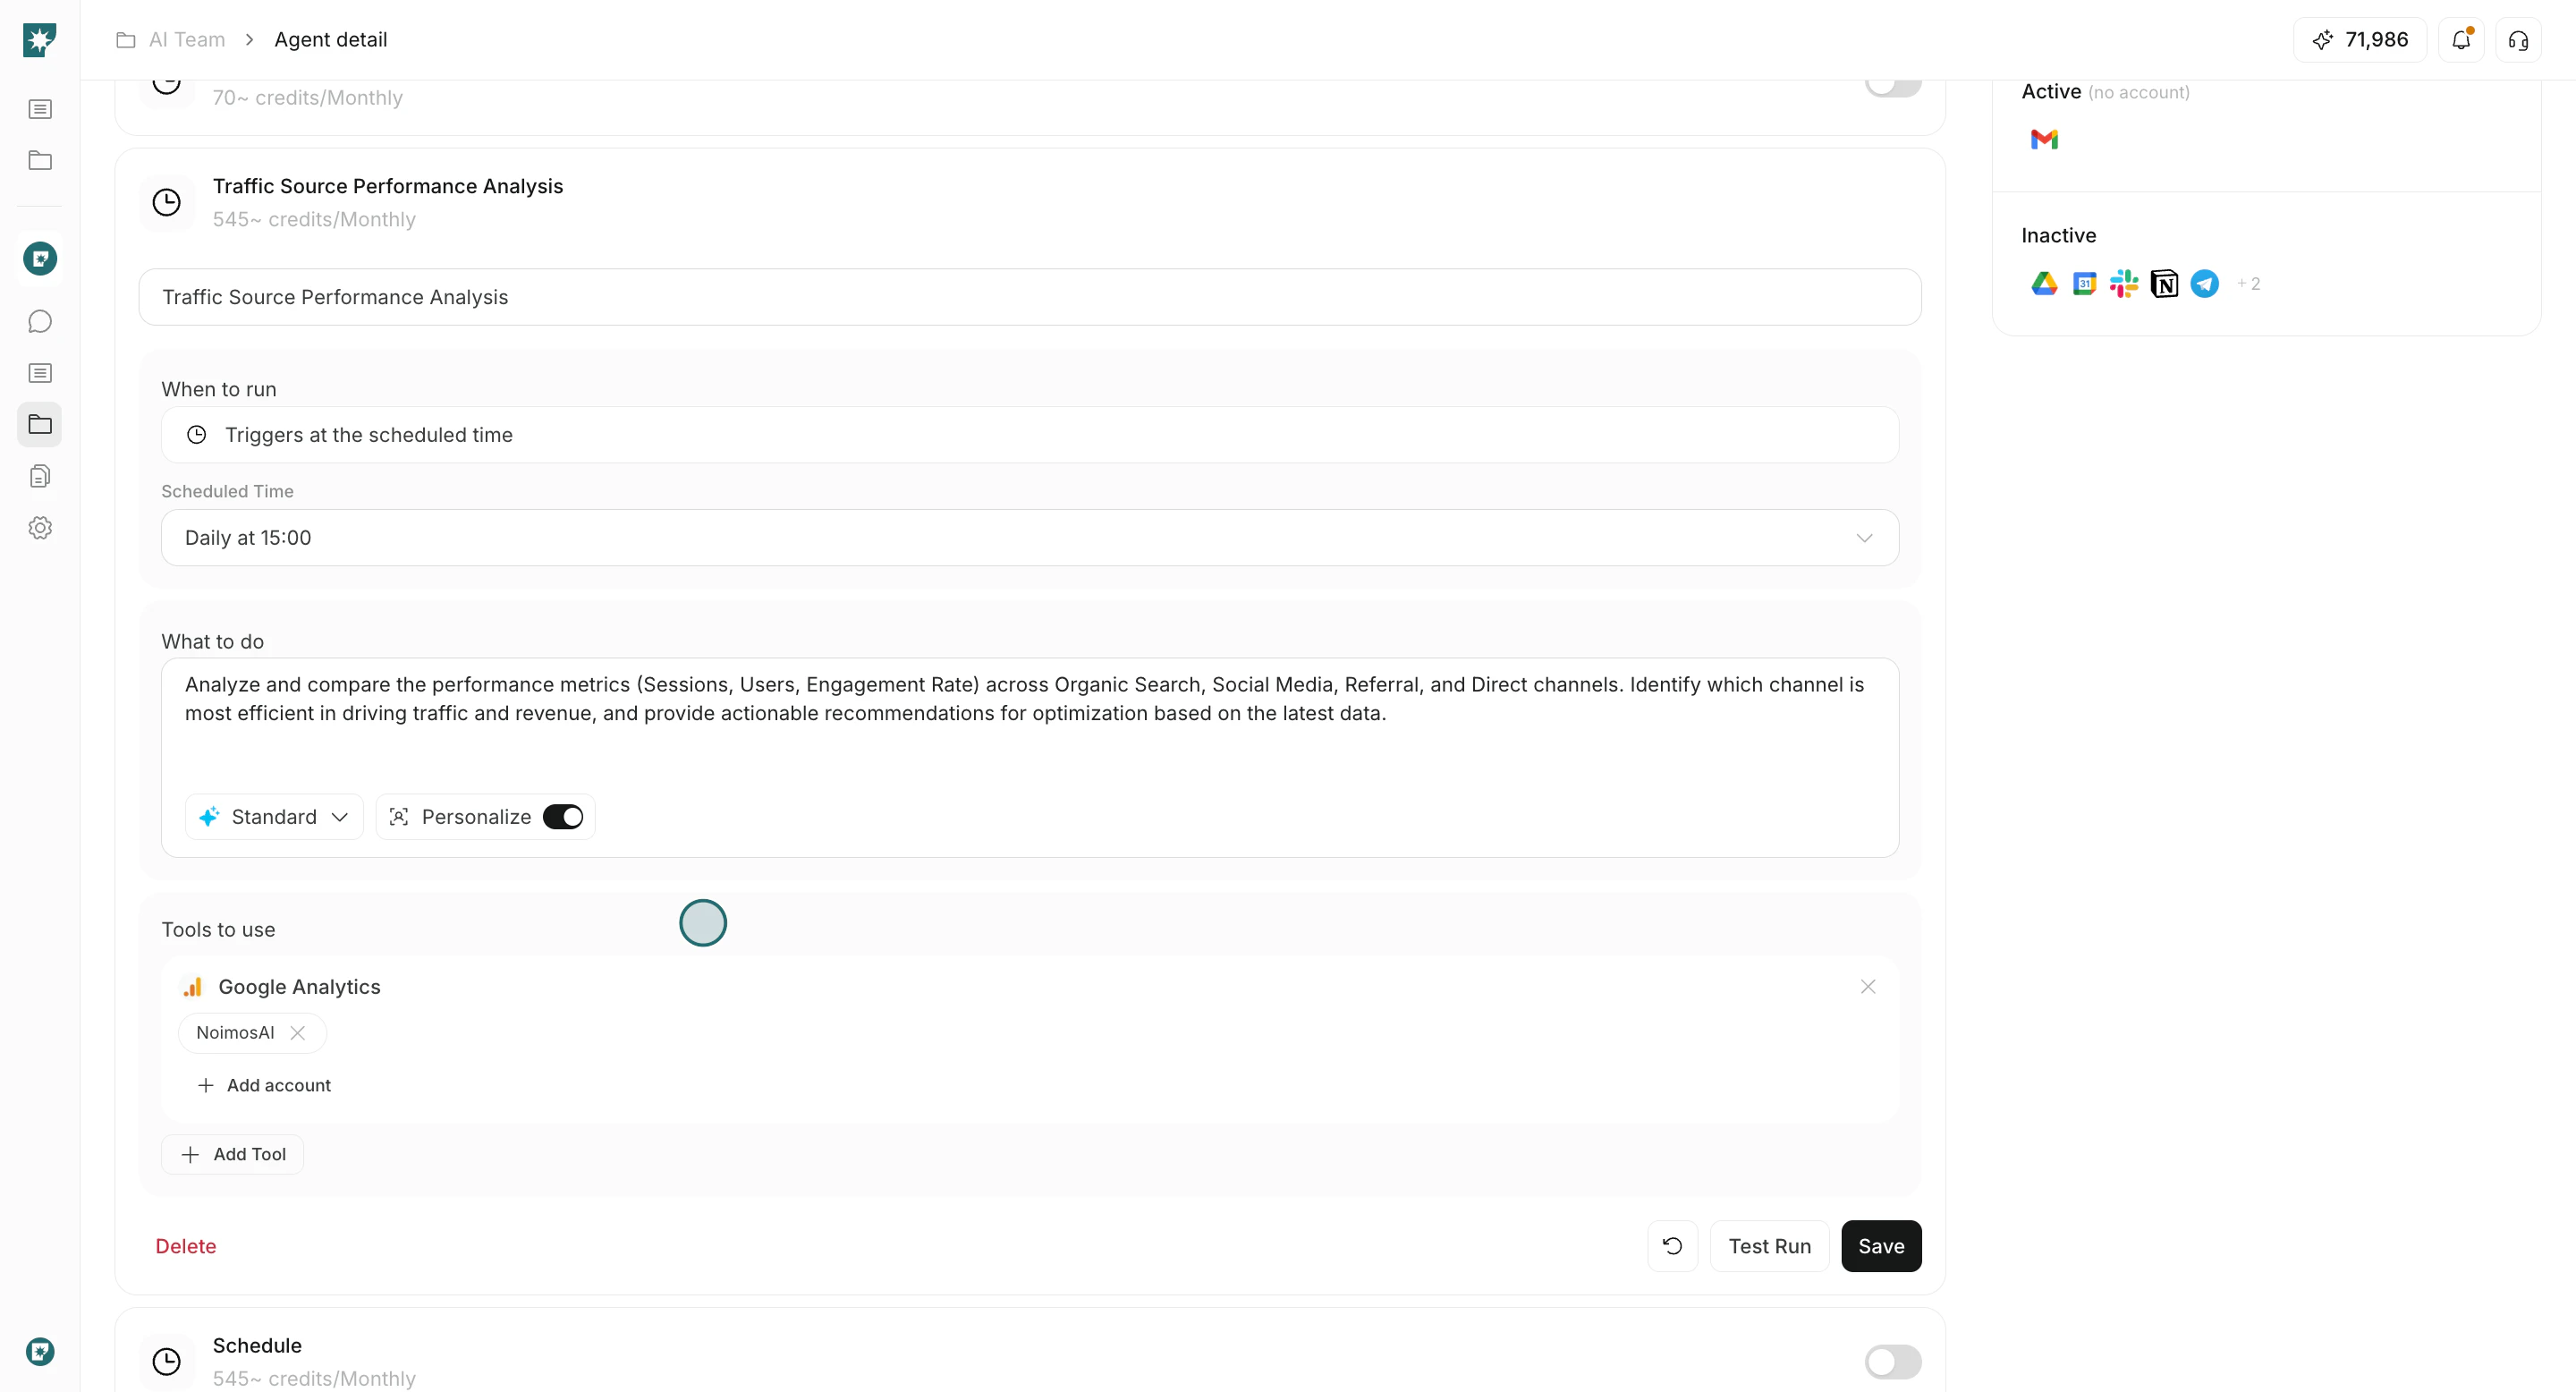
1. 필요한 경우 트리거 이름을 수정합니다.
2. 일정(`실행 시점`)을 확인하고 시간을 조정합니다.
3. 생성된 `수행할 작업` 프롬프트를 검토하고 필요하면 수정합니다.
4. 도구와 계정 연결을 확인합니다.
## AI가 제안한 설정 검토
트리거를 만들기 전에 AI가 준비한 내용을 확인합니다.
1. 필요한 경우 트리거 이름을 수정합니다.
2. 일정(`실행 시점`)을 확인하고 시간을 조정합니다.
3. 생성된 `수행할 작업` 프롬프트를 검토하고 필요하면 수정합니다.
4. 도구와 계정 연결을 확인합니다.
 ## 생성 및 확인
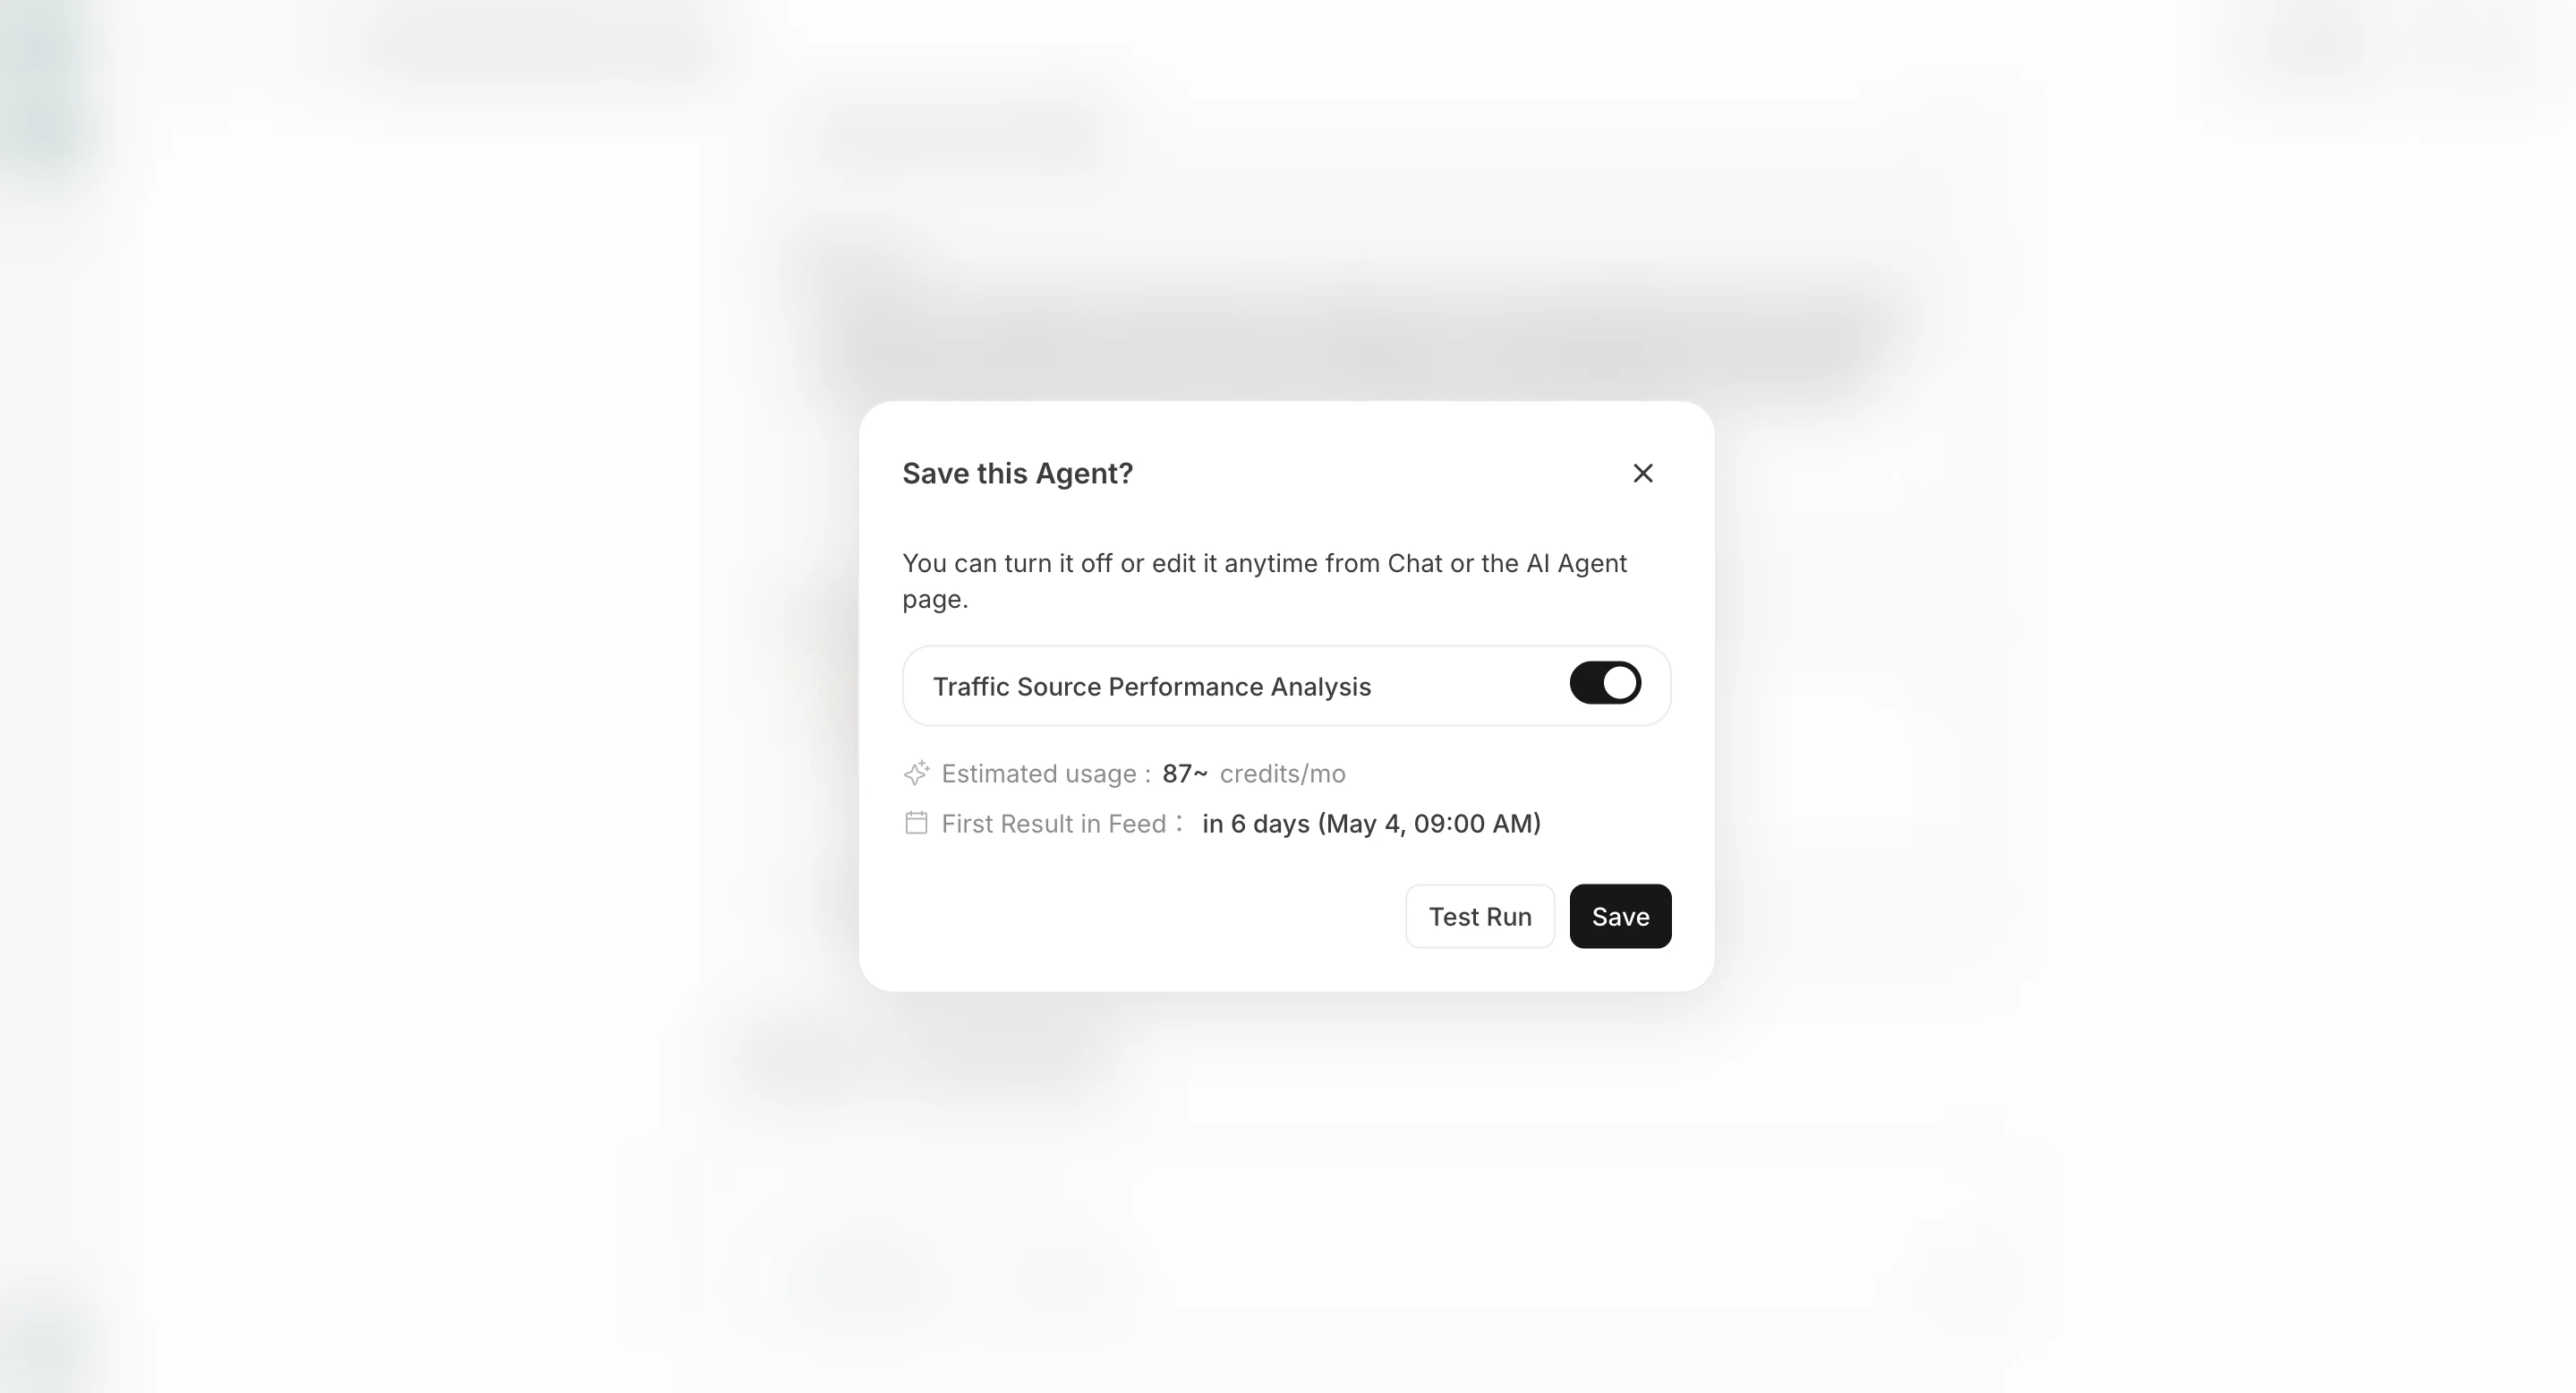
트리거 생성을 완료하고 에이전트에서 확인합니다.
1. `에이전트 저장`을 클릭합니다.
## 생성 및 확인
트리거 생성을 완료하고 에이전트에서 확인합니다.
1. `에이전트 저장`을 클릭합니다.
 2. `에이전트`을 열고 생성된 트리거를 확인합니다.
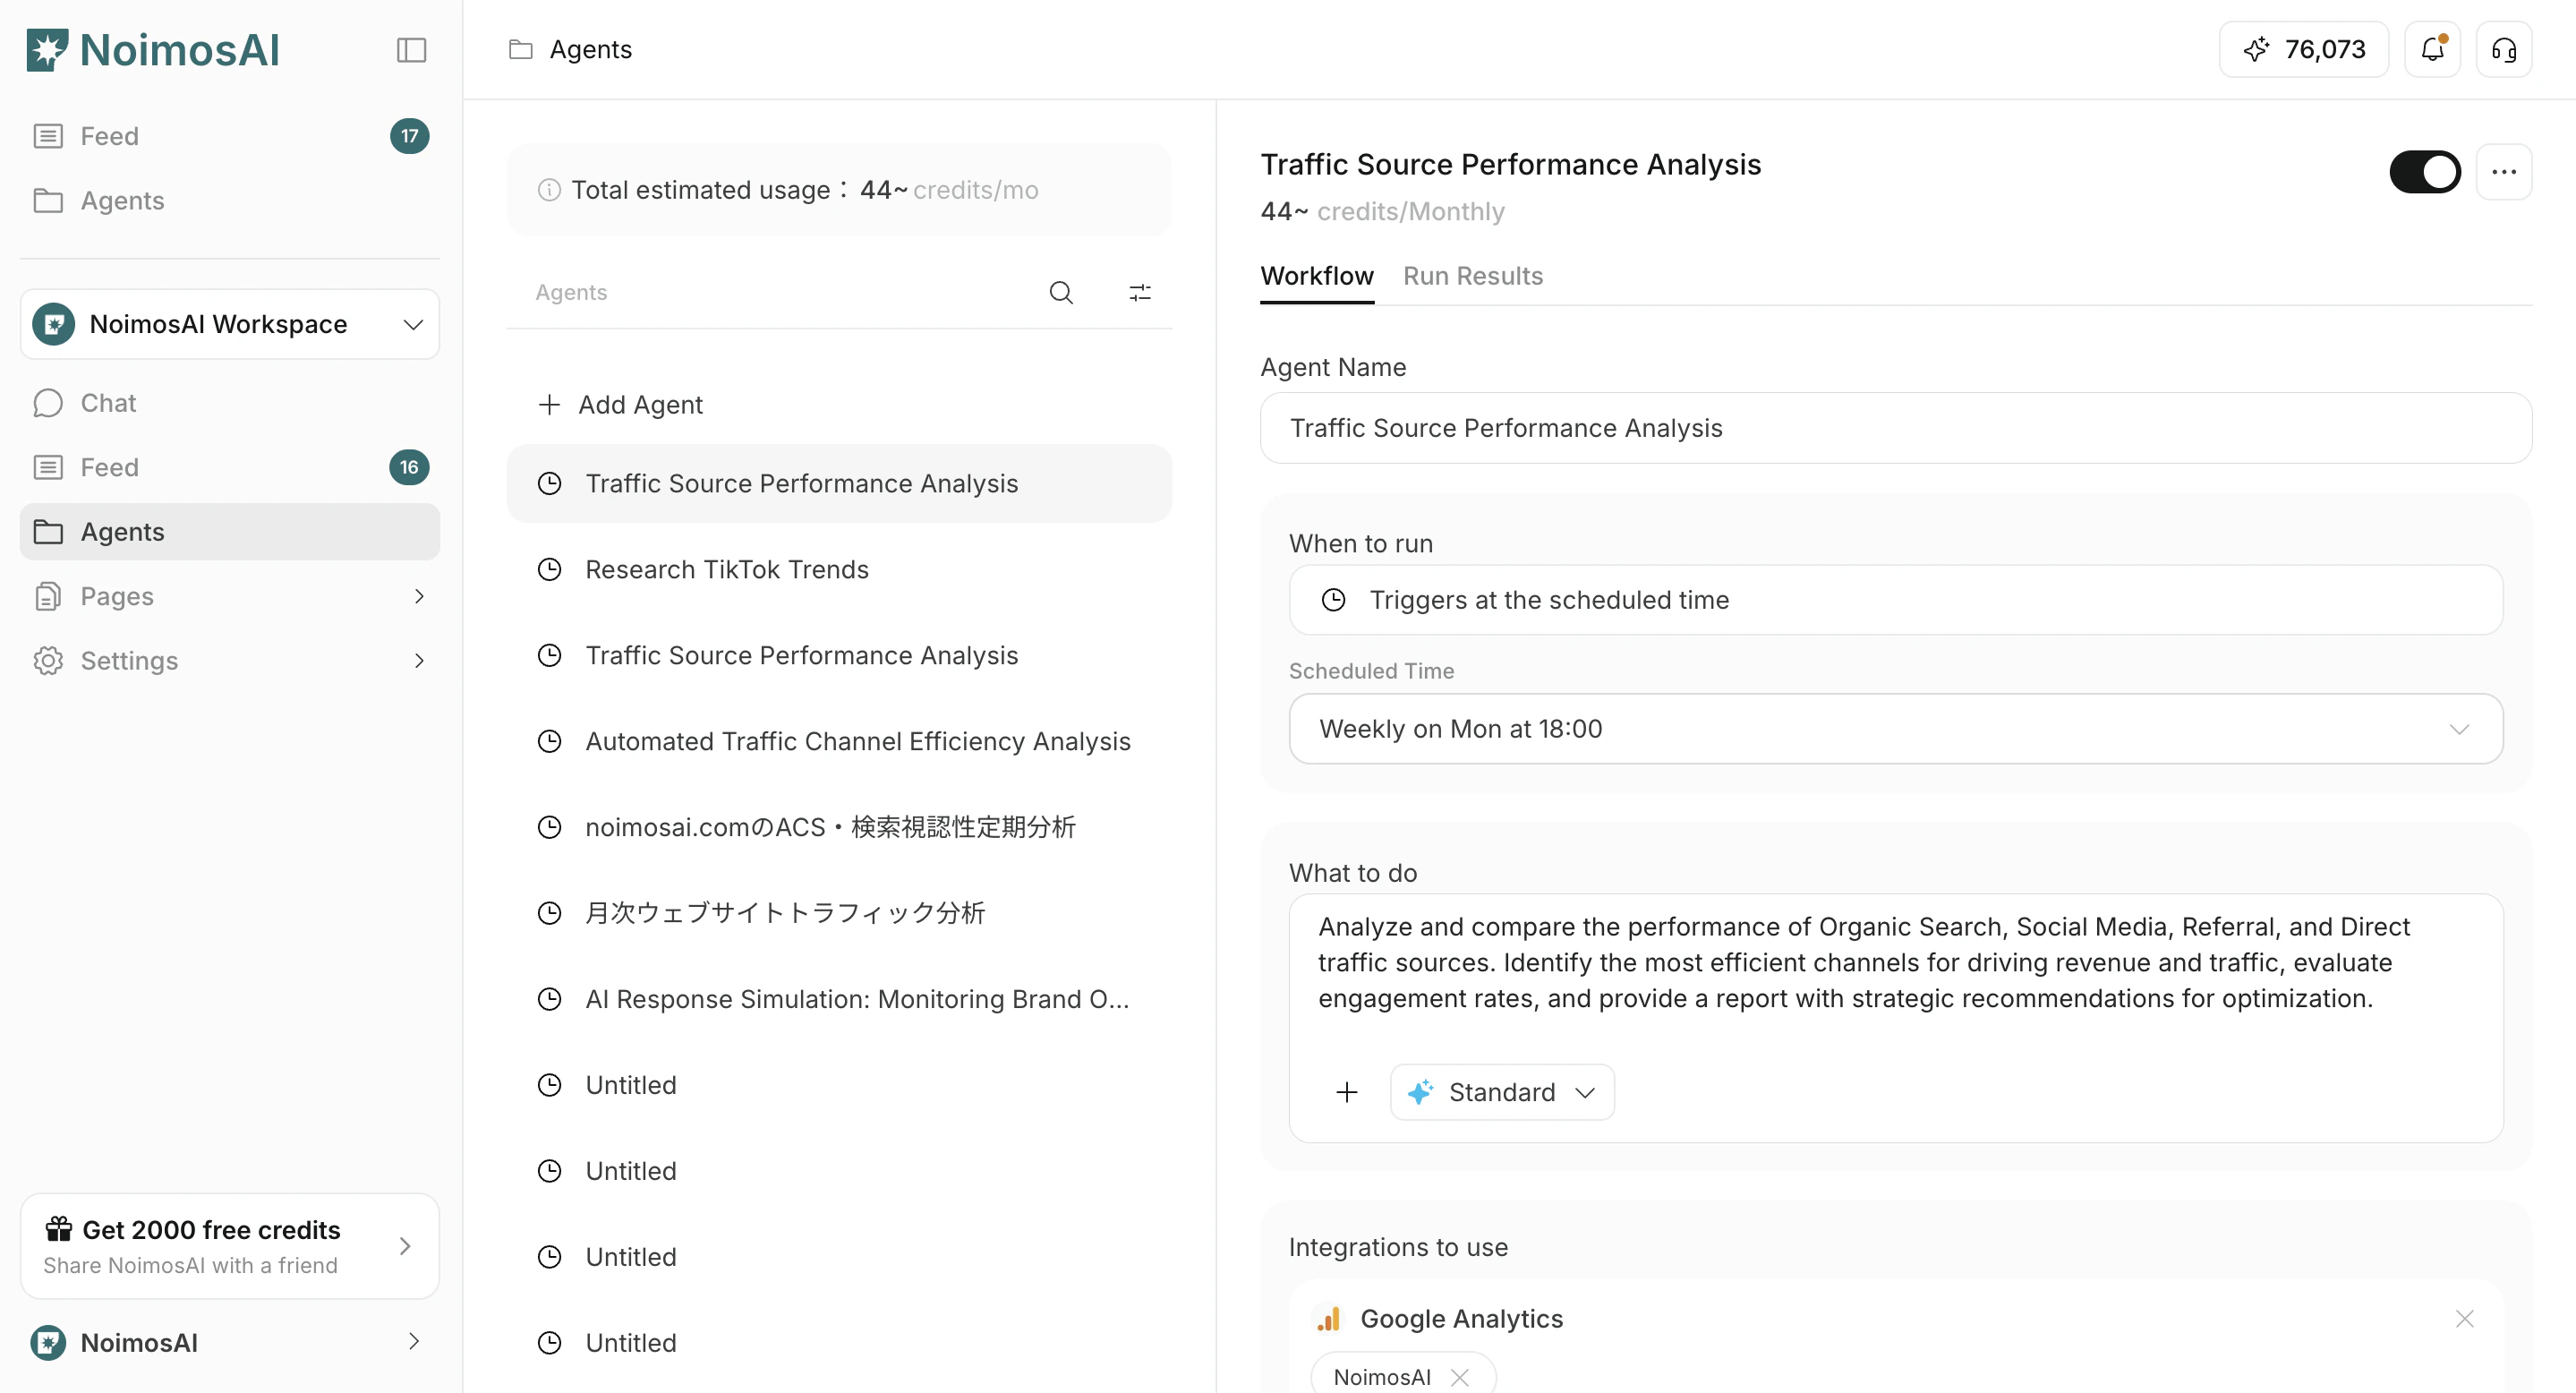 3. 언제든지 트리거를 열어 일정, 프롬프트, 도구를 수정할 수 있습니다.
 ## 사람의 책임
AI는 트리거 구성을 제안하고 초안을 만듭니다.
사람은 기본값을 유지할지, 설정을 수정할지, 트리거를 활성화 또는 비활성화할지, 지속 실행을 승인할지 결정합니다.
## 송신 대상 설정하기
`송신 대상`은 선택 사항입니다. 결과는 기본적으로 `모든 작업`에서 확인할 수 있지만, 알림이나 공유가 필요하면 송신 대상을 추가합니다.
송신 대상은 주로 두 가지 방식으로 추가합니다.
1. **송신 대상 추가**에서는 Slack, LINE, Discord, Telegram, WhatsApp, Notion, Google Drive 등 연동된 앱이나 저장 위치를 선택합니다.
## 사람의 책임
AI는 트리거 구성을 제안하고 초안을 만듭니다.
사람은 기본값을 유지할지, 설정을 수정할지, 트리거를 활성화 또는 비활성화할지, 지속 실행을 승인할지 결정합니다.
## 송신 대상 설정하기
`송신 대상`은 선택 사항입니다. 결과는 기본적으로 `모든 작업`에서 확인할 수 있지만, 알림이나 공유가 필요하면 송신 대상을 추가합니다.
송신 대상은 주로 두 가지 방식으로 추가합니다.
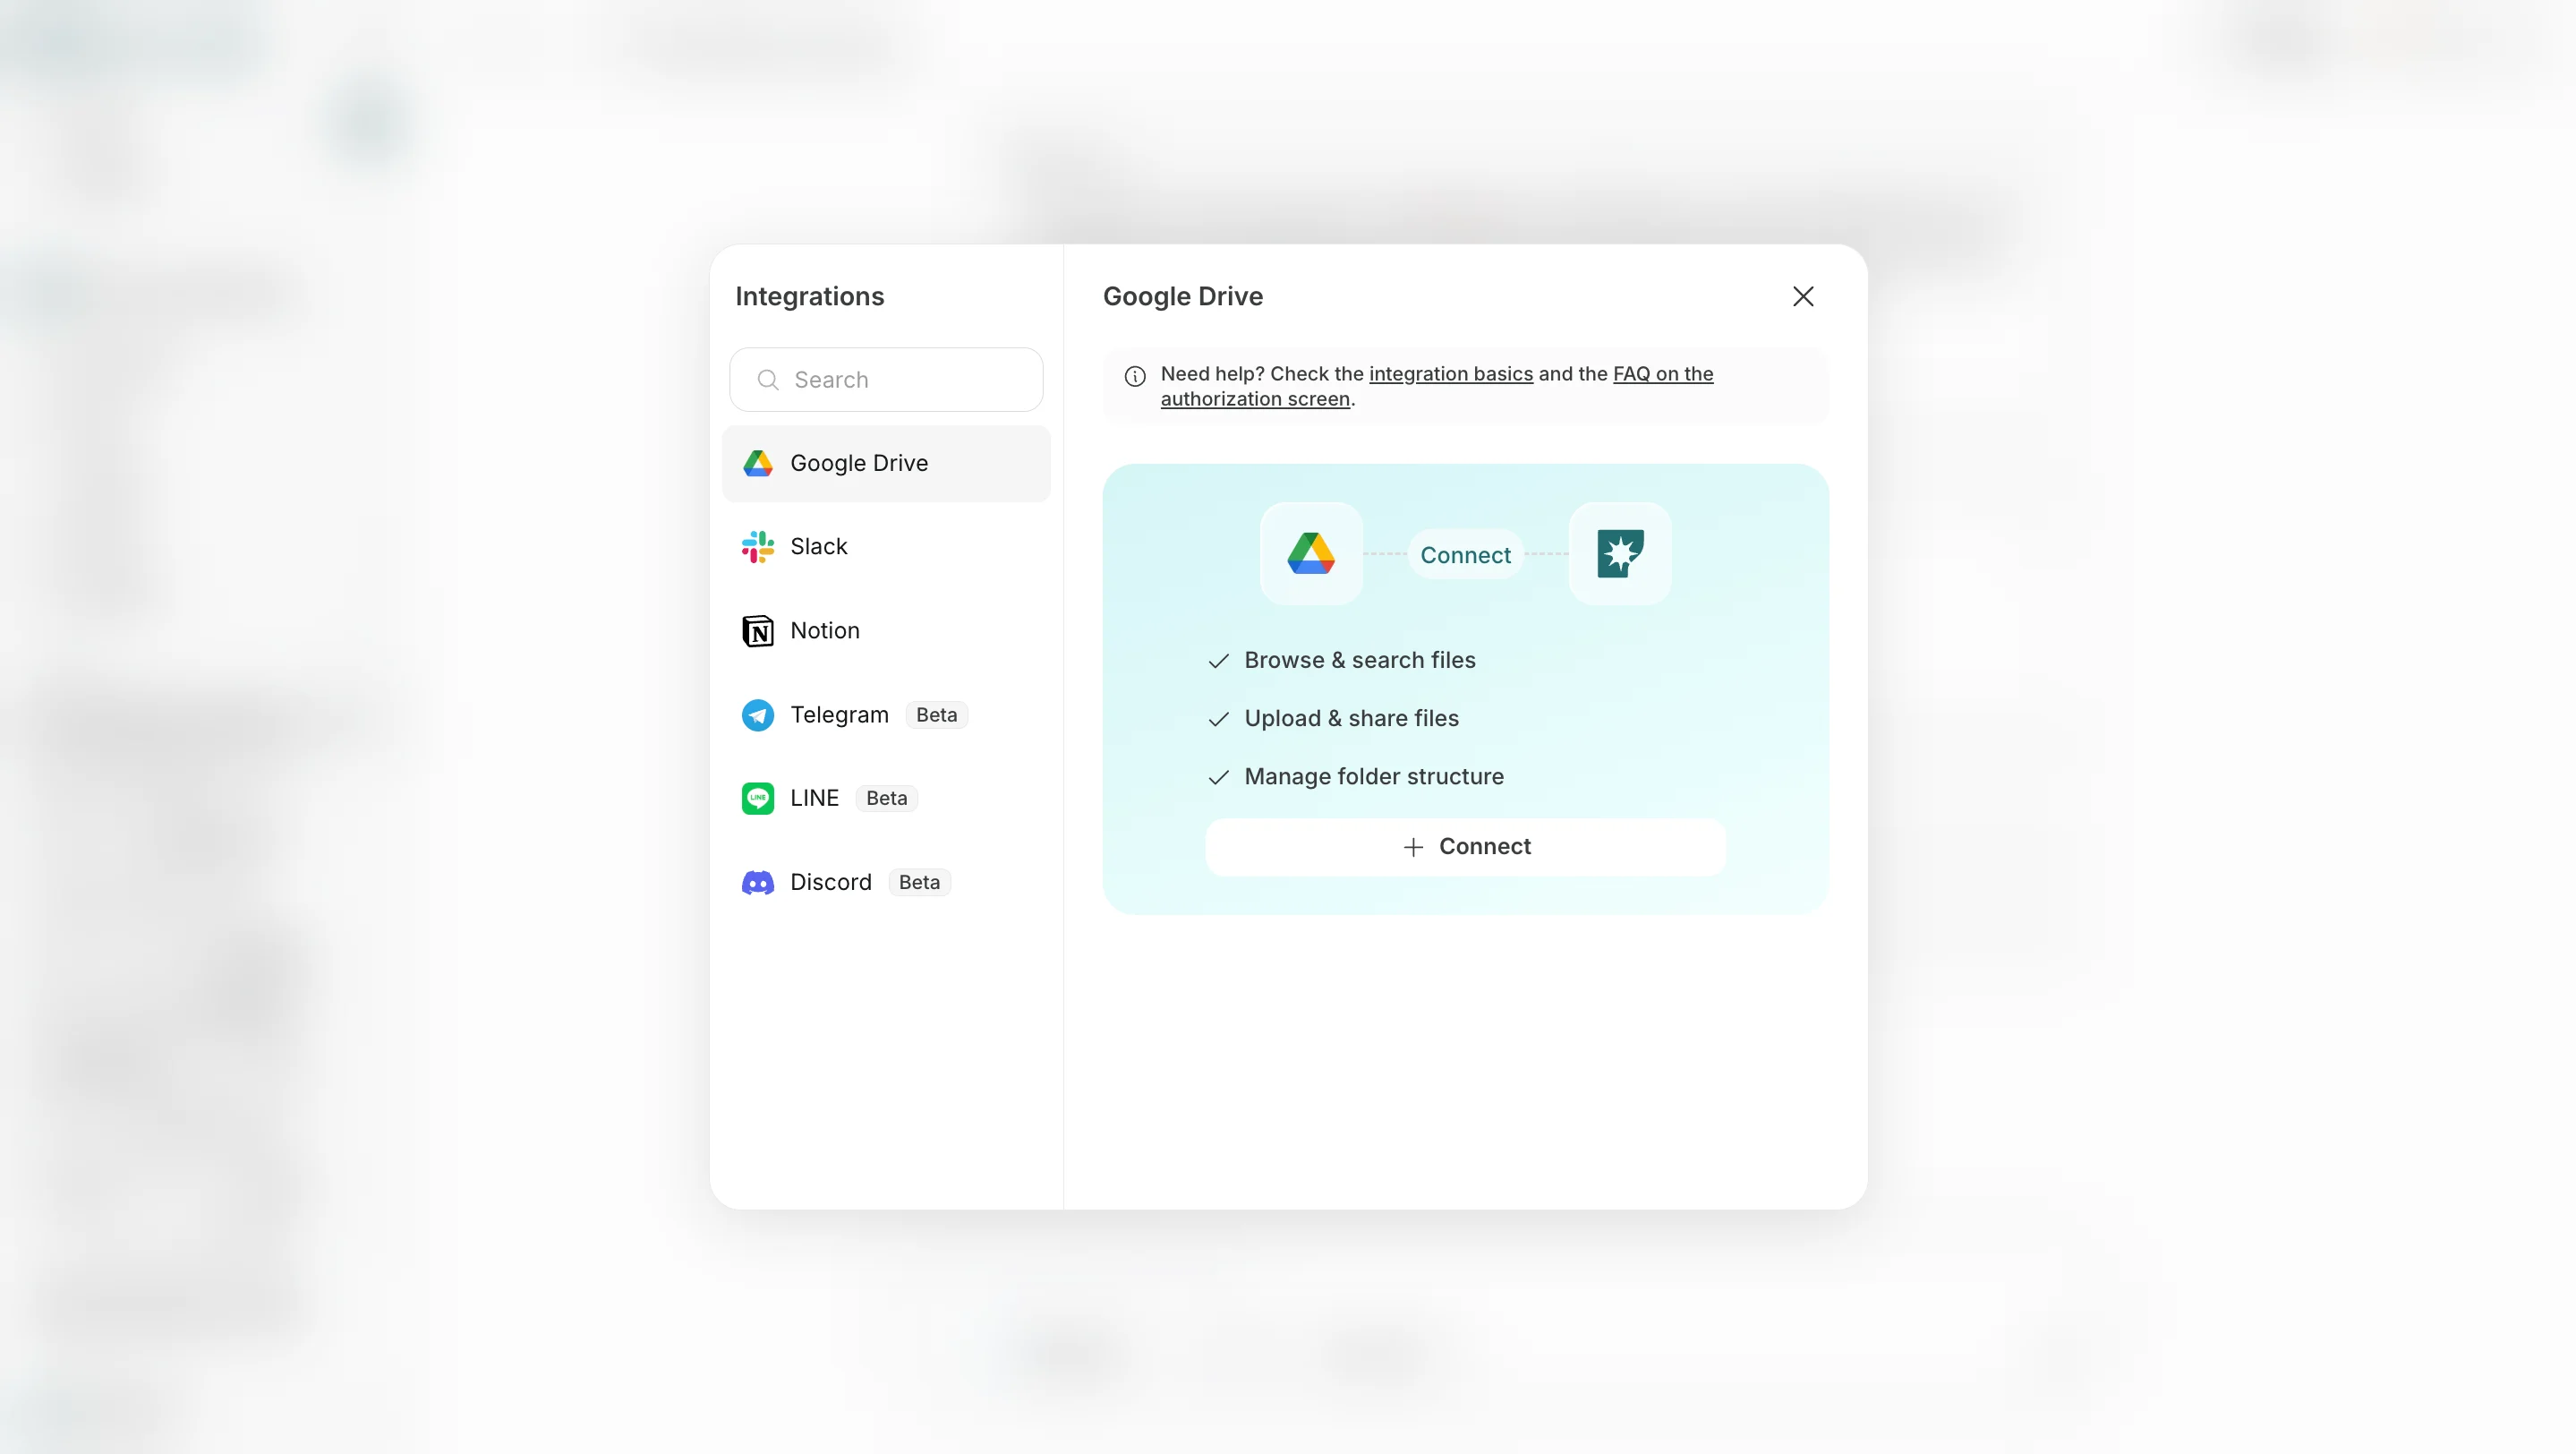
1. **송신 대상 추가**에서는 Slack, LINE, Discord, Telegram, WhatsApp, Notion, Google Drive 등 연동된 앱이나 저장 위치를 선택합니다.
 2. **이메일 추가**에서는 이메일 주소를 지정해 결과를 이메일로도 받을 수 있게 합니다.
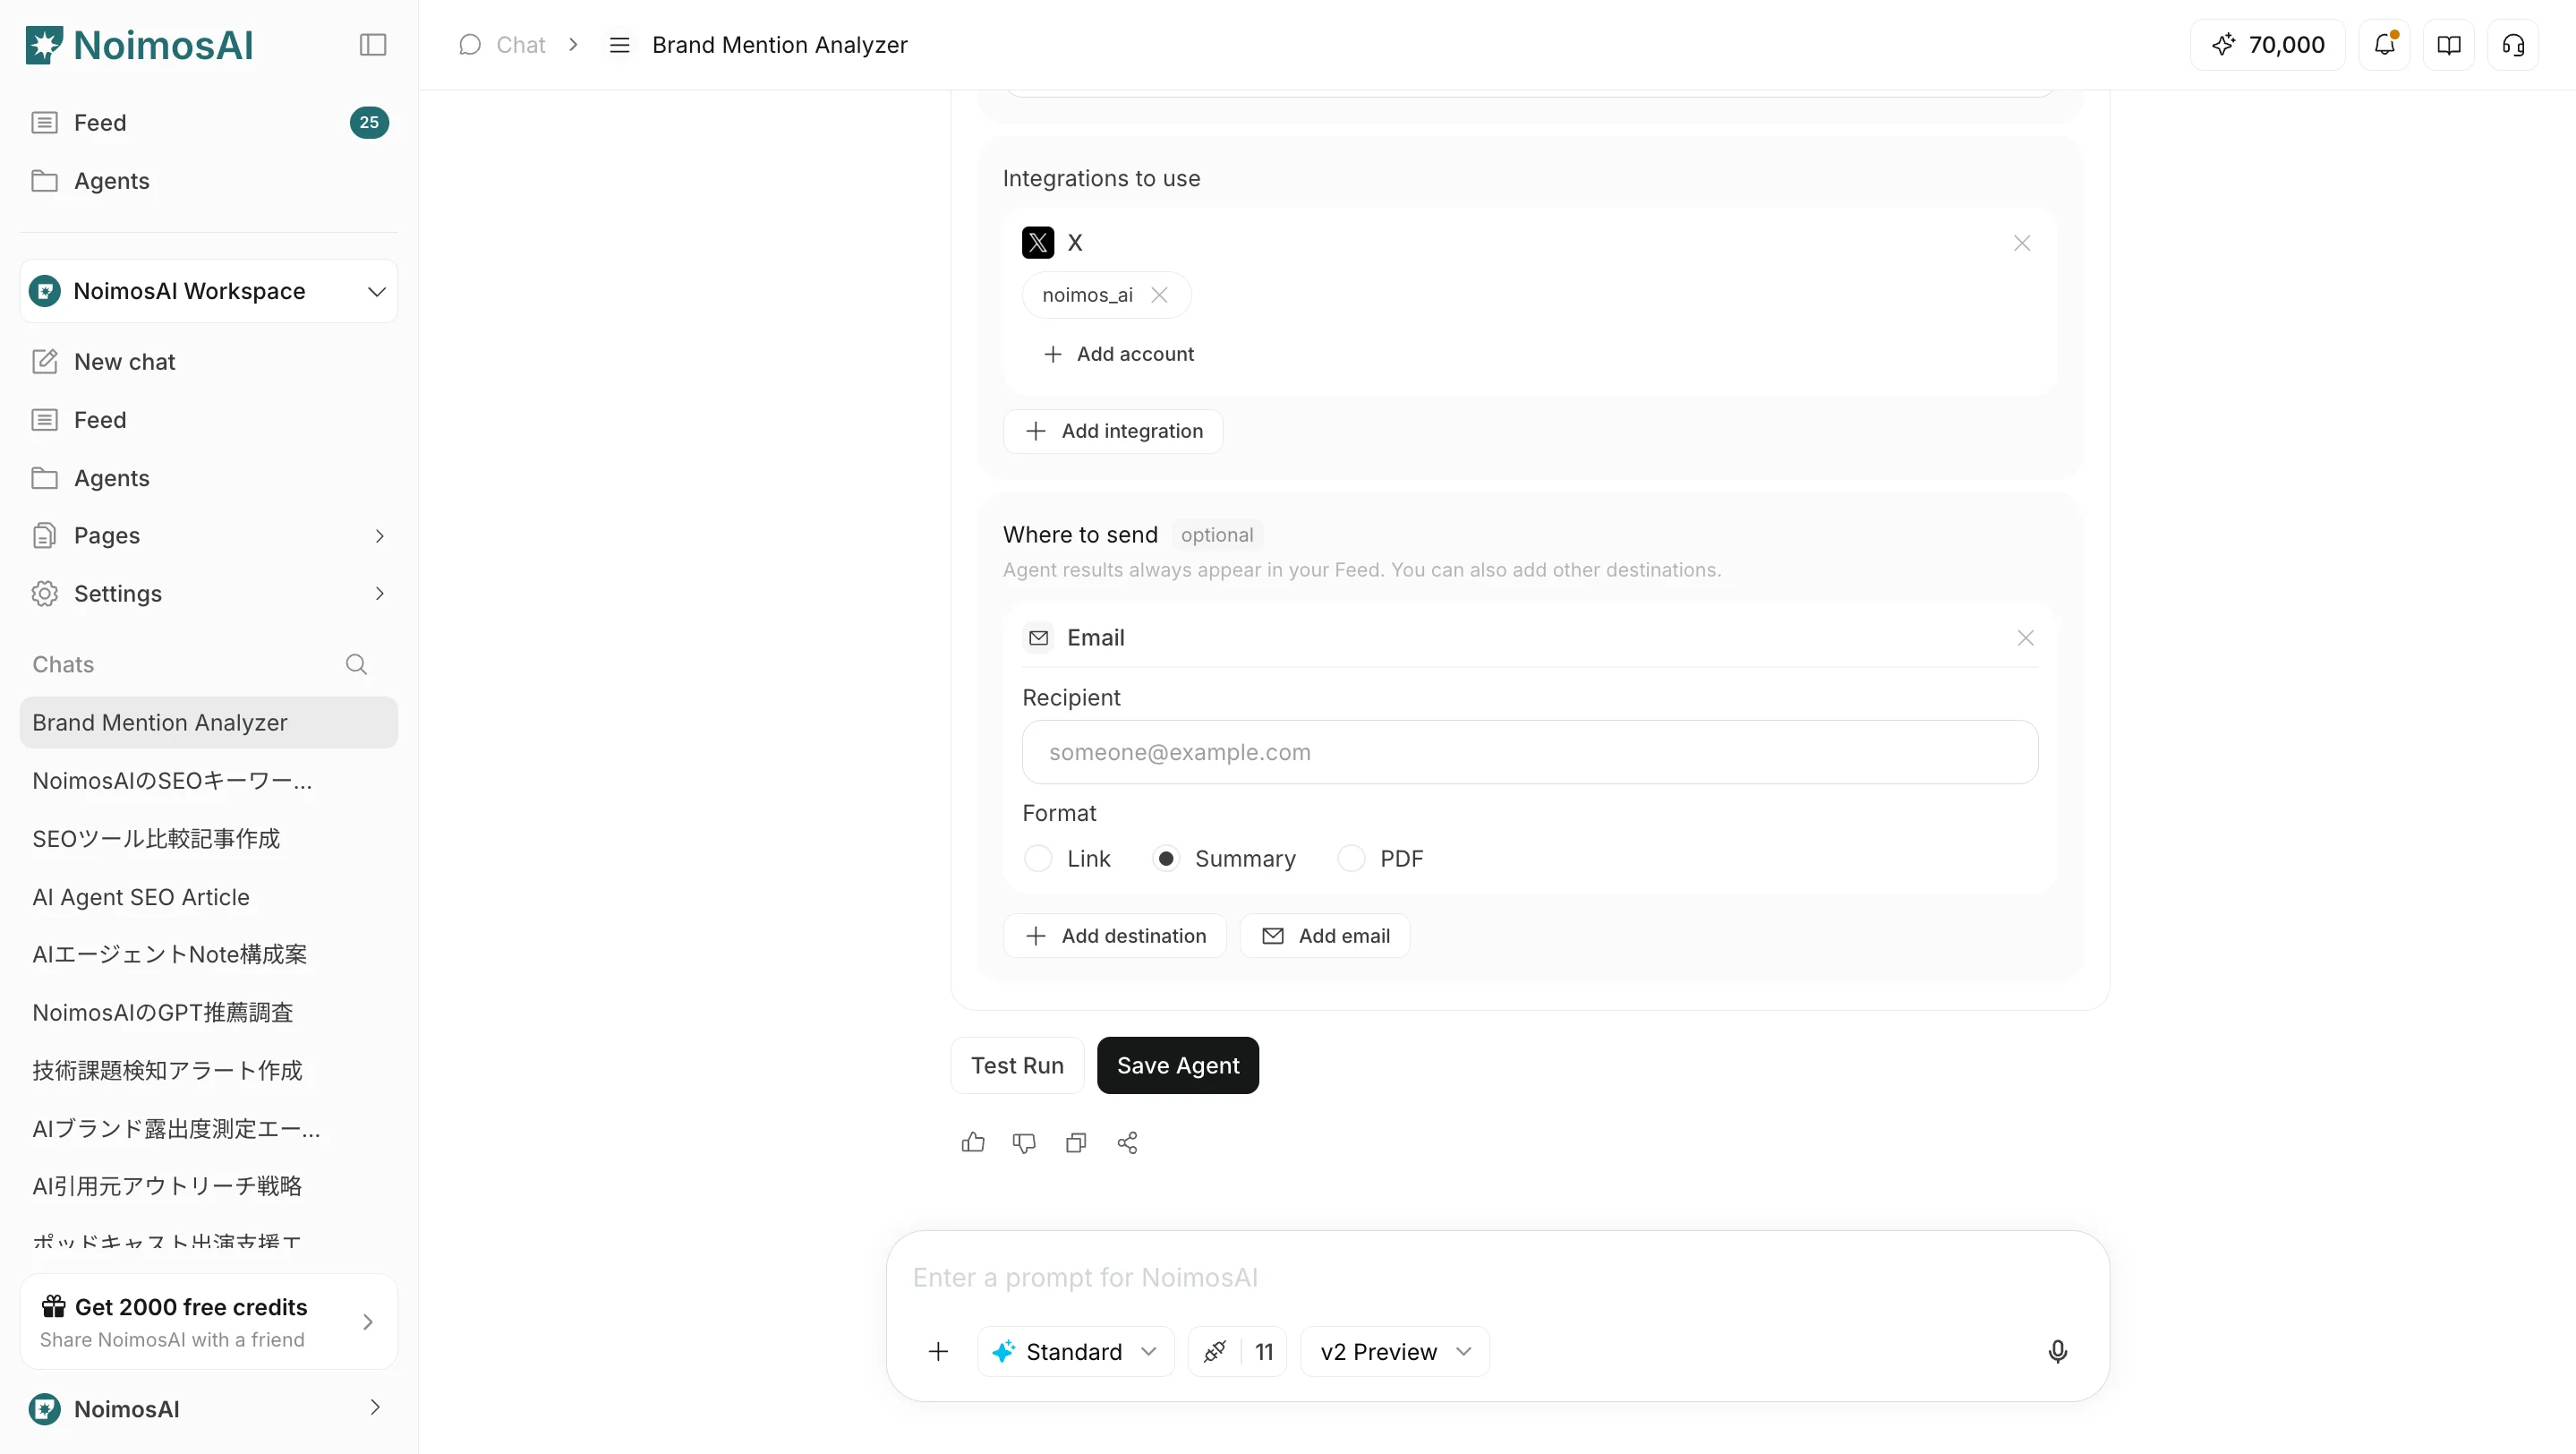 어느 경우든 전송 형식은 `링크`, `요약`, `PDF` 중에서 선택할 수 있습니다.
## 관련
더 자세한 내용은 아래 관련 페이지를 참고하세요.
* [AI 채팅 기본 사항](/ko/help-center/chat/ai-chat-basics)
* [직접 프롬프트 입력하기](/ko/help-center/chat/enter-your-own-prompt)
* [템플릿에서 트리거 만들기](/ko/help-center/ai-team/create-an-agent-from-a-template)
어느 경우든 전송 형식은 `링크`, `요약`, `PDF` 중에서 선택할 수 있습니다.
## 관련
더 자세한 내용은 아래 관련 페이지를 참고하세요.
* [AI 채팅 기본 사항](/ko/help-center/chat/ai-chat-basics)
* [직접 프롬프트 입력하기](/ko/help-center/chat/enter-your-own-prompt)
* [템플릿에서 트리거 만들기](/ko/help-center/ai-team/create-an-agent-from-a-template)