

Overview
Email templates save reusable subjects, body content, images, buttons, and other content for campaigns. This page explains how to create and edit templates, insert customer information, and send a test email. Manage templates fromCustomer engagement in workspace settings. You can also select a template from a campaign’s Send email step.
Create an Email Template
Create a template from a provided design or from a blank canvas. If you manage existing email in HTML, a format that defines an email’s layout and styling in code, you can import the HTML instead. Create a template in the following seven steps. When complete, you can select it in a campaign’s Send email step.- Open
Customer engagementin workspace settings. - Open the email template list from
Email. - Create a new template.
- Select a template such as welcome, newsletter, or promotion, or select
Start from scratchorImport HTML. - Set the template name, category, subject, preview text, and language. Preview text is a short description displayed after the subject in the inbox.
- Add the necessary blocks to the body and edit the content.
- Review desktop and mobile previews, then save.
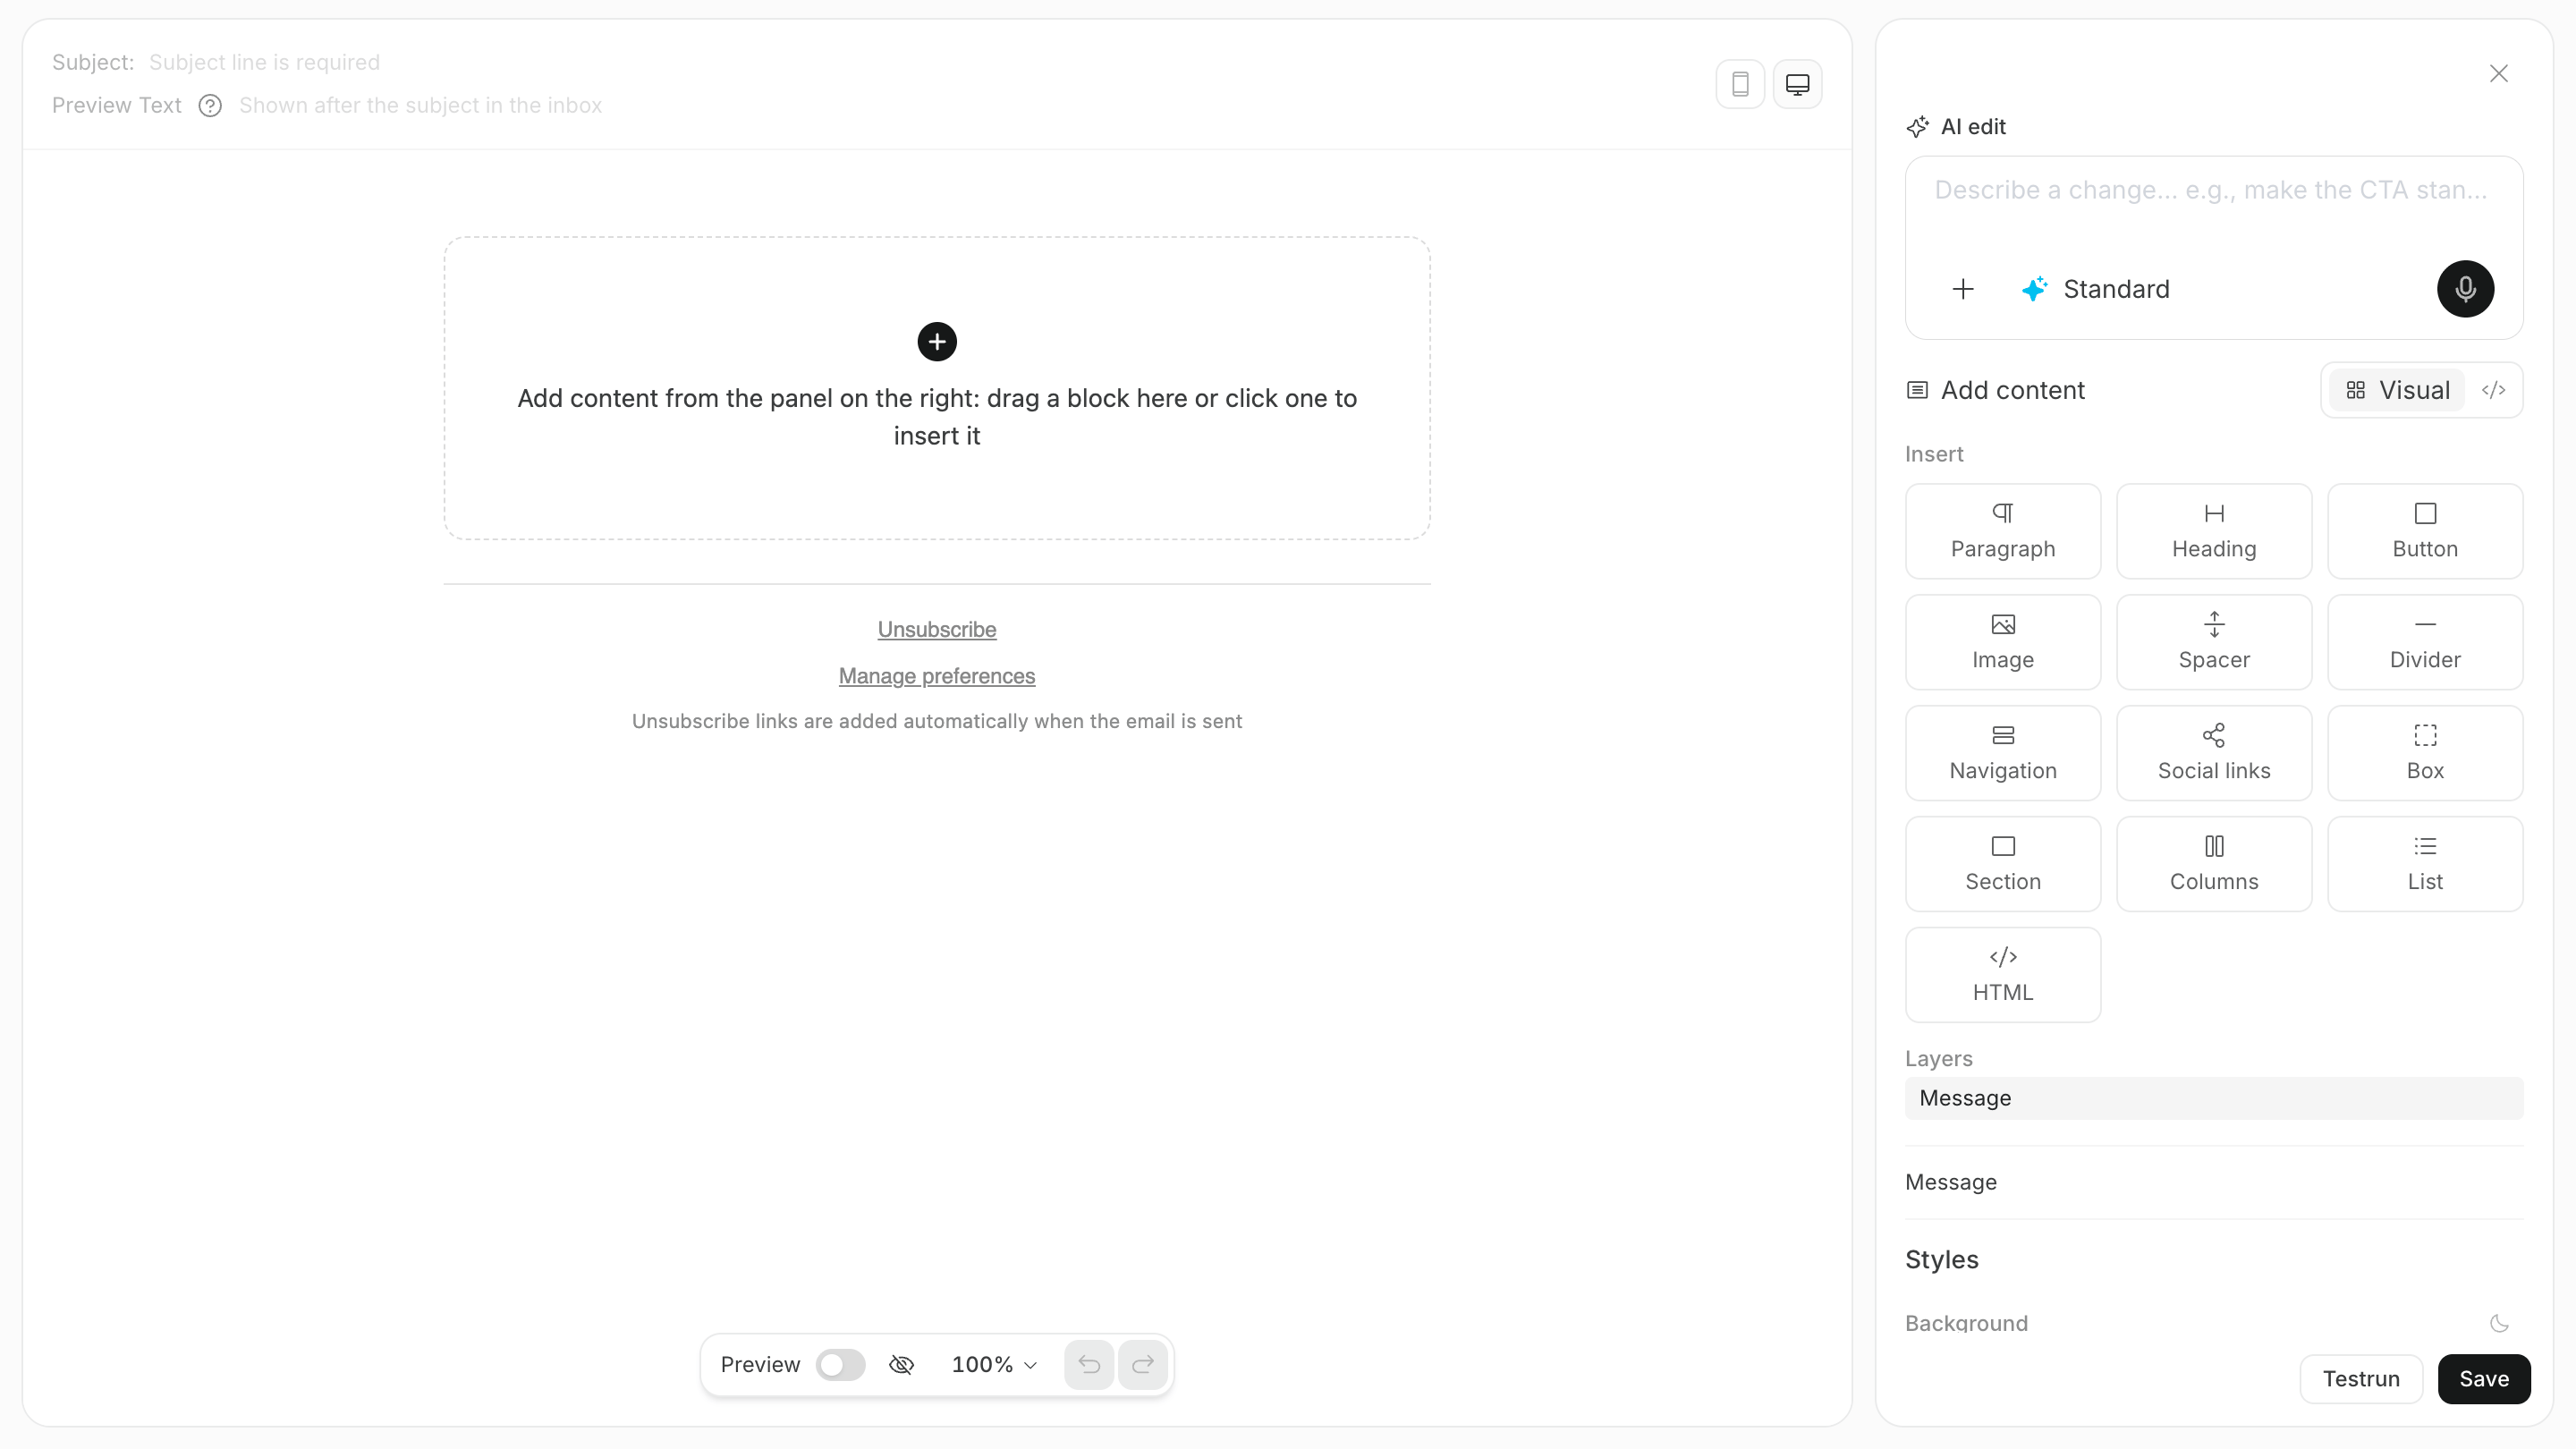
Build Email Content with Blocks
Blocks let you edit an email’s text and layout without writing code. You can add the following nine main blocks.
To list social links, you can also add a
Social block. For buttons and images, set the destination URL and alt text that conveys the content when the image does not display.
Personalize Content with Merge Tags
Amerge tag is a placeholder that is replaced with customer data when you send an email. Add one to a subject or body to change the name or company for each recipient from the same template.
You can use the following five merge tags by default.
For example, enter the following subject.
First name is Taro, the subject becomes Taro, let's get started with initial setup. Select a customer in the preview’s Sample data to test how the content looks with that customer’s information.
Check that the information you insert is saved in customer data beforehand. Use wording that still makes sense for customers without a value, or target only a segment that has the required information.
Import and Edit HTML
If you manage existing email in HTML, selectImport HTML and paste the source code to edit it.
In HTML mode, the preview updates as you edit the source in the center. A template saved as HTML cannot return to the block format, so review the layout and links before saving.
Send a Test Email
Before using a template in a campaign, send a test email and check how it appears in an actual inbox. Send a test email in the following four steps.- Select
Send testin the template editing screen. - Enter the destination email address.
- Select a sender and send the test email.
- In the received email, review the subject, inserted content, images, buttons, links, and mobile display.