Overview
If you no longer need the current Team plan, you can cancel the subscription from Billing. The flow includes review and confirmation steps before final cancellation.Before you cancel
Use this section to confirm before you cancel so you can proceed without avoidable errors.- Confirm whether changing plan would be enough instead of canceling.
- Review current renewal date and billing status.
- Make sure Team members understand when access or limits may change.
Where to find
Use the following path to open this area.Team -> Billing -> Usage.- In
Plan Details, open plan actions and select cancellation.
Start cancellation from plan actions
Use this section to understand start cancellation from plan actions and what to confirm while completing this part.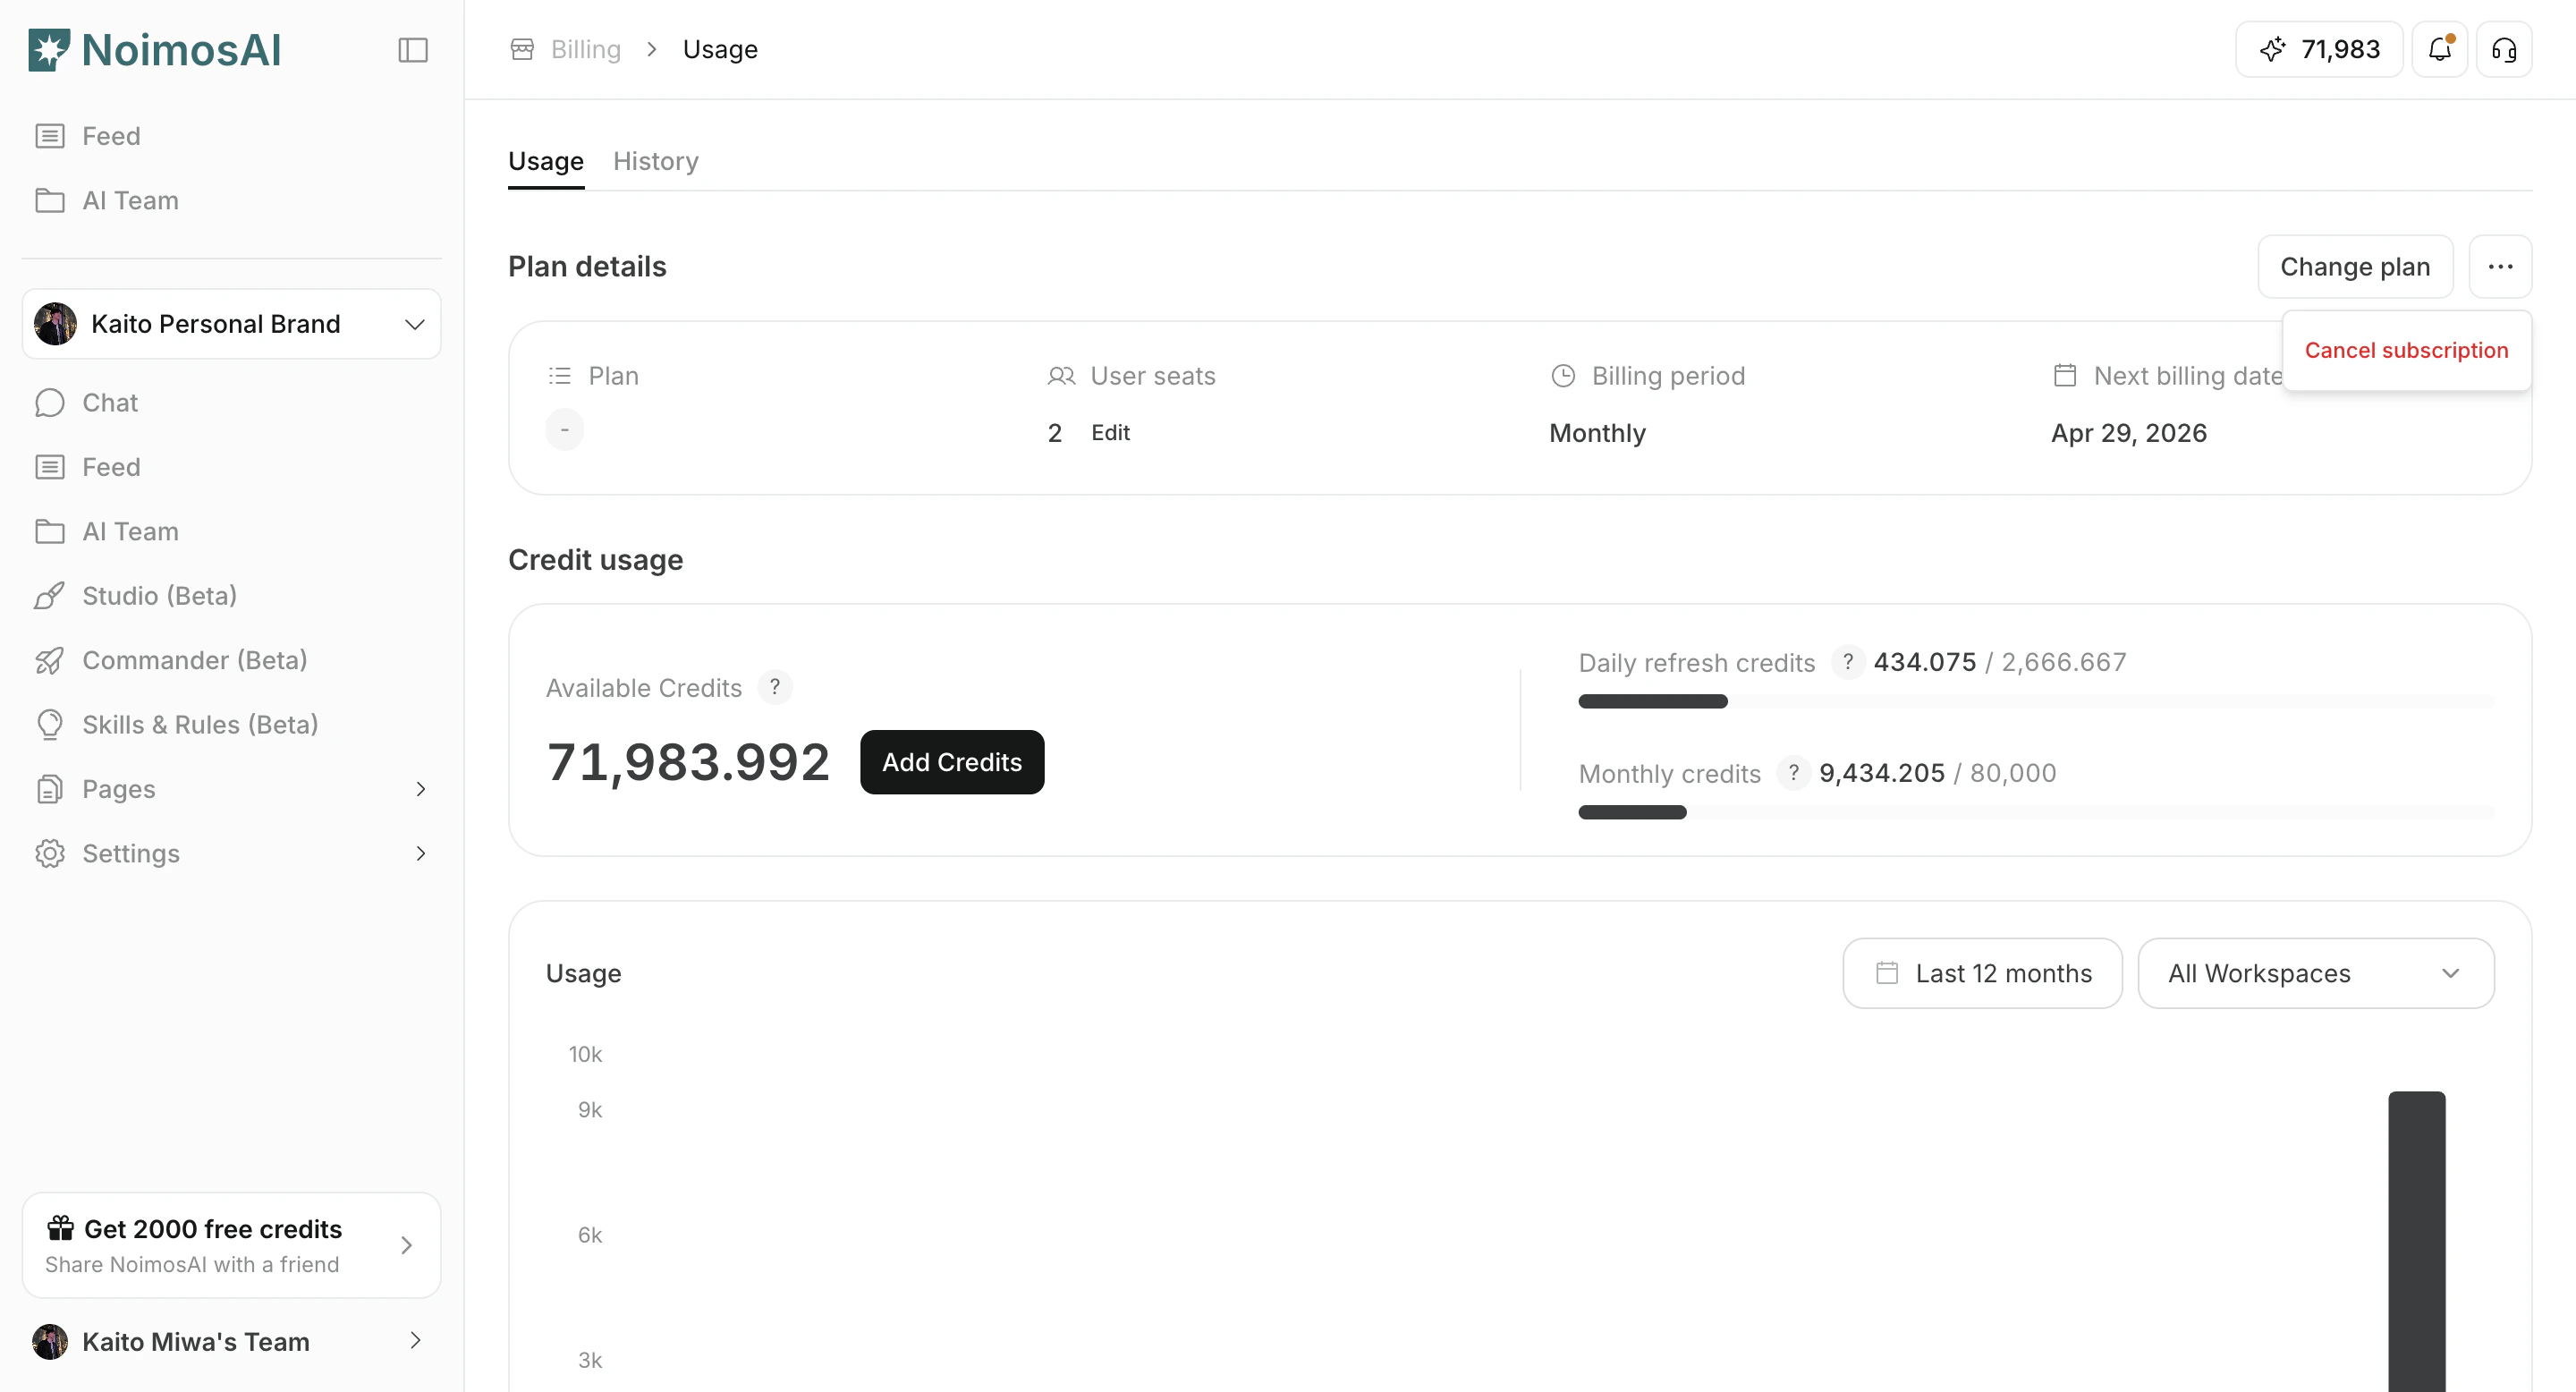
Confirm cancellation
Use this section to understand confirm cancellation and what to confirm while completing this part.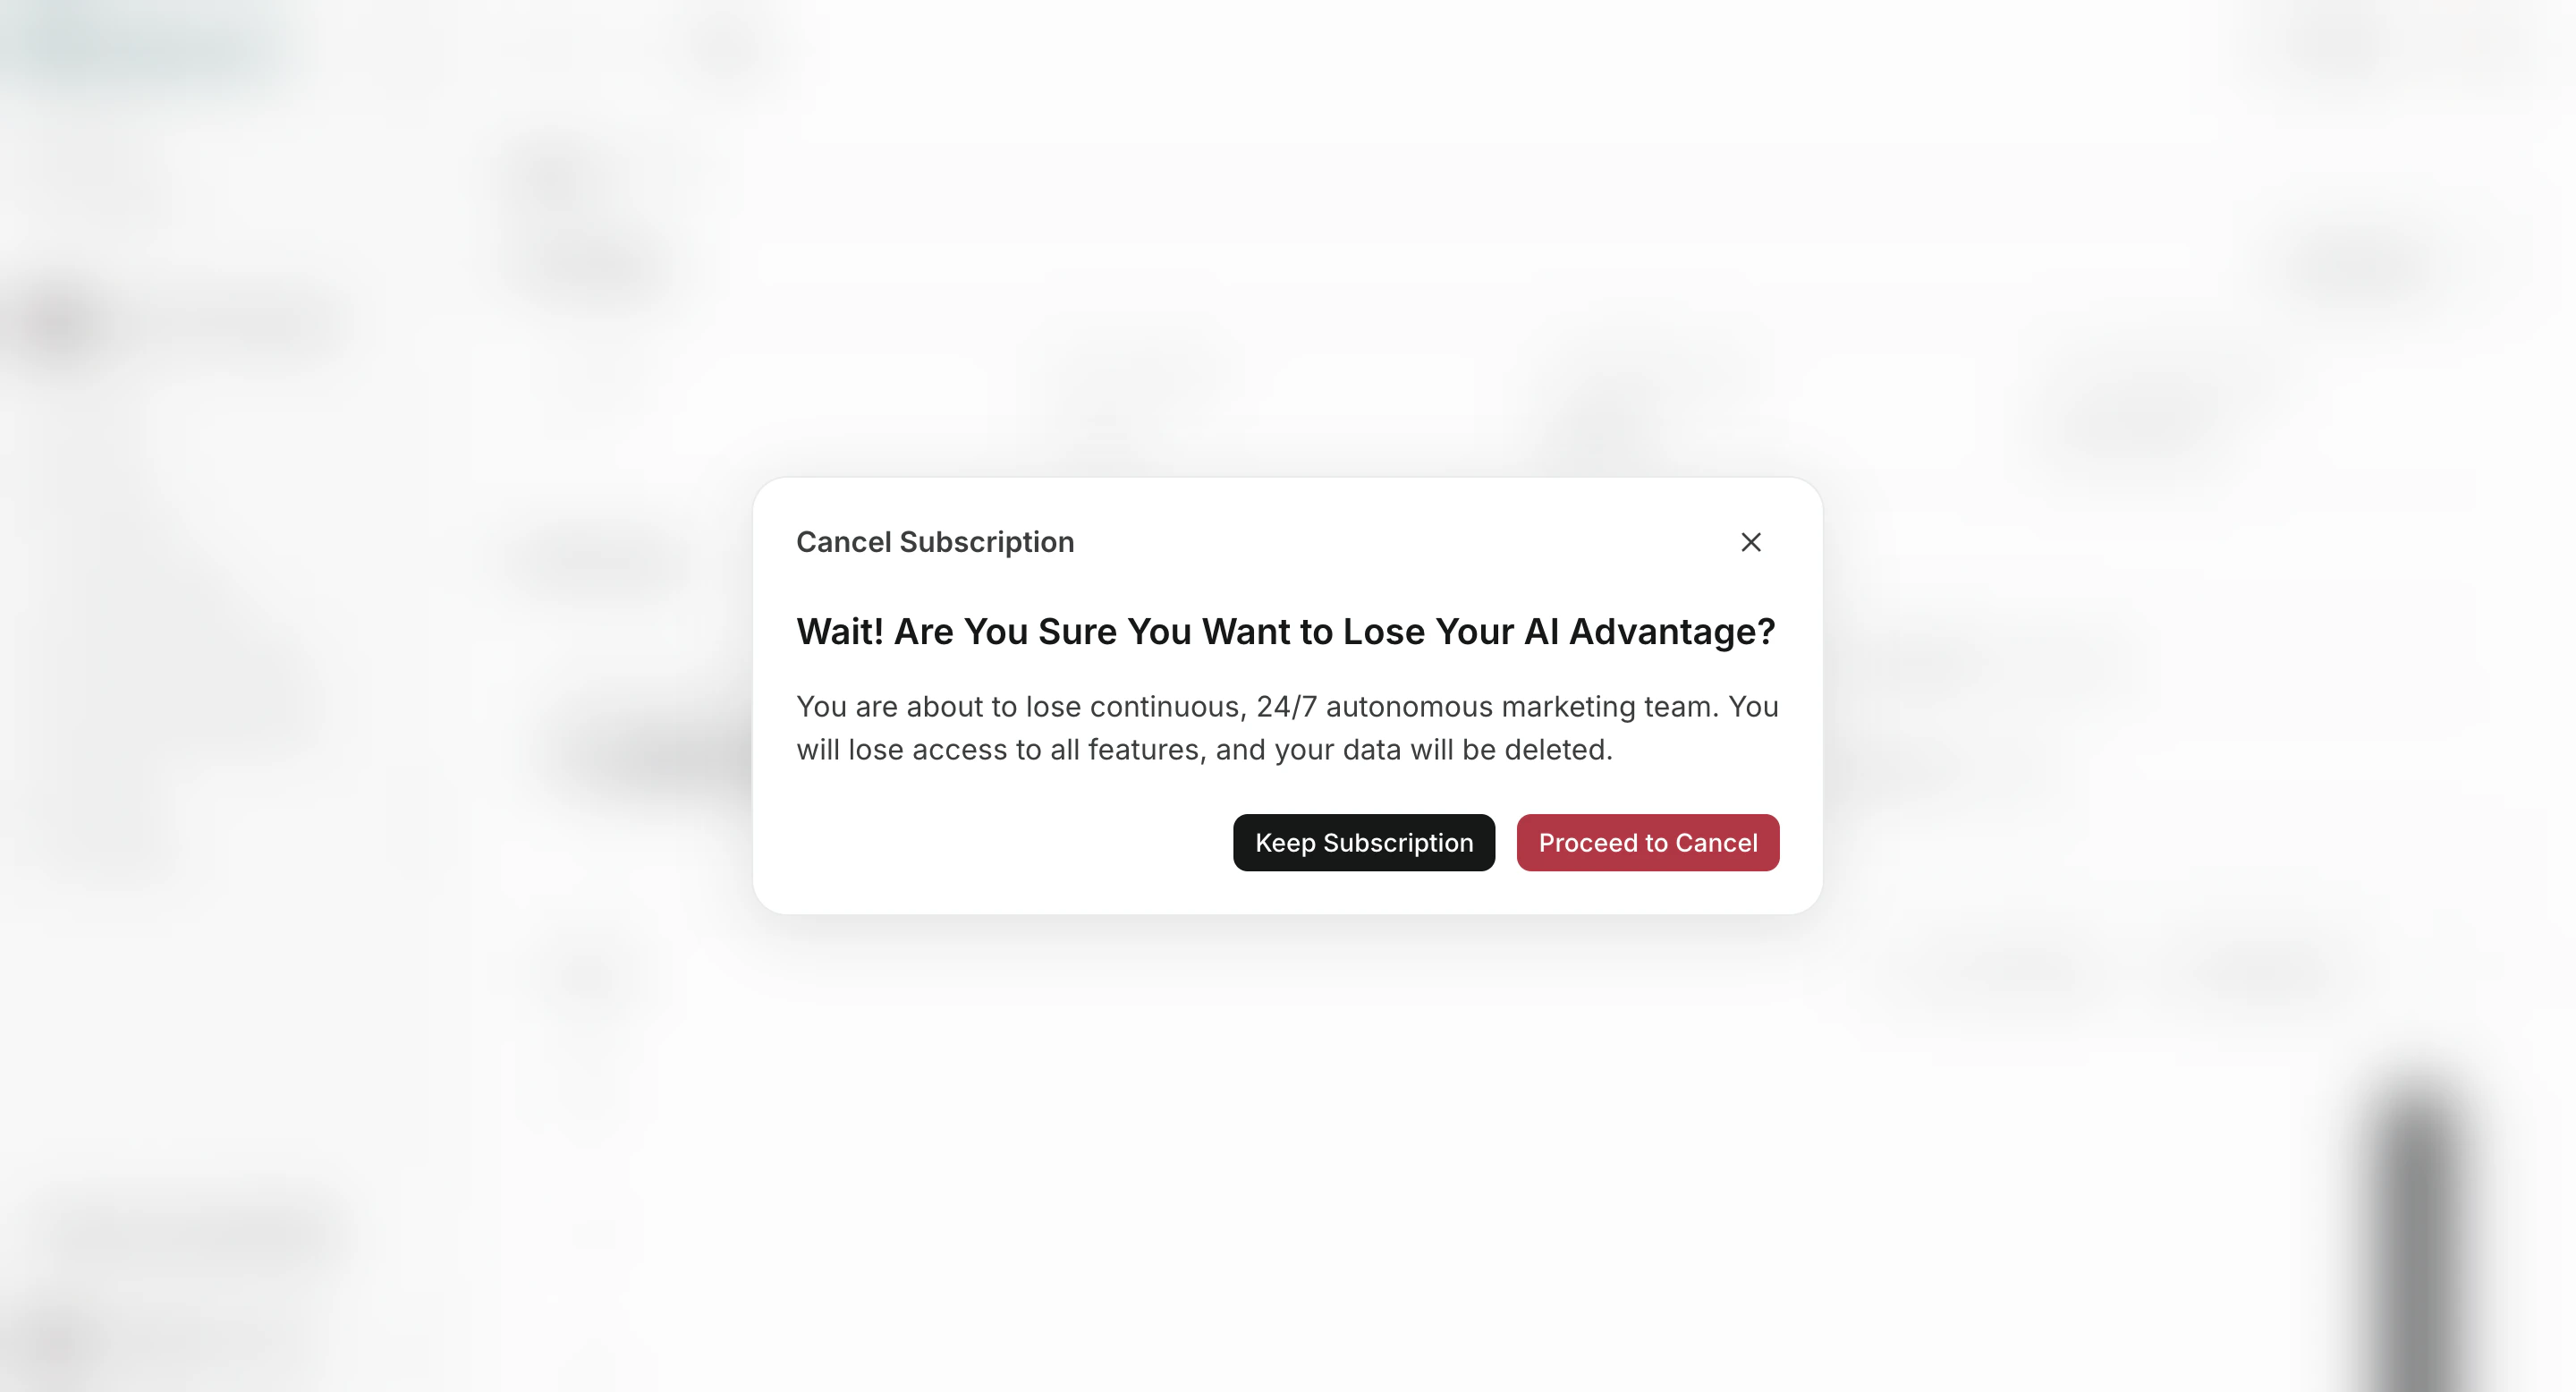
Cancellation flow
This section walks through the cancellation flow and clarifies the key decision points.- Open cancel modal from plan actions.
- Complete the reason and confirmation steps.
- Review any retention option if shown.
- Confirm final cancellation.
What happens after cancellation
Use this section to understand what happens after cancellation and what to verify before moving to the next step.- Billing usually remains active until the end of the current billing period.
- Billing UI shows canceled or scheduled cancellation status after confirmation.
- You can verify final status in
Billing -> Usage.