

Overview
Campaign steps define which messages customers receive after meeting an entry condition, when they receive them, and in what order. This page explains how to create or revise the whole sequence in chat and configure individual blocks in the canvas.
You can create and revise campaign steps in the following two ways.
Create and Revise Steps in Chat
Ask the agent in chat when you are creating an entire campaign or making several changes together. Start by describing the goal, target customers, and what you want to send. If information is missing, the agent asks about entry conditions and timing. For example, to create a campaign for newly signed-up customers, ask:Set Entry Conditions with Triggers
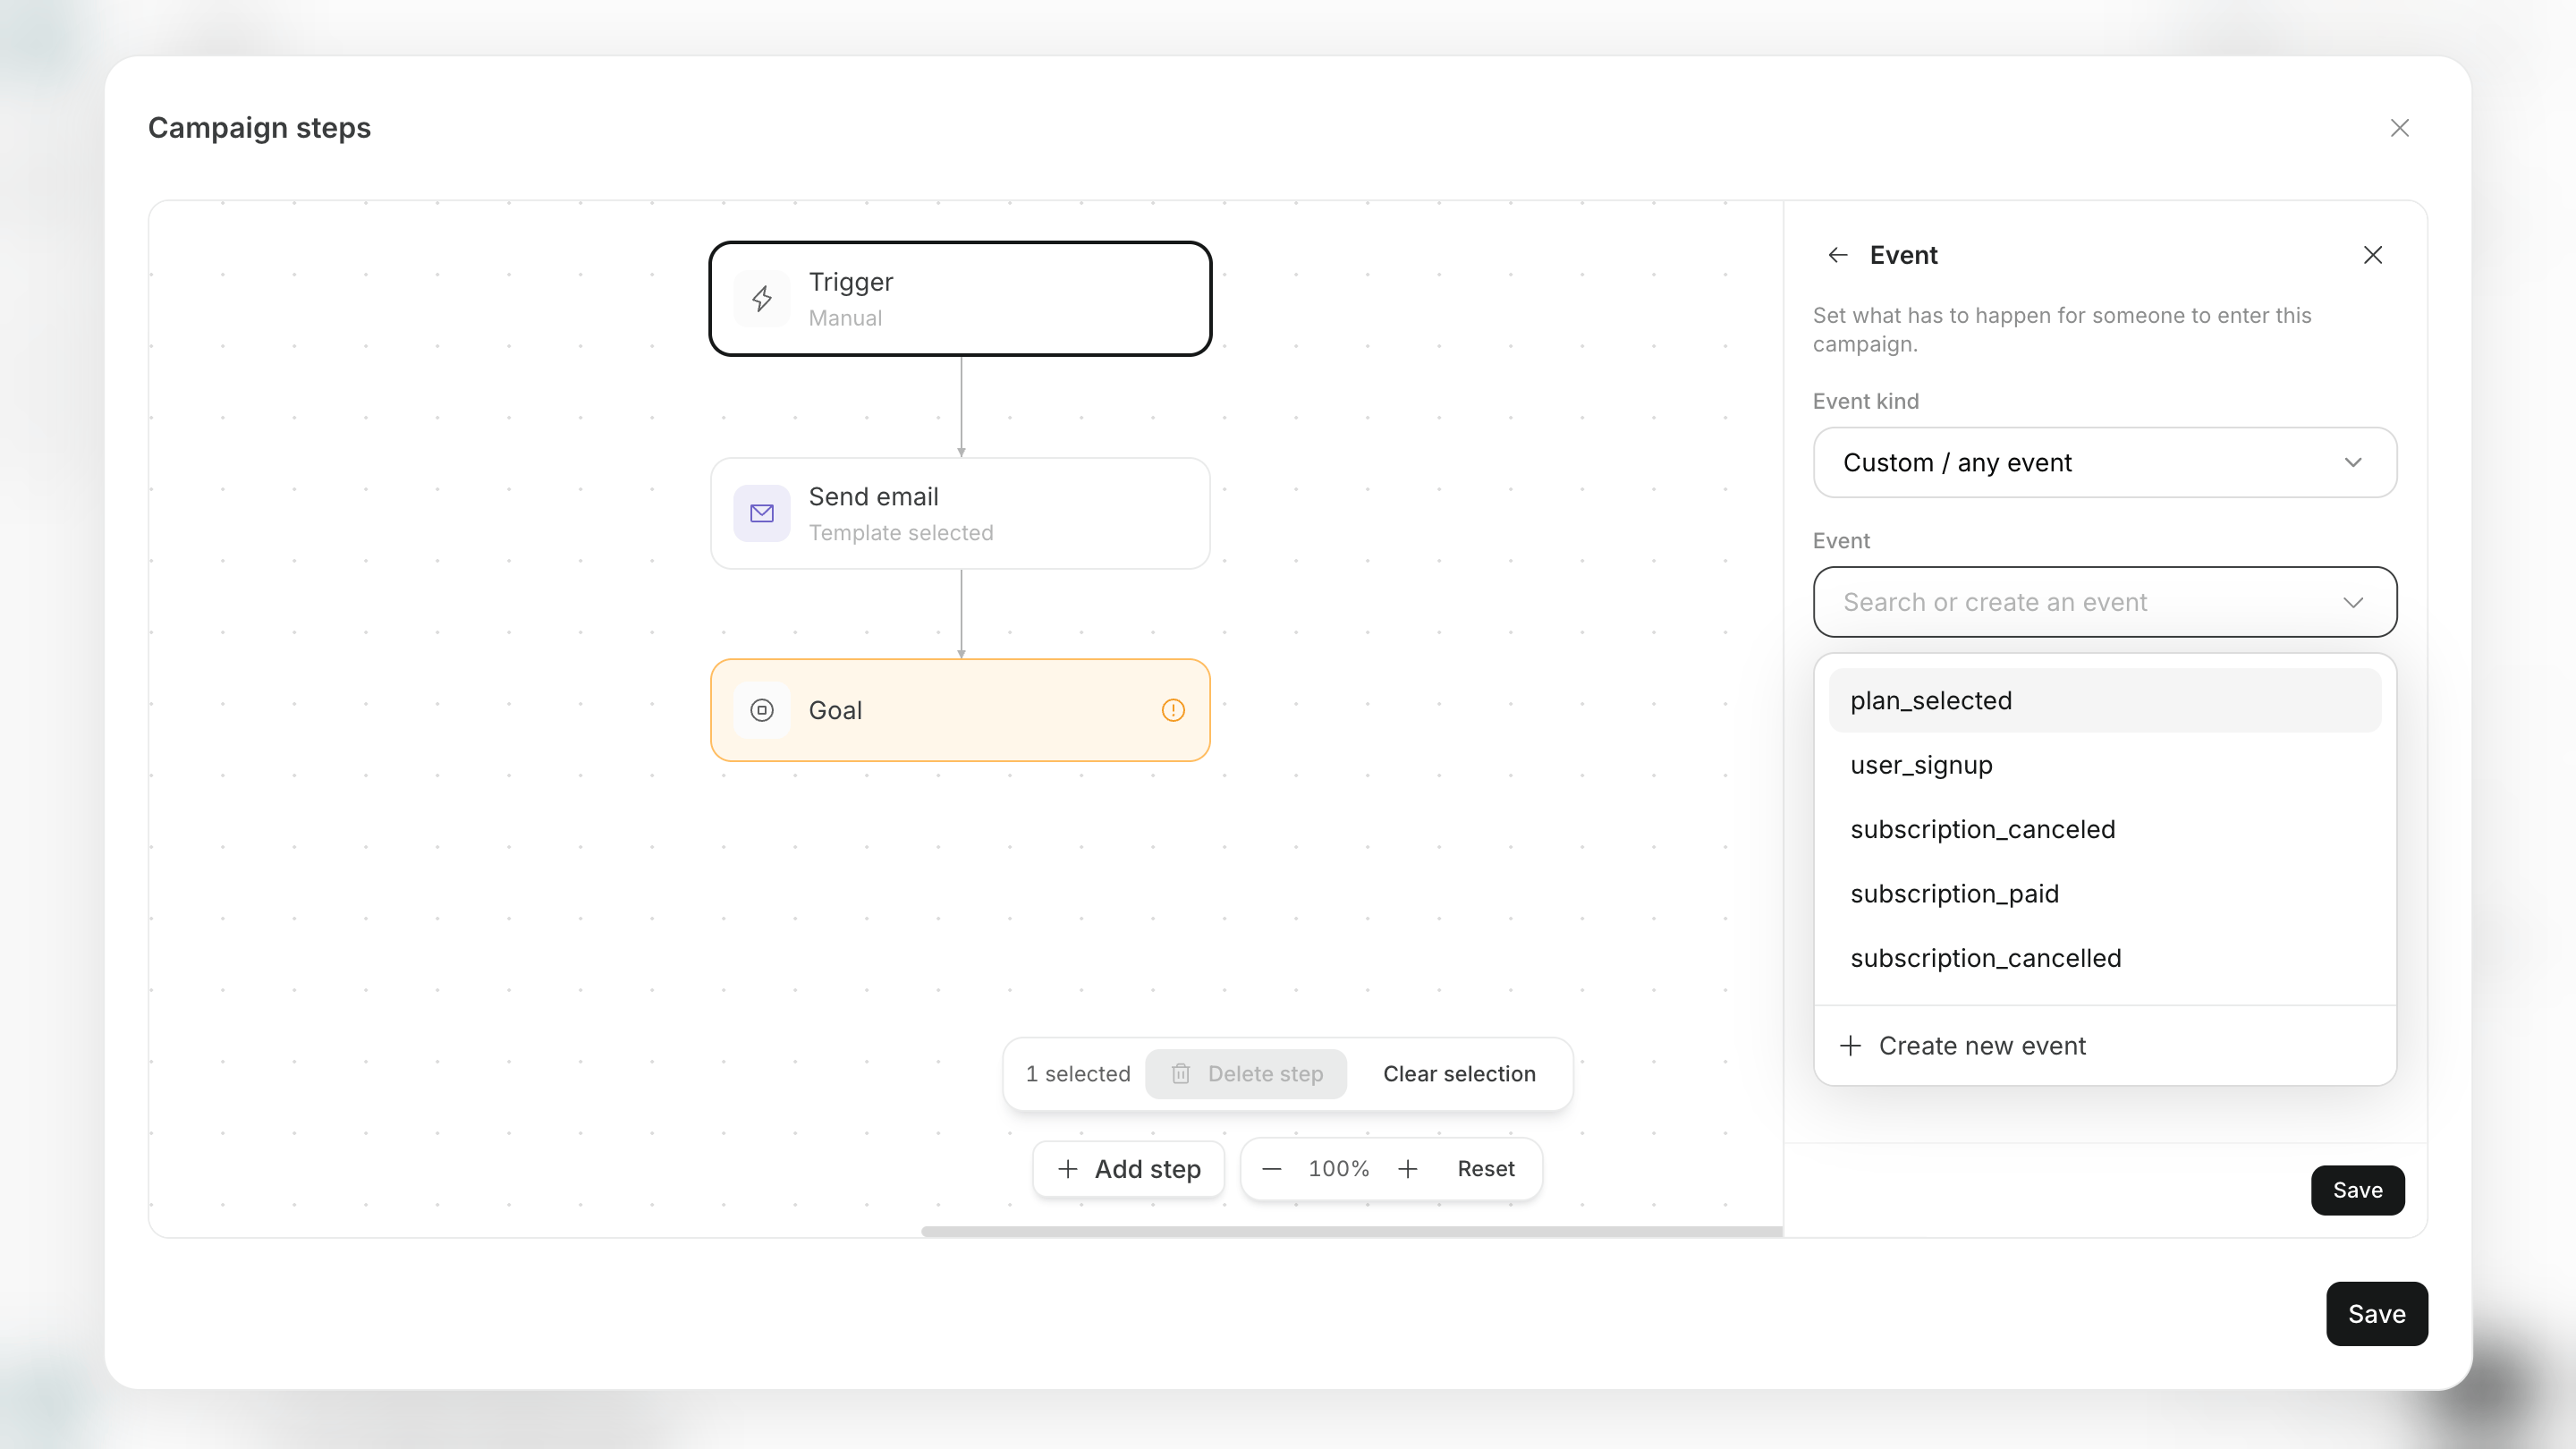
ATrigger is what starts work for a customer. Set who moves to the first step and what needs to happen for them to enter the campaign.
You can currently choose from the following seven triggers.
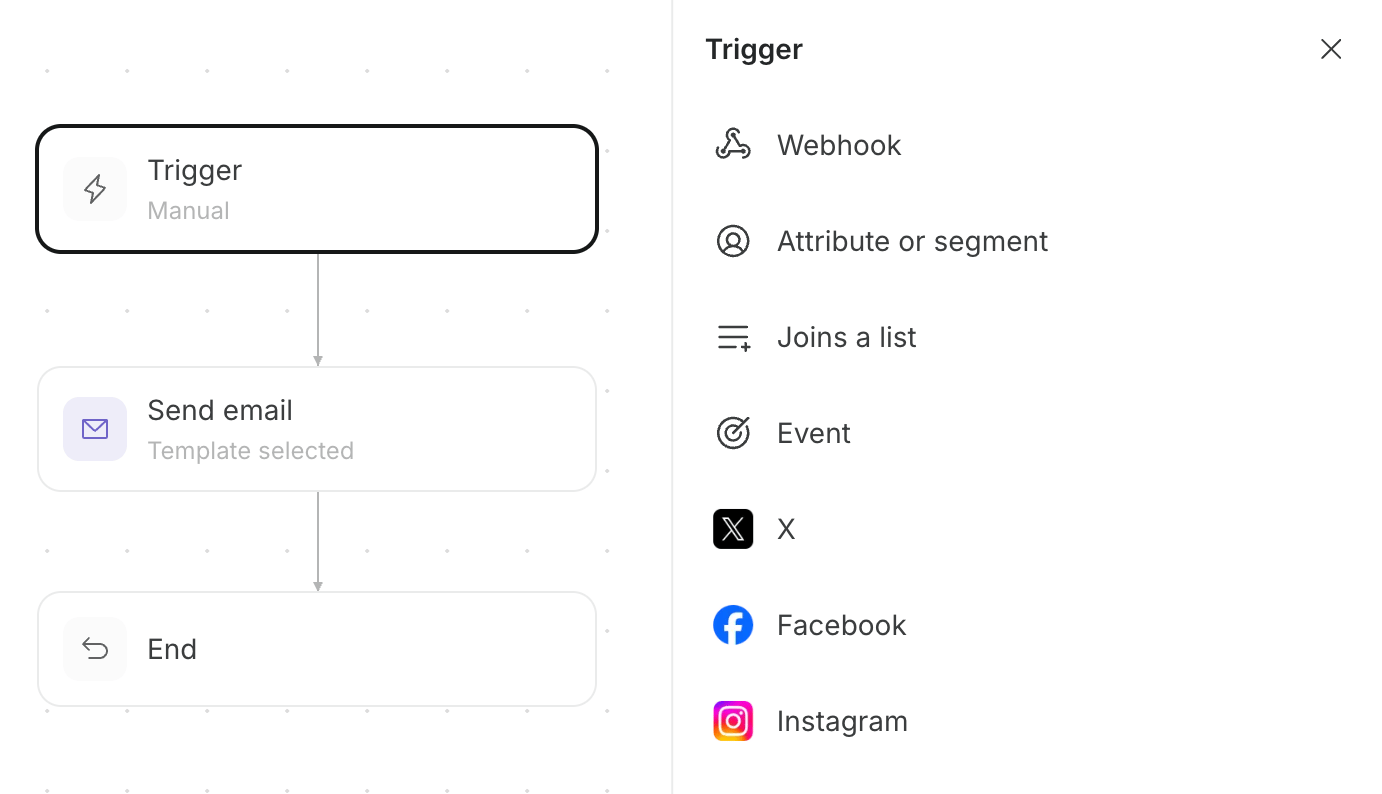
New sign-up event or when the customer starts matching a Within 7 days of sign-up segment. When you use an event, you also need to configure your website or app to send the same event name.
Deliver a Message
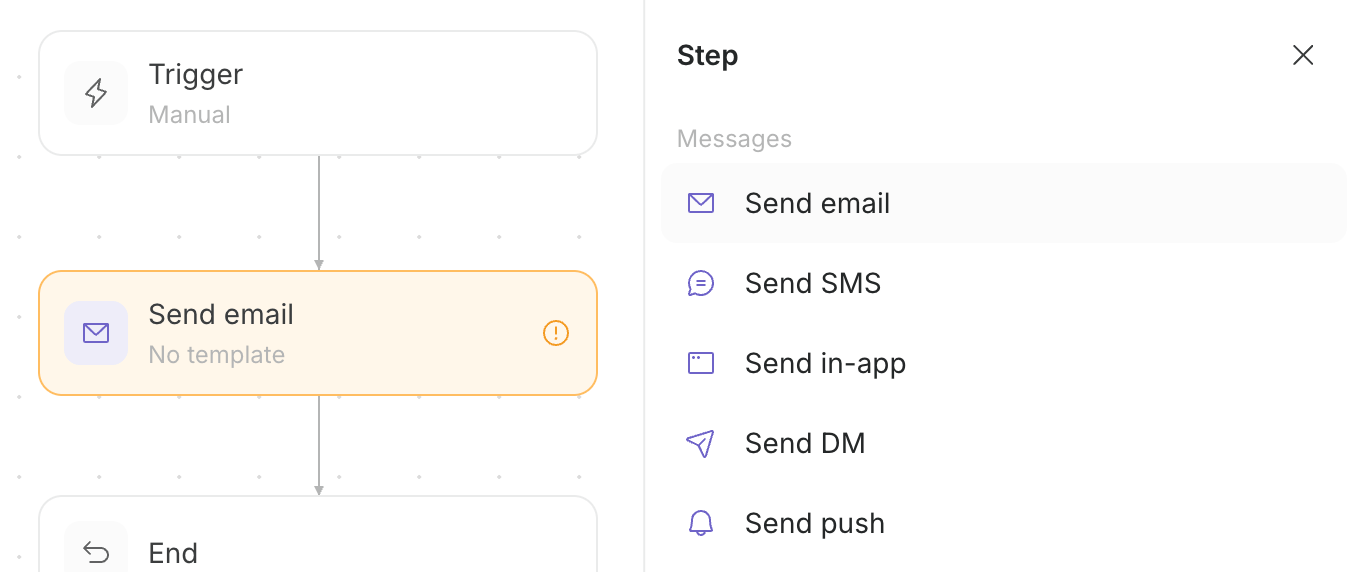
Message steps set the channel and content delivered to customers. You can add the following five message types.
Open
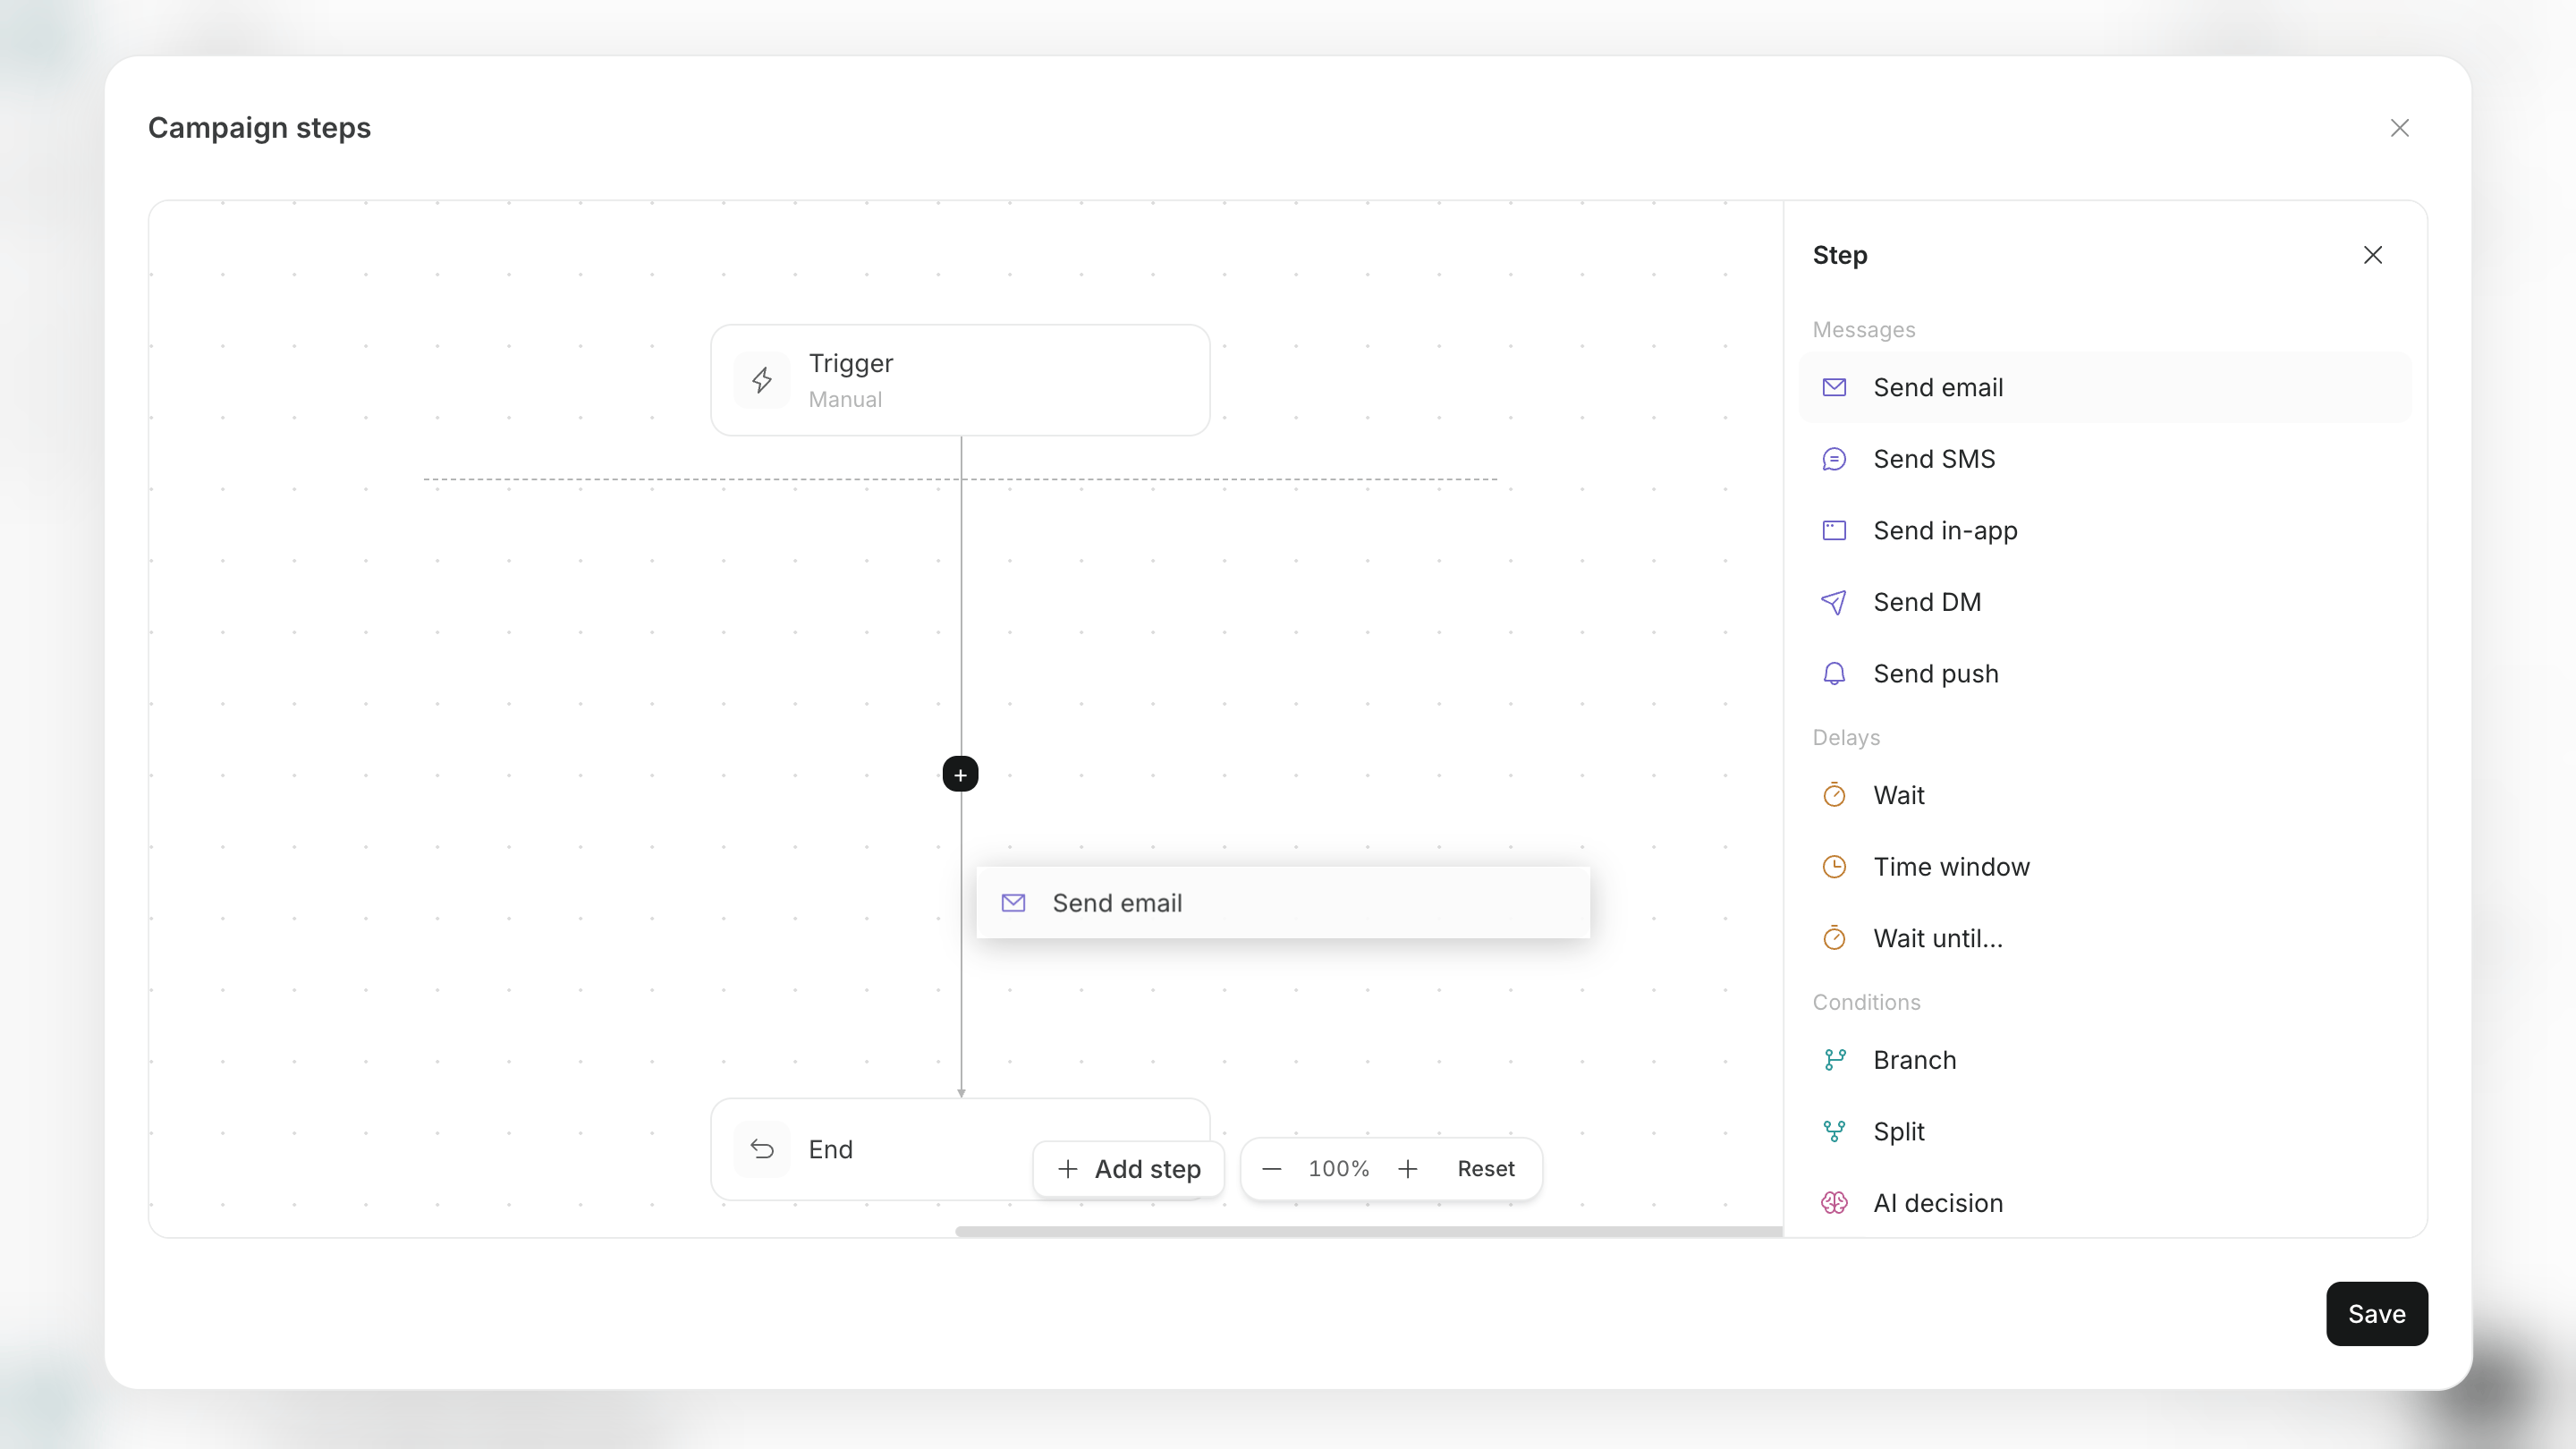
Add step to select the message channel from the list.
Adjust Sending Timing
Add aWait step to control when or under what condition the campaign moves to the next message.
You can configure the following four wait methods.
In
Wait under Add step, choose a time delay, time window, or wait-until condition. Configure optimal time after you add a Wait step.
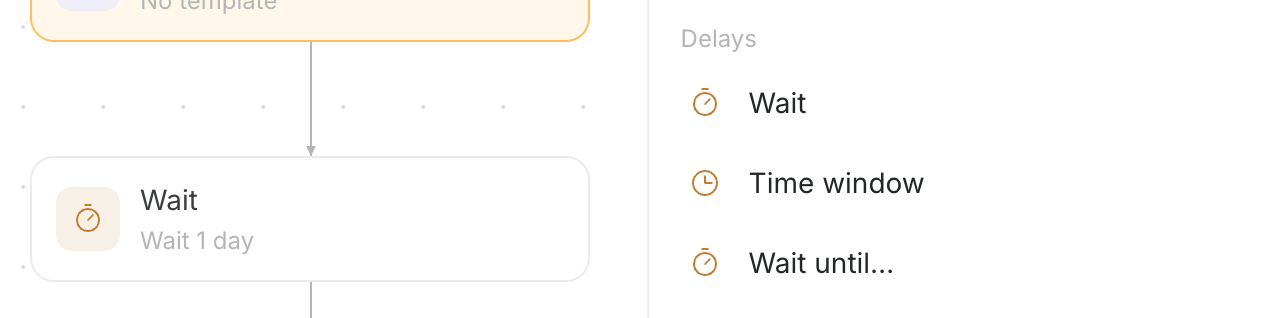
3 days delay before the second email. Add a wait-until condition for Initial setup completed before the second email to send customers who complete setup to the goal and those who do not complete it by the deadline to the next guidance.
Change the Path Based on Conditions
Condition steps change the next action based on a customer’s information or behavior. The following four blocks can change the path.
When you select Branch, the canvas separates the paths for customers who match the condition and those who do not.
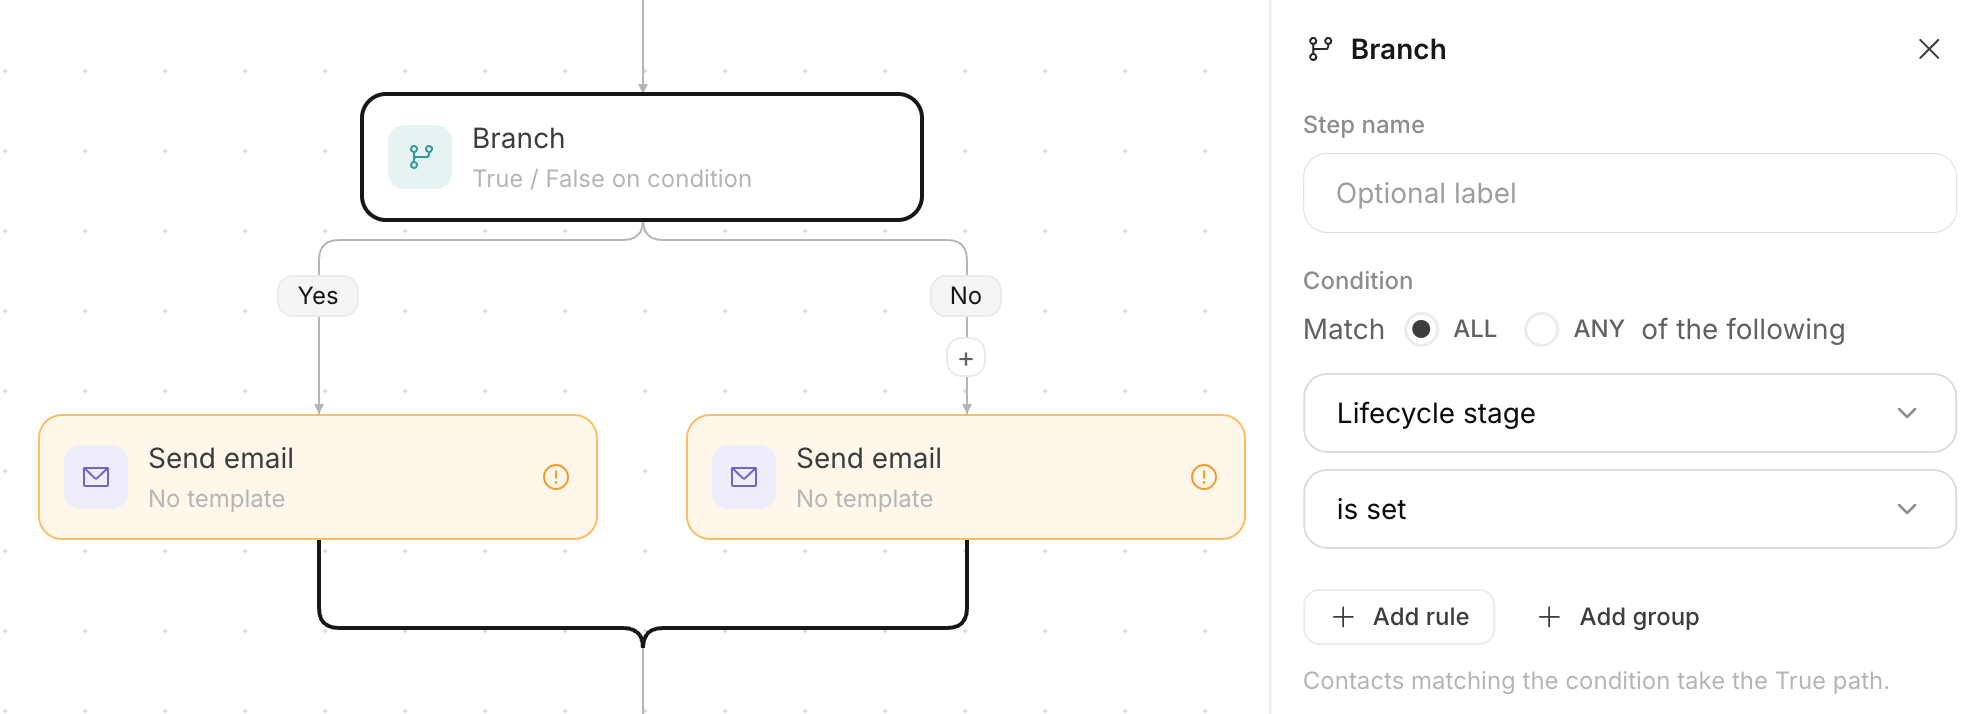
Initial setup completed event occurred and move customers who completed setup to the goal. Send the next guidance to customers who have not completed setup, then move them to End after the planned number of messages.
Update Customer Data and Connect External Services
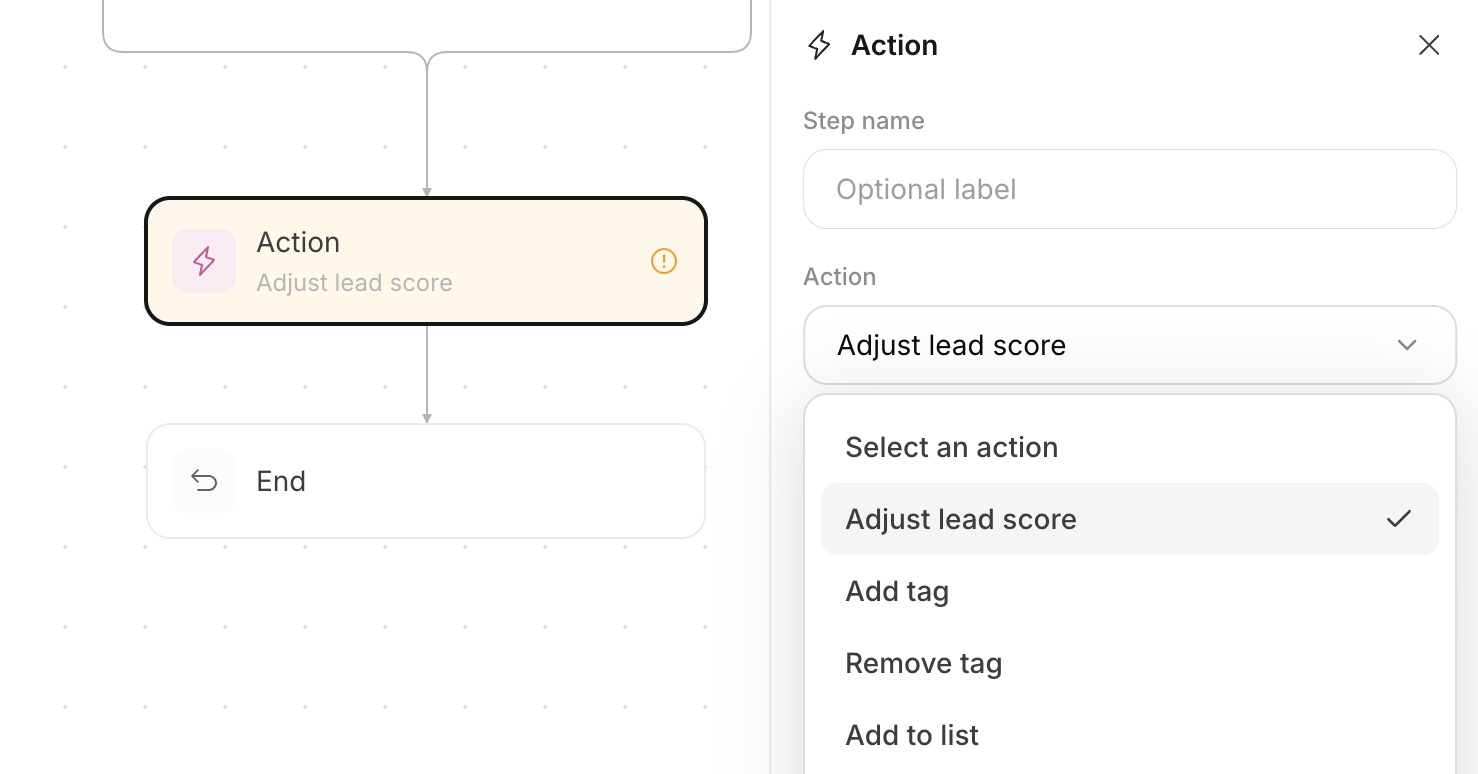
AnAction adds work that updates customer data or triggers an external service.
You can choose from the following eleven actions.
Select an Action step to choose the customer-data operation from the list.
Choose Between Goal and End
Connect every path toGoal, which counts as a result, or End, which does not.
The two endpoints handle customers differently.
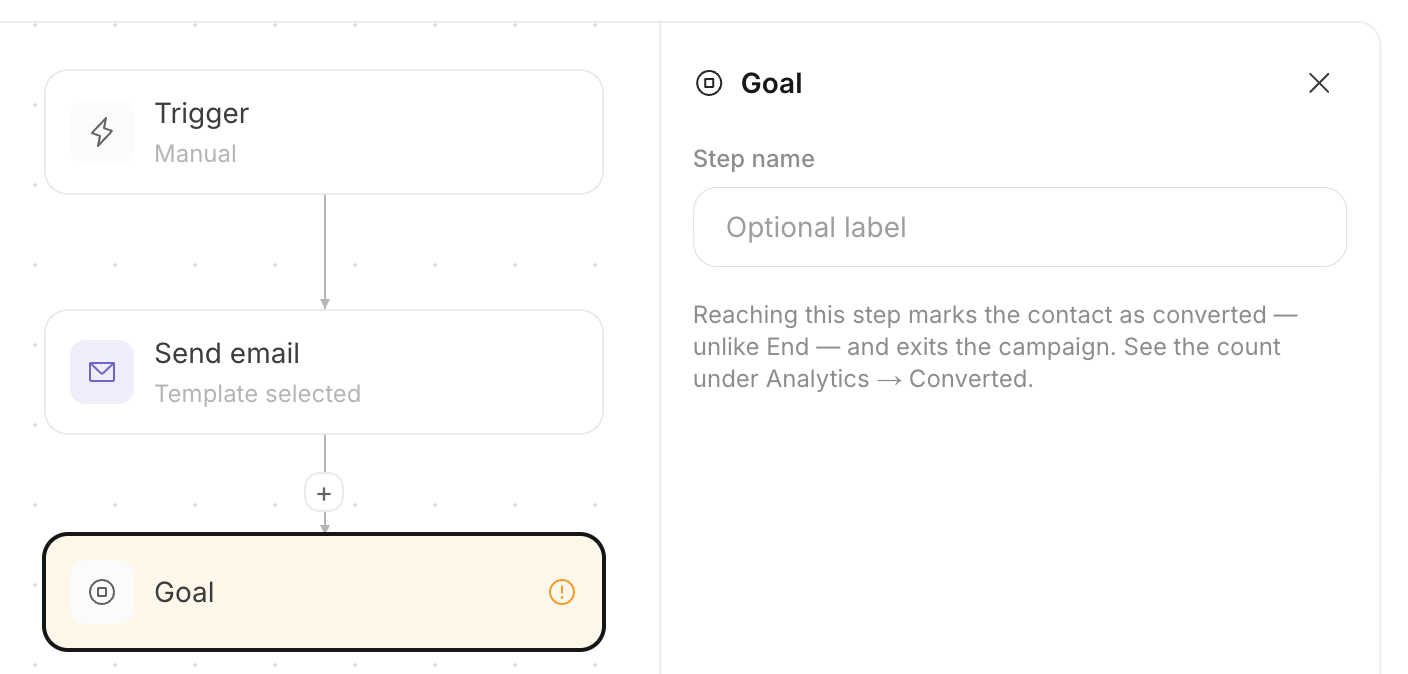
Goal and customers who do not purchase by the end of the guidance period to End.
Edit Steps in the Canvas
Use the canvas labeledFlowchart to change individual steps created by the agent.
Edit in the canvas in the following six steps. When complete, you can save or approve the changed steps.
- Open
Flowchartin the campaign canvas. - Select the trigger or step you want to change.
- When needed, use
Add stepto add a message, wait, condition, action, or another step. - Open each step and configure its content or conditions.
- Connect every branched path to another step,
Goal, orEnd. - Review the full sequence and save it.
Configure Segments and Events
UseSegments & Events to configure the target customer group and the actions used as entry conditions or goals.
You can perform the following actions on this screen.
- Set an existing segment as the campaign audience.
- Create a new segment.
- Create or save an event to use.
- View an event’s code and most recent received time.
- Ask the agent to create a GitHub pull request that adds activity-tracking code to your website.
Fix Incomplete Steps and Paths
Before saving or starting, fix steps with missing configuration and paths that do not reach an endpoint. The following five issues commonly require a fix.- A trigger is not configured.
- Email or notification content is not configured.
- A wait time or branch condition has no value.
- A path after a branch does not connect to the next step.
- A path remains without a Goal or End.
Edit a Running Campaign
You cannot edit the steps in a running campaign, so customers already in progress do not receive a different configuration partway through. Make changes in the following six steps. When you resume after saving, the campaign proceeds with the changed steps.- Open the campaign from
Campaignson theAgentsscreen. - Pause the campaign.
- In
Settings, selectEditforCampaign steps. - Ask for changes in chat or change individual steps in the canvas.
- Select
Save. - Review the changes and start the campaign again.
Save to continue editing.